Step Into Stillness—Right Outside Your Door

Sunshed Garden Shed 812 J. Benoit 8 scaled

Sometimes, the most valuable thing you can do is nothing at all.

In a world where busyness is worn like a badge of honor, carving out time to pause, breathe, and reconnect with yourself is not just a luxury—it’s a necessity. Your backyard can be that place. Whether you need a quiet moment to sip your morning coffee, read a few chapters of a favorite book, or simply sit and watch the clouds, creating a peaceful outdoor retreat at home helps restore balance and clarity.


Why You Need a Backyard Sanctuary

Your outdoor space isn’t just a spot for entertaining or gardening—it can also be your personal escape. A backyard solitude zone gives you:

  • A place to de-stress and quiet your mind

  • A quiet corner for reflection, journaling, or prayer

  • A creative space for reading, drawing, or playing music

  • A mindful start or end to your day with intentional stillness

  • An opportunity to reconnect with nature

  • Sheds Sunshed 8x12 13 scaled

Simple Ways to Make It Your Own

You don’t need a massive garden or a big budget to create your own backyard retreat. Just a few intentional design choices and you can build a personal space that speaks to your soul.

1. Create a Secluded Corner

Choose a quiet spot in your yard—maybe near a flower bed or under a tree. You can use lattice walls, tall potted plants, or a Western Red Cedar privacy screen to block out distractions and create a feeling of enclosure.

2. Comfort Is Key

Sunshed Garden Shed D. Hooker 2 scaled 1 768x1024 1

Add a cozy bench, weatherproof armchair, or even a hammock. Top it with outdoor cushions, throws, and maybe even a small table to hold your tea, book, or sketchpad.

Looking for inspiration? Check out our Garden Bench Kits made from sustainable Western Red Cedar—perfect for both form and function.

3. Add Sensory Elements

This space is all about how you feel. Layer in elements that engage your senses:

  • Sound: Wind chimes, a small fountain, or a playlist of ambient nature sounds

  • Sight: Flowering plants, ornamental grasses, or even a trellis draped with vines

  • Smell: Lavender, rosemary, or a cedar planter full of mint and thyme

  • Touch: Natural wood textures, soft cushions, or smooth stepping stones

4. Light It Up

812 Sunshed Garden Shed OLT E. Ryan 2 scaled 1 225x300 1

If you plan to use your retreat during the evening or early morning, soft lighting is a must. Consider:

  • Battery-powered lanterns

  • Solar-powered path lights

  • Candle lanterns with citronella to keep bugs at bay

  • Warm white string lights for added ambiance


Backyard Creativity: More Than Just Relaxation

Some of our favorite moments of inspiration come when we finally slow down. This backyard escape isn’t just about rest—it’s a space where your creativity can flow. Bring your guitar, sketchbook, or journal, and let your thoughts take shape.

If you work from home, this space can also double as a mid-day recharge zone. Just 10 quiet minutes outside can reset your mindset and help you return to your tasks refreshed.


Make It Yours

However you choose to use your backyard retreat—whether for early morning meditation, late-night stargazing, or simply enjoying a moment of silence—it should reflect you. Add personal touches like a framed quote, a sculpture, or even a bird feeder to make the space feel meaningful.


Need Ideas? We’ve Got You Covered

Sheds Sunshed 12x12 6 2

Not sure where to start? Our customers have built some truly inspiring outdoor retreats, from cedar corner nooks to full garden studios. Browse through our photo gallery or contact our team to see how Outdoor Living Today can help you build your own space for solitude and serenity.

🔗 Explore structures and furniture made for backyard calmShop Now

Read More

How to Organize Your Garden Shed Like a Pro
gc42 7

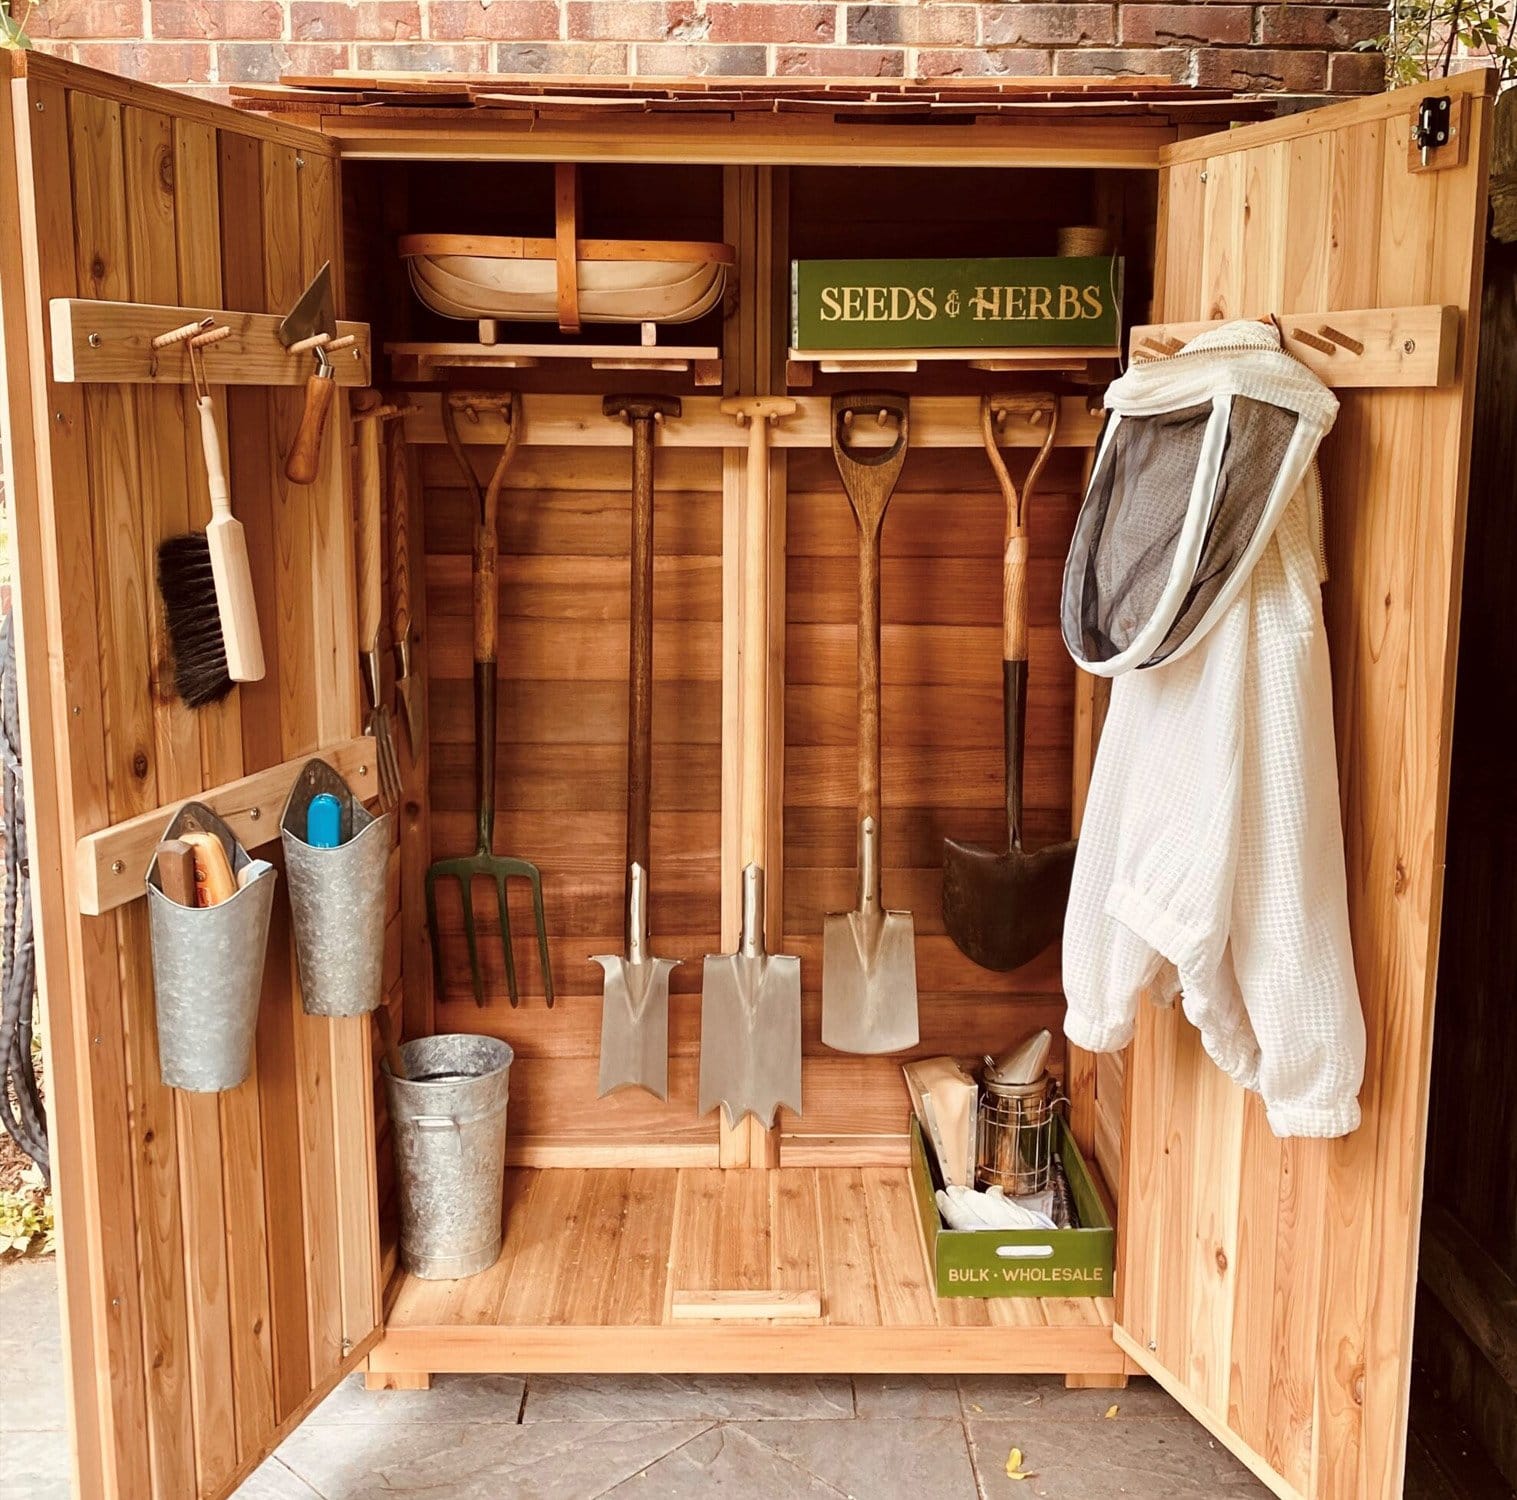
An organized garden shed saves you time, energy, and money. When everything is in its place, you’ll no longer waste time searching for your trowel or spend extra cash replacing items you can’t find. A well-structured tool shed can also reduce stress and improve safety.

Hose Storage Made Safe

Avoid tripping hazards by mounting your garden hose on a sturdy wall hook with a steep angle. This not only keeps your space tidy but prevents painful falls.

Hang Long-Handled Tools
Space Master 12x16 SM1216 Outdoor Living Today western red cedar Banner 2

Maximize floor space by installing a tool hanger on the inside of your shed door. Long-handled tools like rakes and shovels stay out of the way but within reach.

Install Open Shelving

Open metal shelves are ideal for tight sheds with limited natural light. They allow sunlight to pass through and make your tools easier to spot. Choose adjustable shelving to fit your tools of all sizes.

Use Bins to Avoid Clutter

Shelves alone won’t prevent chaos. Use plastic or metal storage bins to group and organize smaller items neatly.

Add a Magnetic Tool Strip

Mount a magnetic strip to store metal tools like pruning shears or trowels. Mechanics have used this method for years—apply the same logic to your garden shed for quick access and safe storage.

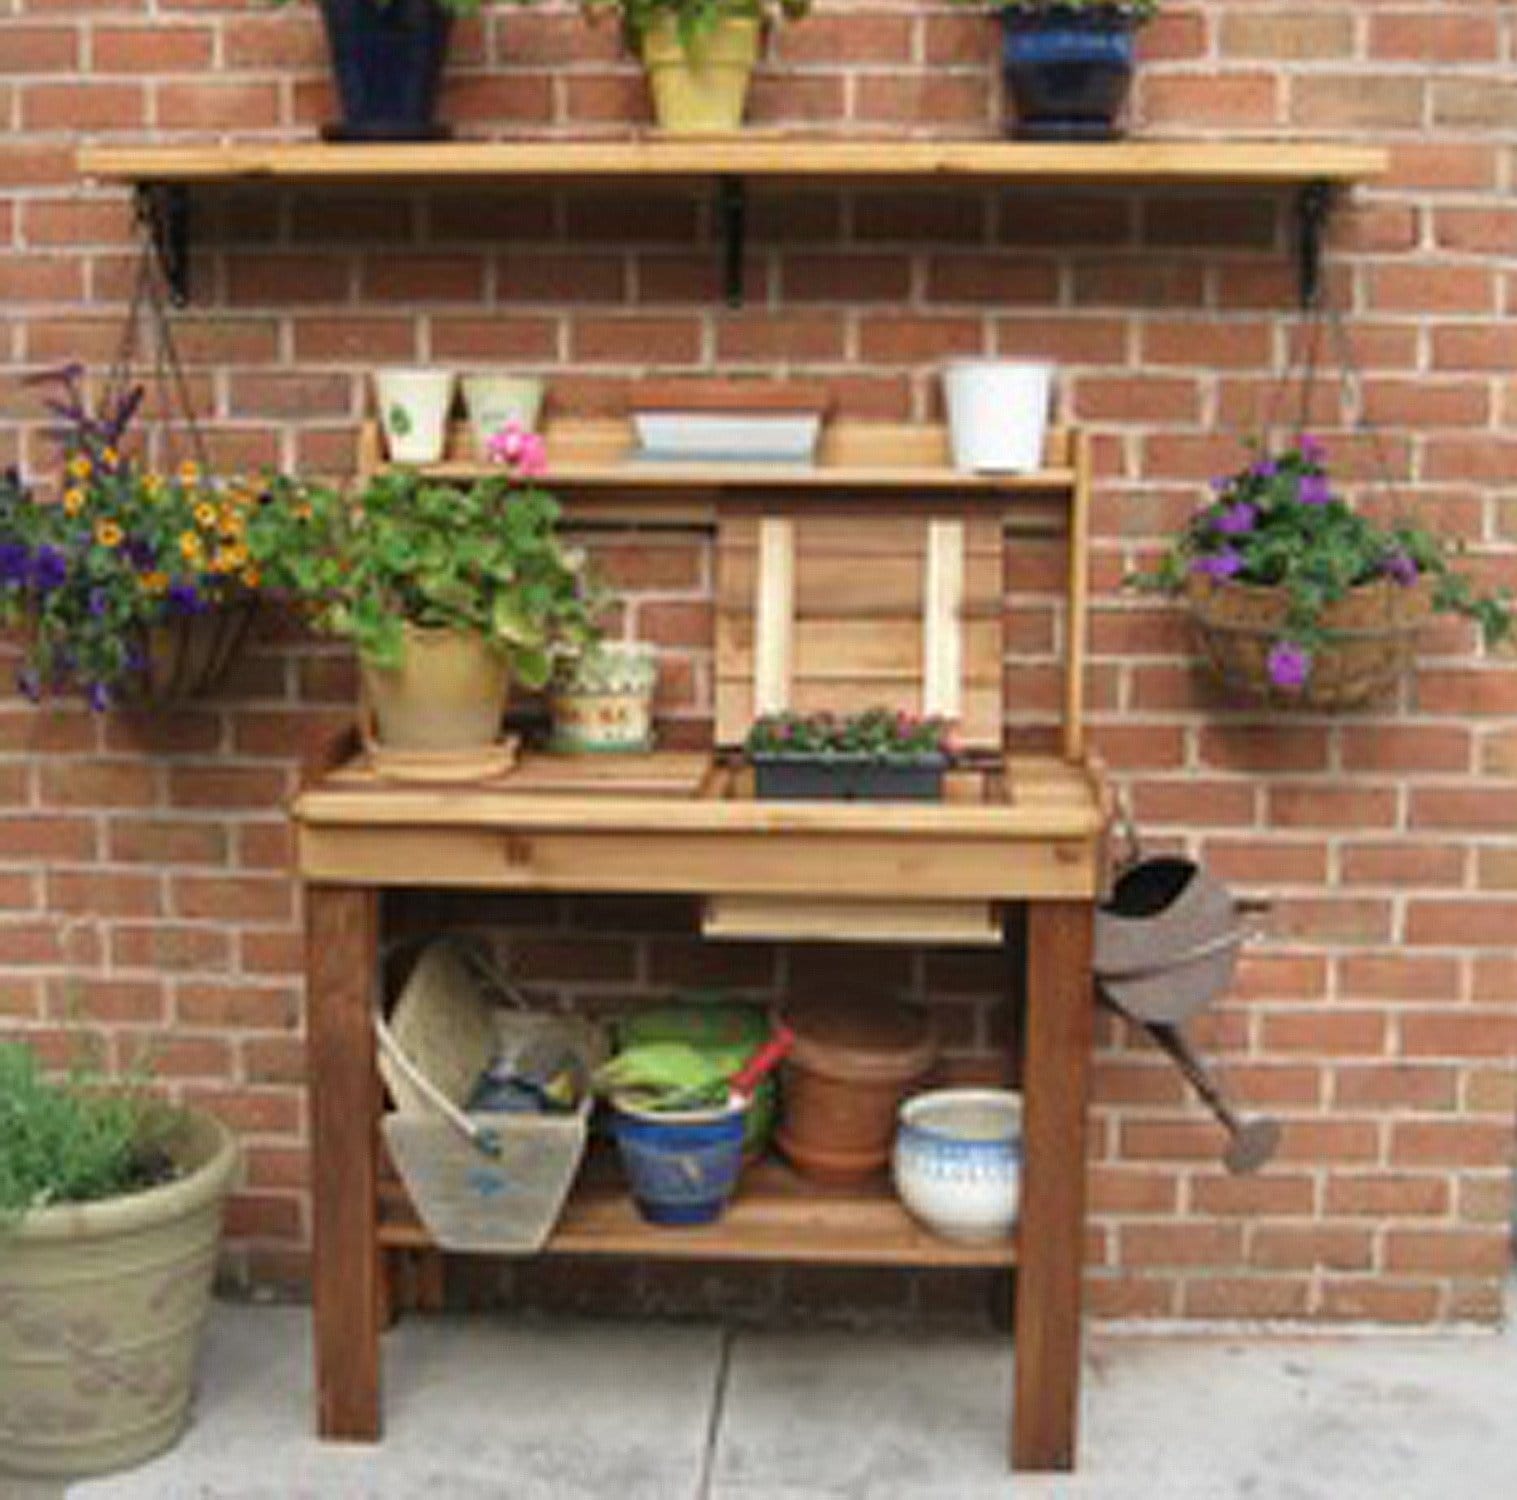
Create a Potting Bench
pb42 2 1

A potting bench gives you a dedicated space to plant or repot—even on rainy days. It also keeps potting mix dry and your gardening more enjoyable.

Track Tasks with a Calendar

Install a metal calendar in your shed to track seasonal chores. Bonus: magnetic holders let you store seed packets, plant tags, and more in one place.

Wicker Basket Essentials

Hang a wicker basket on your shed door to stash essentials like gloves, shears, or gardening books. It’s the quickest grab-and-go storage for your most-used items.

Baskets Under the Bench

Place a bushel basket or bin under your potting bench to hold mulch, birdseed, or potting soil. You’ll find great deals at local flea markets or use any weatherproof container you have.

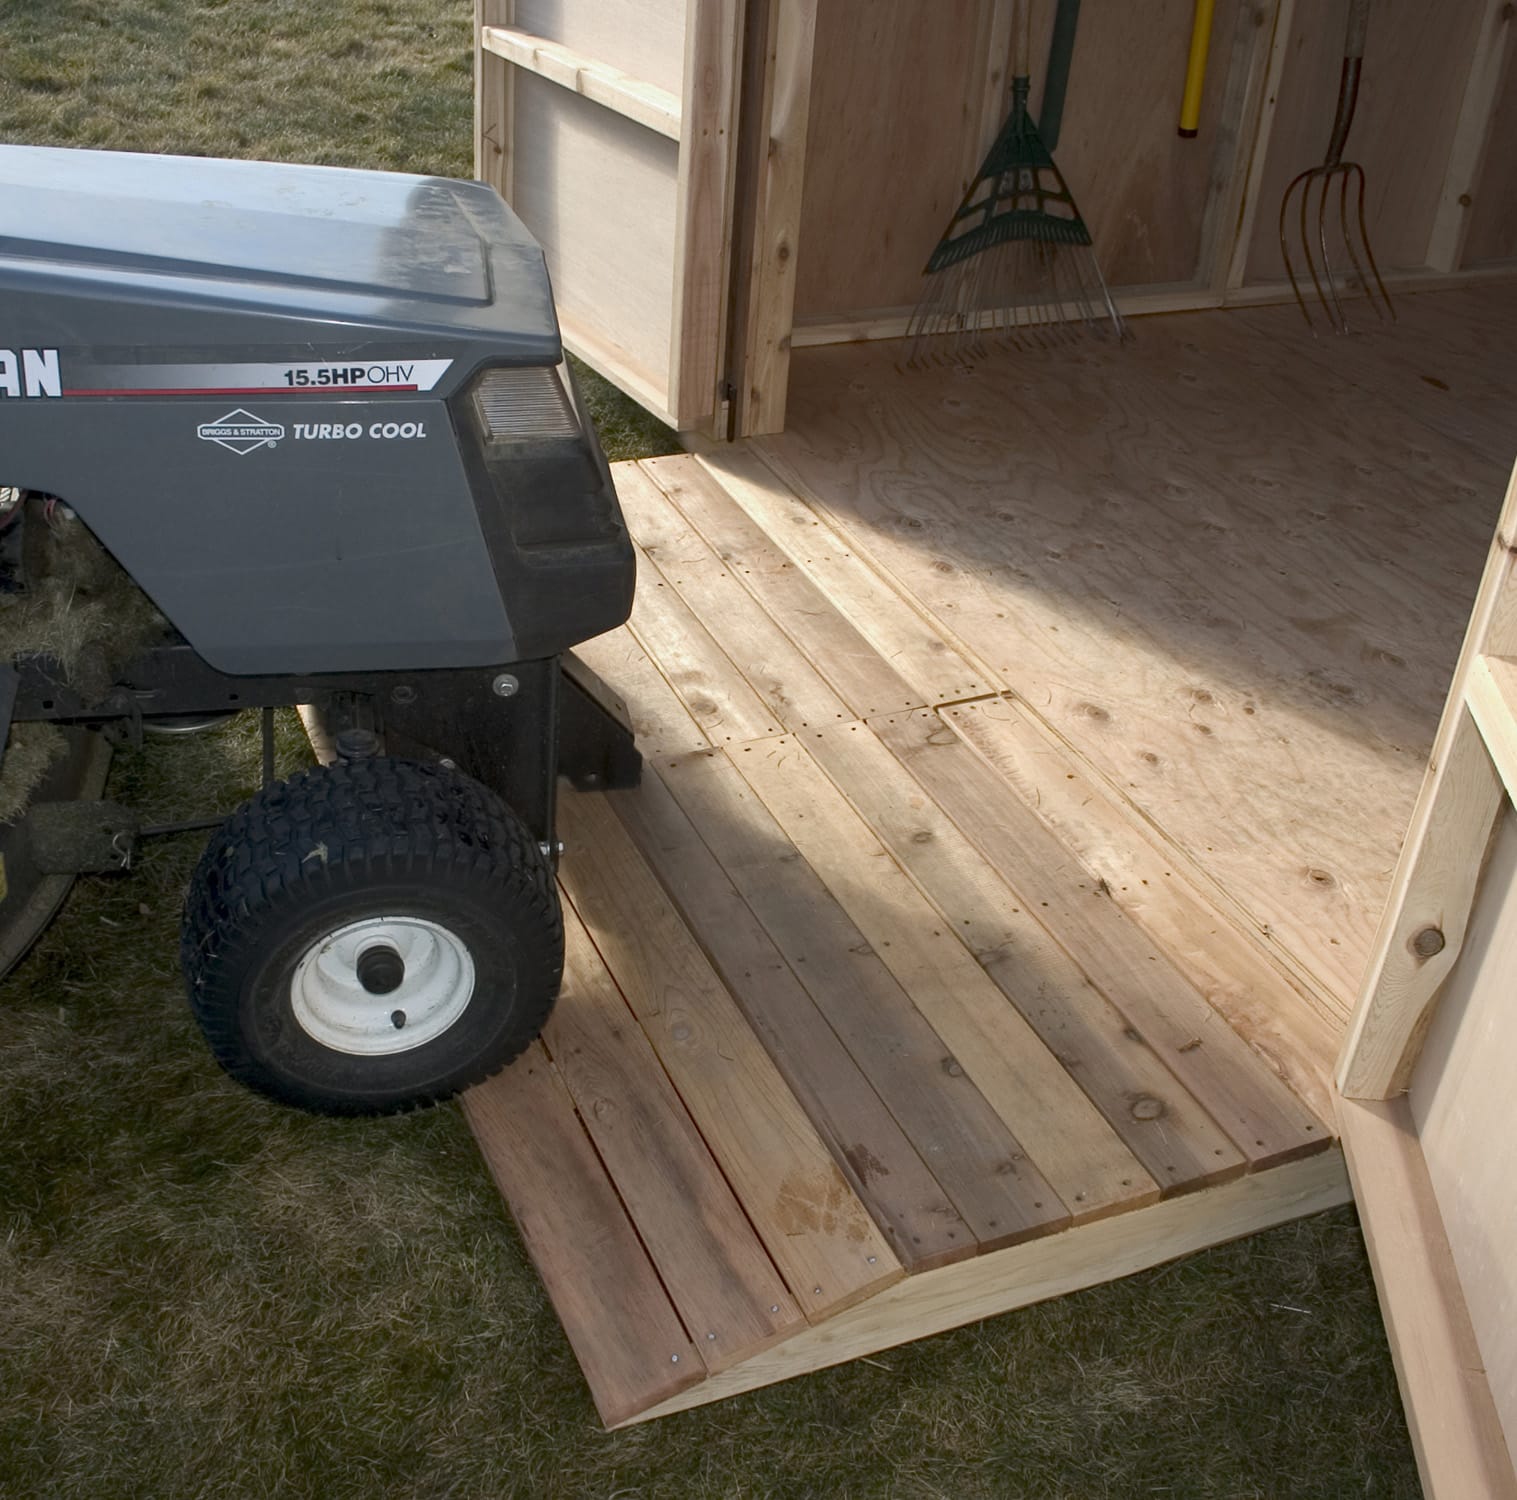
Add a Portable Ramp
RAMP Option OLT

Make moving heavy equipment easier with a DIY ramp. A couple of 2x4s and a piece of ½” plywood can create a sturdy yet compact ramp that’s easy to store when not in use.

Plan Shed Design Around Your Needs

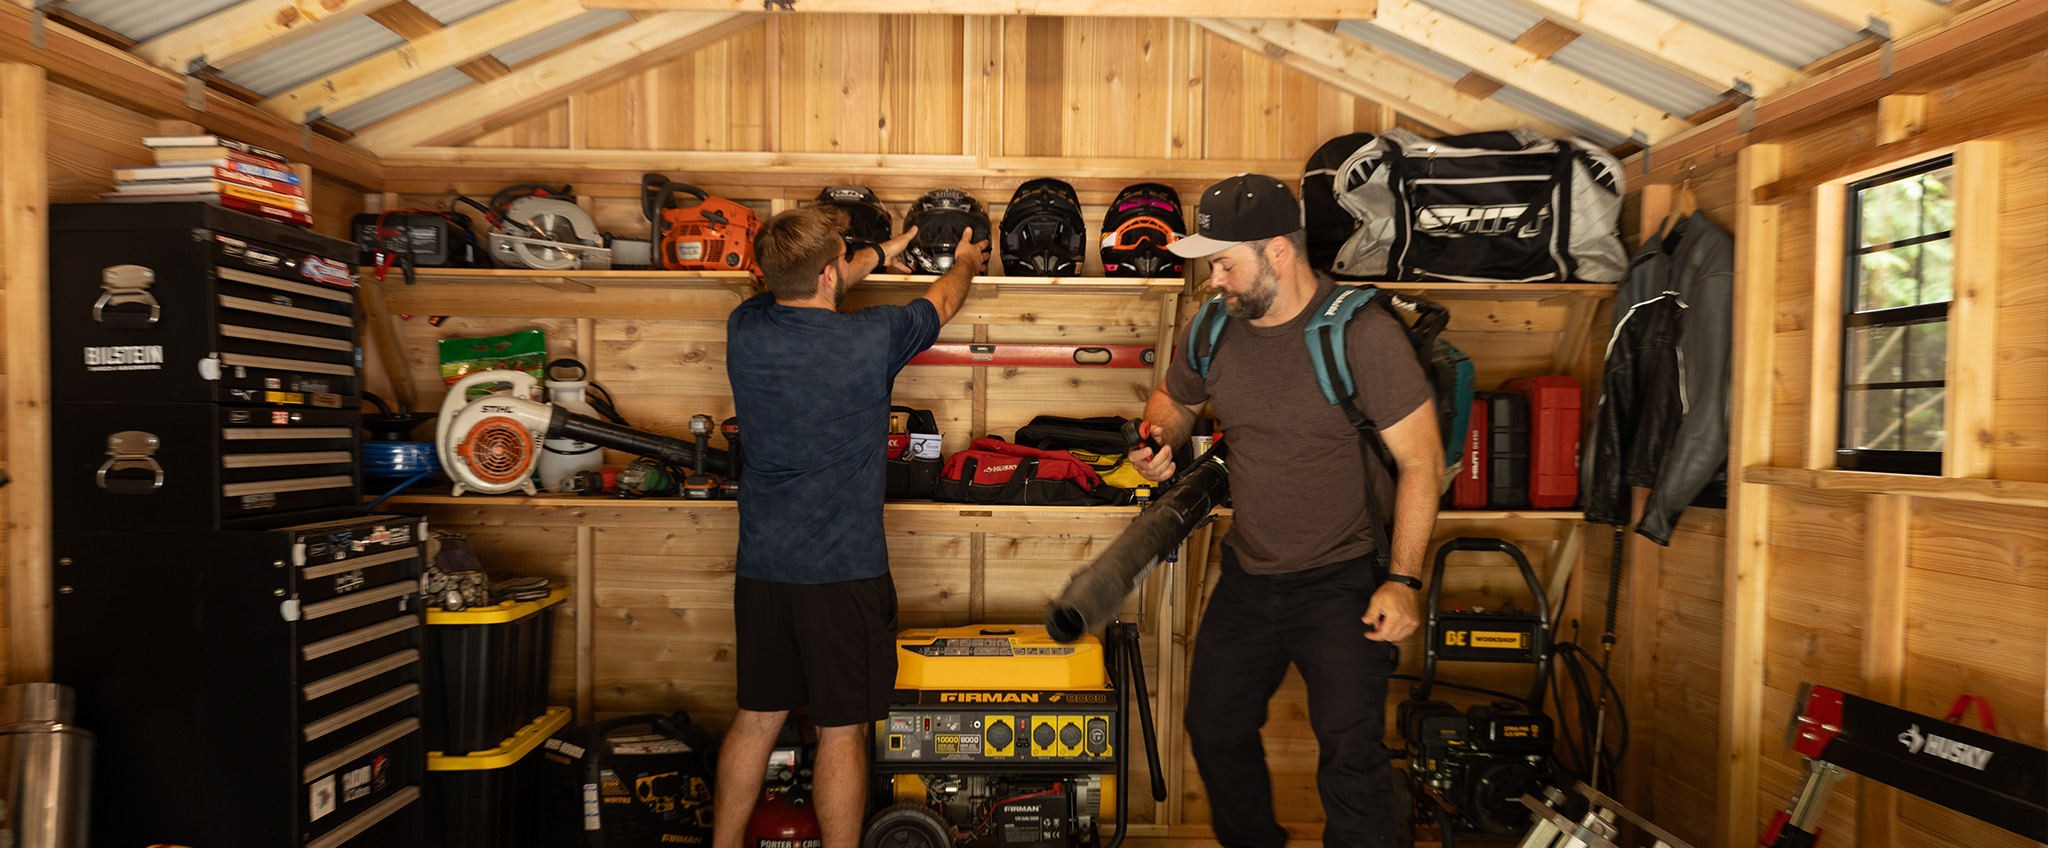
Before building or buying a shed, pile up your gear and measure its footprint. If you plan to store large power tools, you’ll need more space—plan accordingly.

Prioritize Tool Placement

Keep frequently used tools at the front and center of your shed. Store less-used items at the back. Make sure trowels, gloves, and pruning gear are always easily accessible.

Hang Tools Safely

Mount smaller tools like rakes, saws, and cultivators on the lower section of your shed wall or doors. This keeps blades safe and tools in good condition while protecting you from injuries.

Declutter Ruthlessly

Group similar items—cords, seeds, chemicals—and donate or dispose of broken, rusty, or unnecessary duplicates. An organized shed starts with only what you truly need.

Read More

How to Build a Level Base for Your Shed: Step-by-Step Guide

OLT How To Build A Foundation Graphic Steps 2

If you’re building a garden or storage shed, the single most important step is preparing a solid, level base. Even if your yard looks flat, assuming it’s level can lead to major headaches down the road. From wobbly workbenches to crooked walls, an uneven foundation impacts everything that comes after.

In this guide, we’ll walk you through how to create a strong shed foundation using crushed stone and pressure-treated wood.

Why Leveling Matters


A level base ensures your shed walls, doors, and especially roof panels align properly during assembly. Many DIYers discover too late that an off-kilter base causes misaligned screw holes, unstable framing, and frustrating gaps during roof installation.

And beyond aesthetics, if you plan to install a workbench, shelving, or any equipment, you’ll need it sitting perfectly level—not tilted like a funhouse.

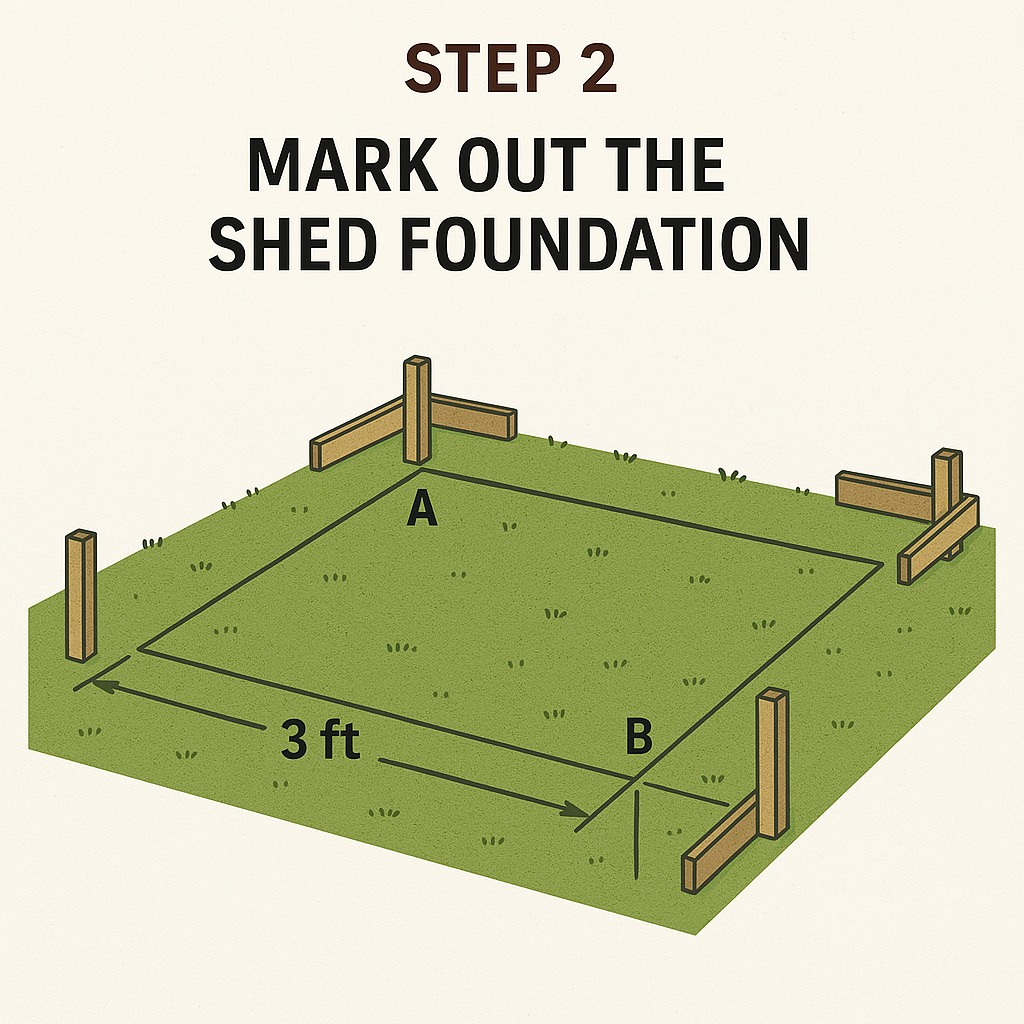
Step 1: Mark and Measure Your Shed Footprint

OLT How To Build A Foundation Graphic Steps 8

Start by choosing your shed’s final position. Consider:

  • Sun exposure

  • Drainage

  • Obstruction of views or light

Use four wooden stakes to mark out a slightly larger footprint than the shed base. This ensures enough room for installation and airflow.

Step 2: Identify Your High Corner

Use a long 2×4 and spirit level to determine which corner of your base is the highest point. Tap the stake in until it’s 4-6” above ground. This will be your reference height for the other corners.

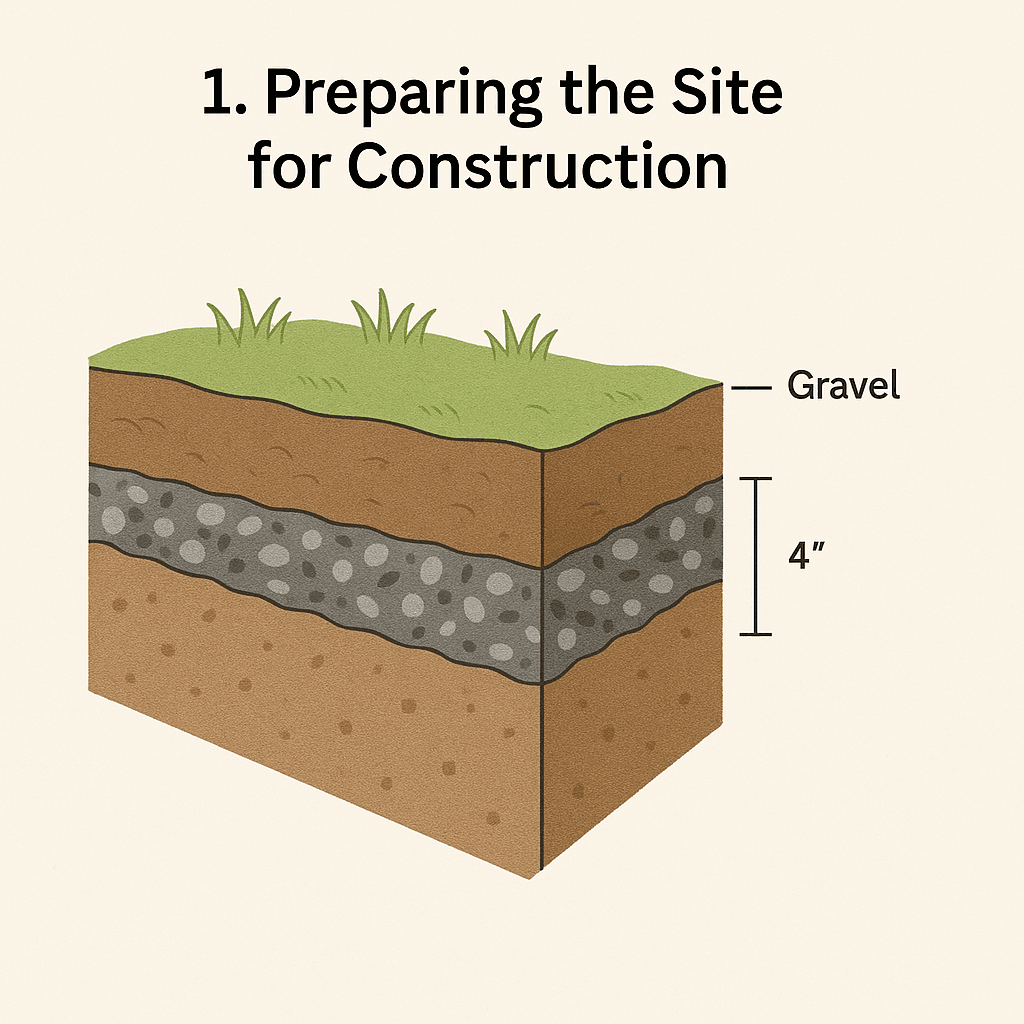
Measure down from this point to determine how much soil needs to be excavated from the remaining corners to make the base level. Strip turf and excavate to 3″ depth minimum (ideally 3″ to 5″).

Step 3: Add and Compact Crushed Stone

Lay down a weed barrier, then spread crushed aggregate (crushed stone with fine dust). Rake it as level as possible.

To compact it:

  • Rent a vibrating plate compactor or

  • Use a 25 lb hand tamper to pound the stone flat

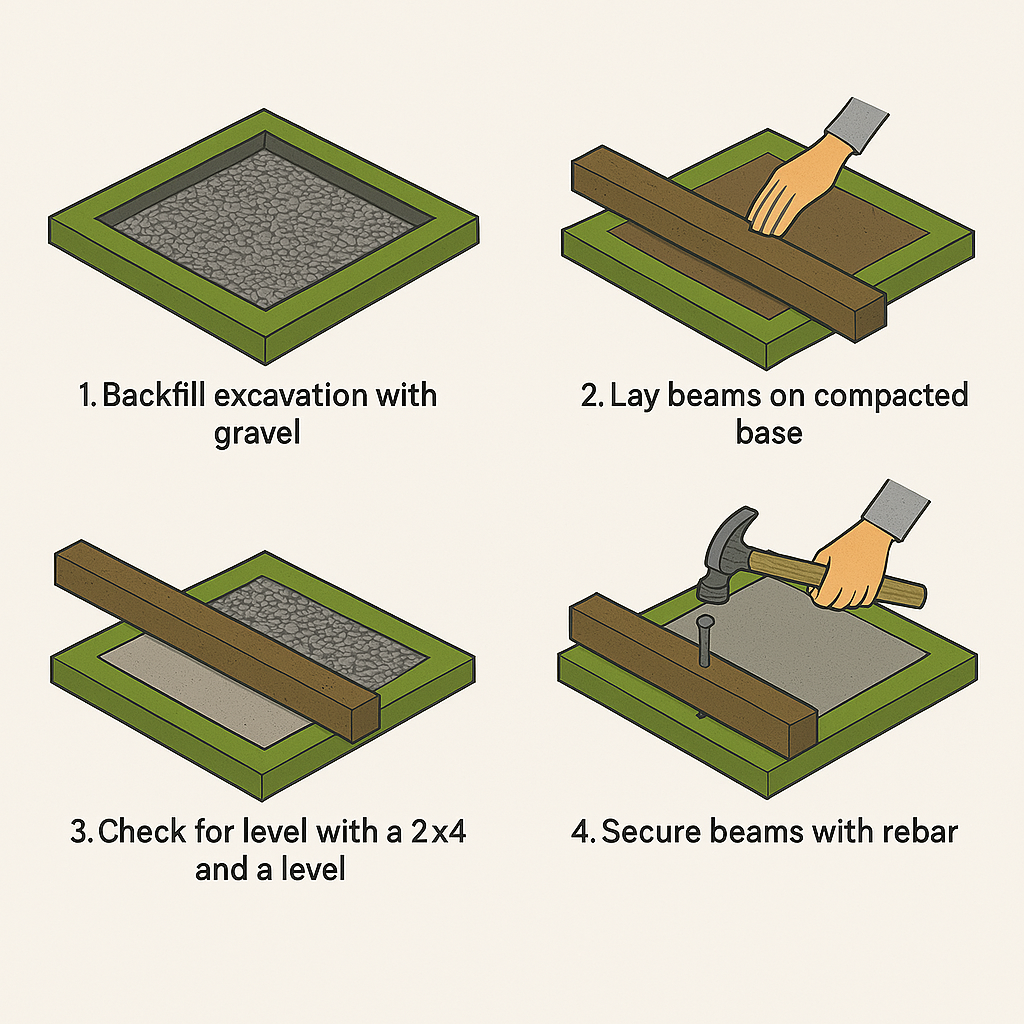
Keep checking your levels between corners using your 2×4 and spirit level. Add or remove stone as needed until the entire base is flat and compact.

Step 4: Add Pressure-Treated Wood Timbers

OLT How To Build A Foundation Graphic Steps 8 1

Lay 4×4 pressure-treated timbers perpendicular to your planned shed floor joists. These elevate the shed for better air circulation and help prevent water damage. Ensure the wood sits flush and level across the stone base.

Tip: Use stainless steel or aluminum fasteners to prevent staining or corrosion.

Step 5: Maintain Dryness for Longevity

Moisture is the main cause of wood decay. Crushed stone allows water to drain, and elevating your shed with pressure-treated wood adds another layer of protection. Together, they dramatically extend the life of your shed.

Summary

Building a proper shed foundation takes time, but it prevents costly errors and repairs later. A few key tools and steps ensure a long-lasting, stable base:

  • Mark your site carefully

  • Level it out thoroughly

  • Compact crushed stone

  • Add pressure-treated support timbers

With these steps, you’ll have a rock-solid base for whatever you build on top—from garden sheds to backyard studios.


Read More