Lawn Care Tips for a Healthier, Greener Backyard

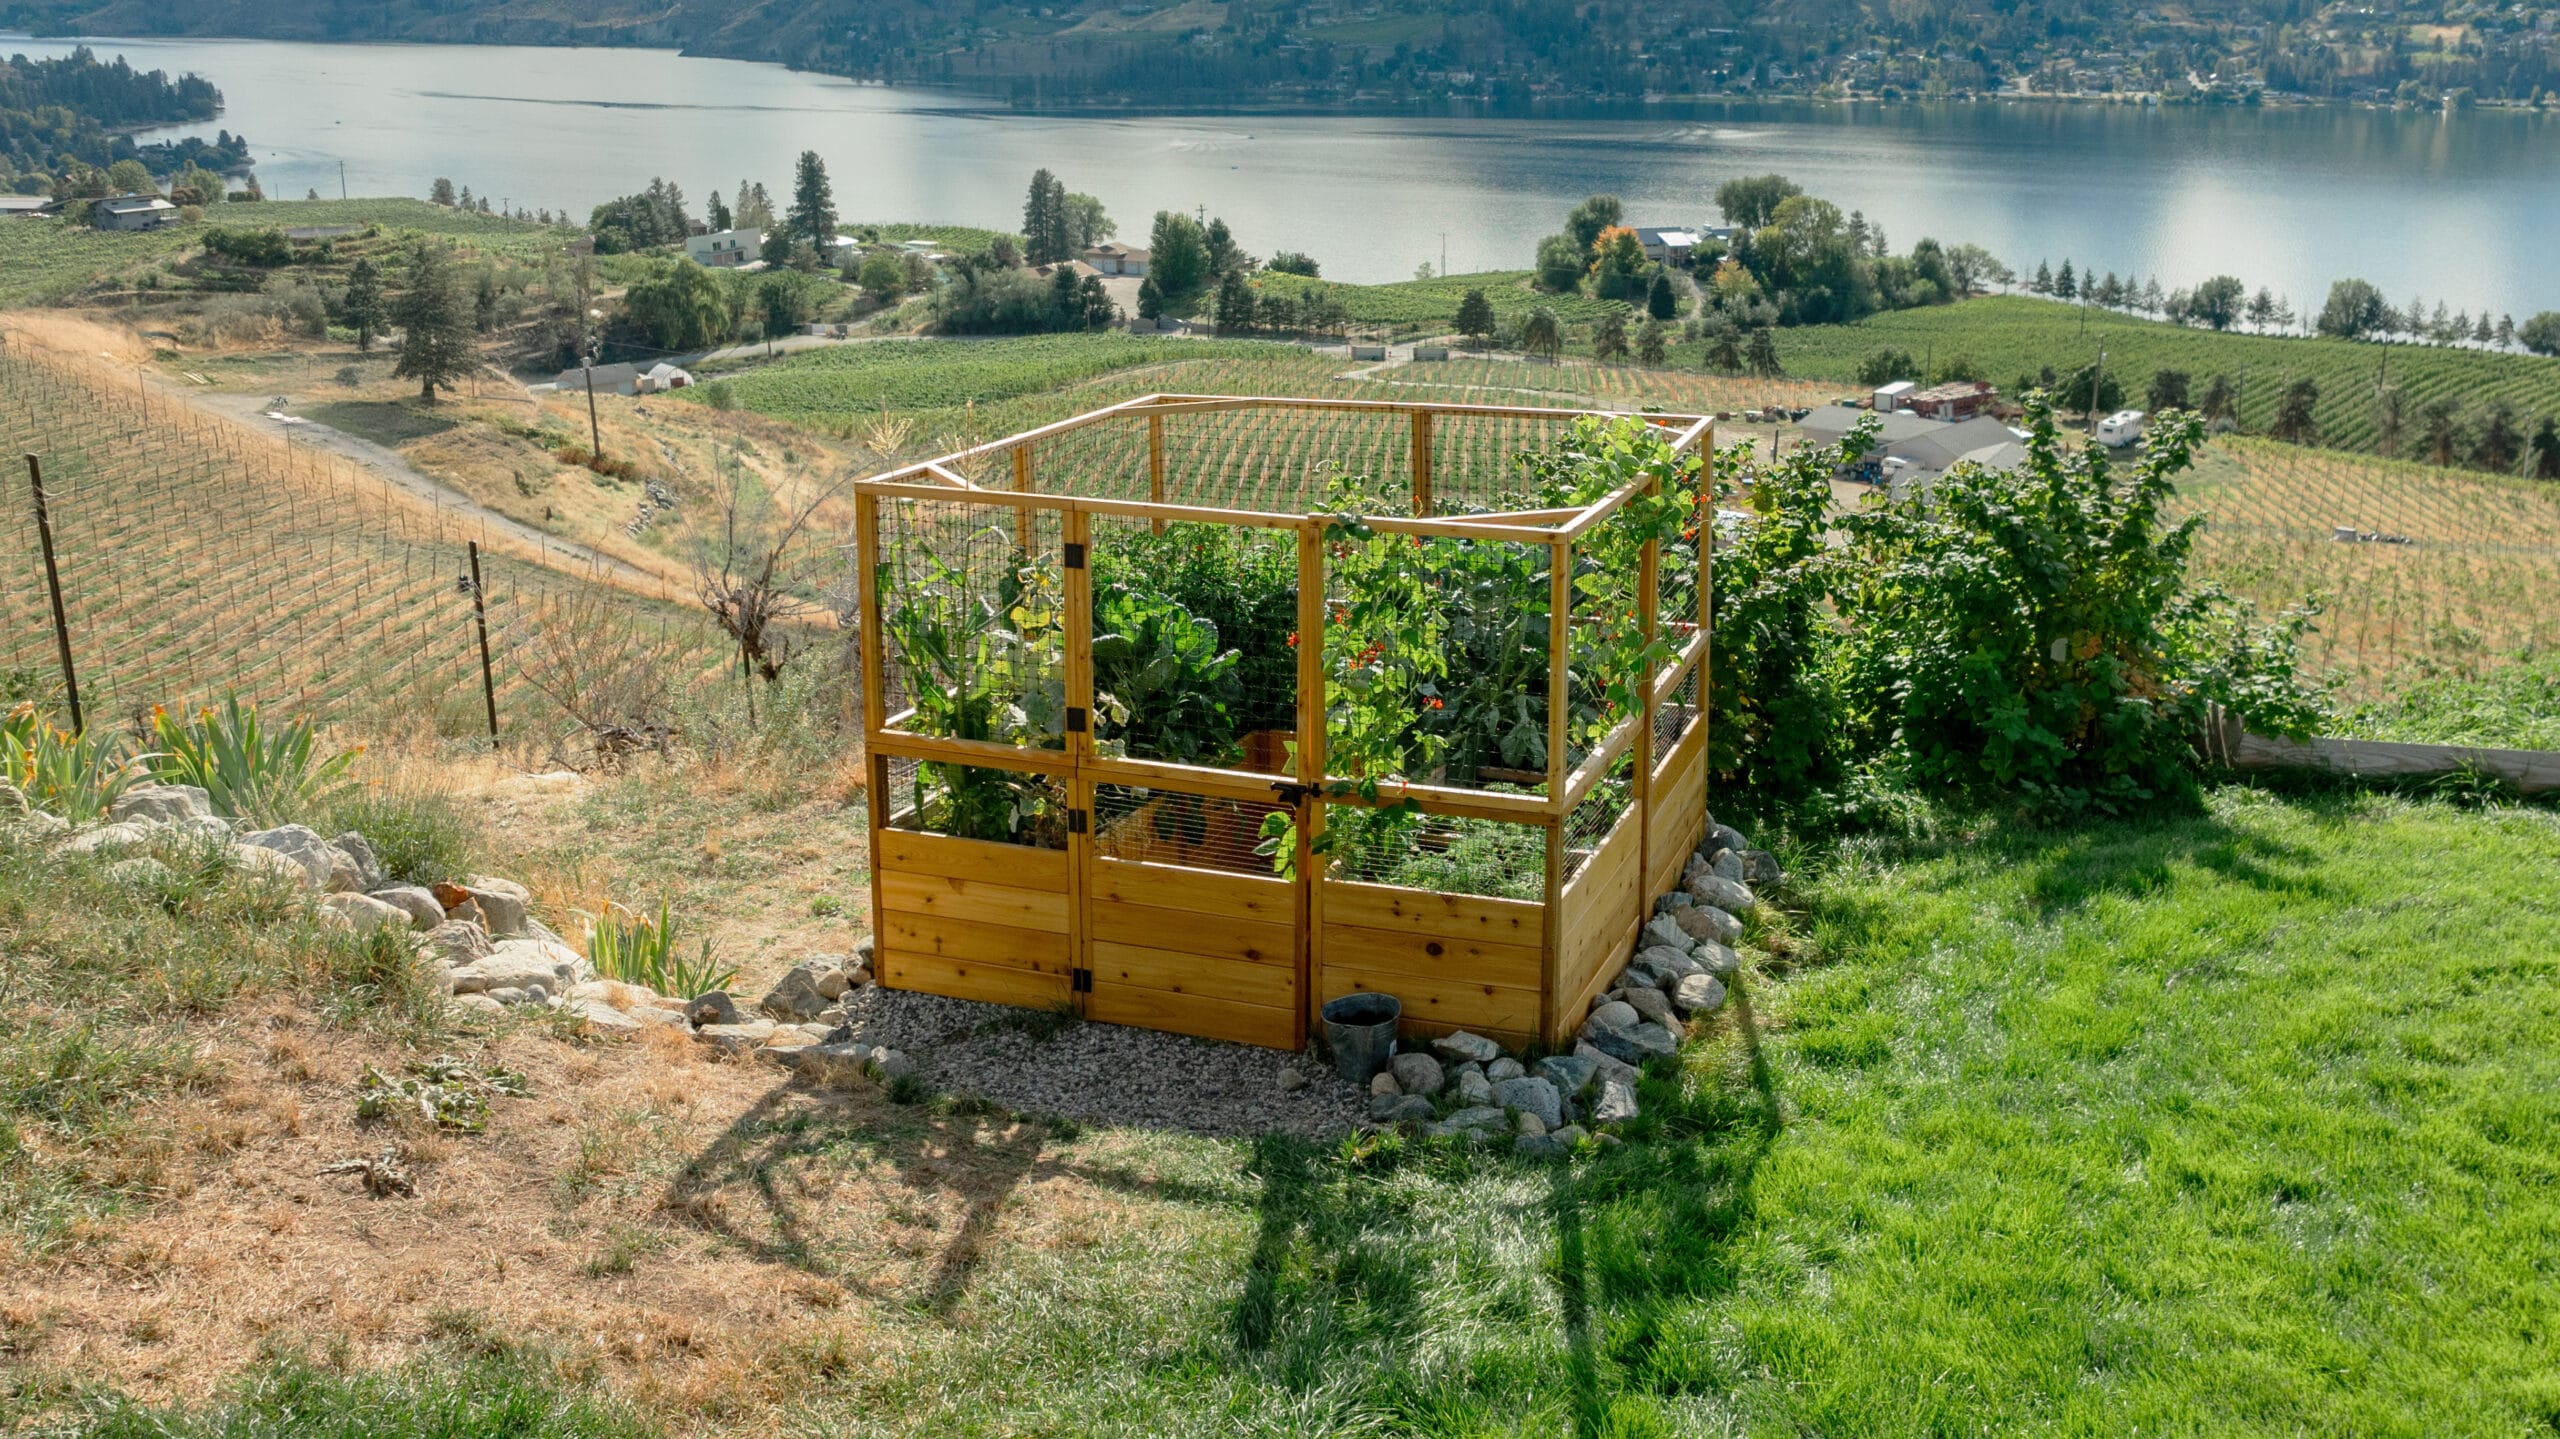
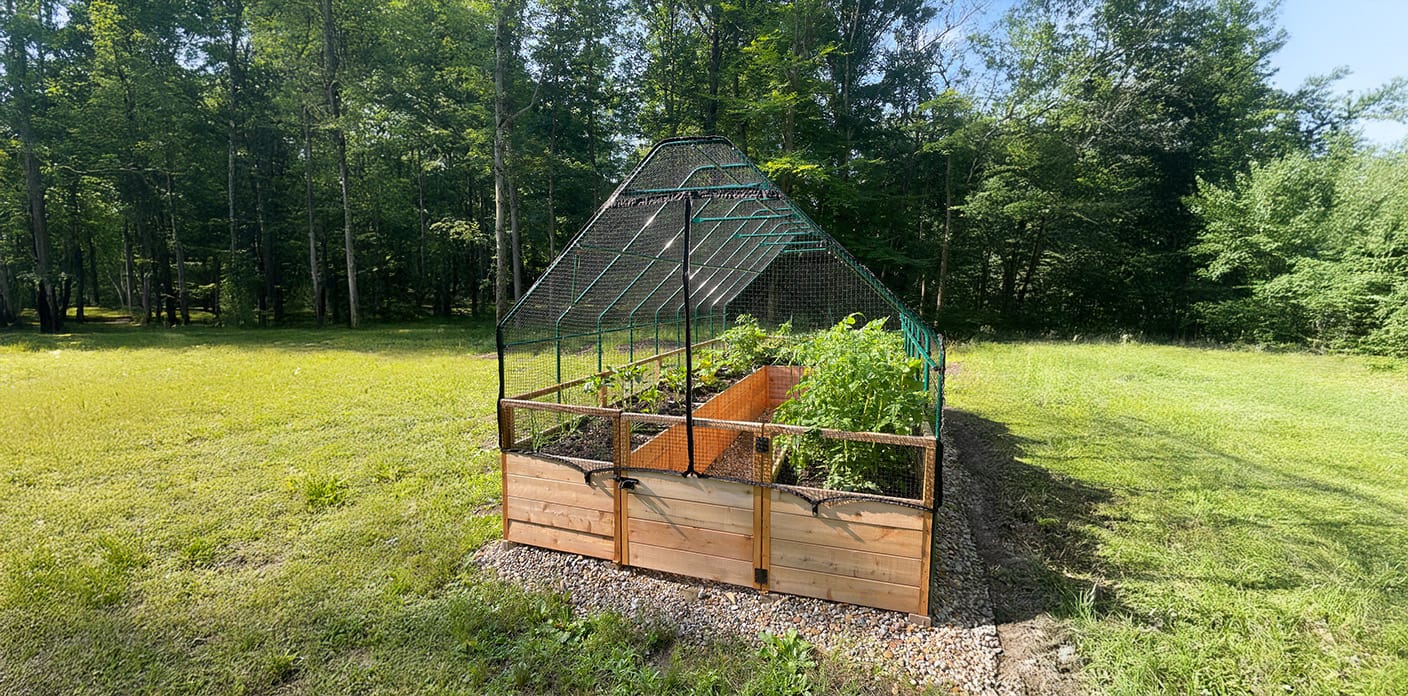
Western Red Cedar Raised Garden Bed With Deer Proof Fence Outdoor Living Today scaled

A lush, healthy lawn doesn’t need to rely on harsh chemicals. With eco-friendly lawn care practices gaining popularity, homeowners across North America are learning how to grow green lawns using sustainable methods that benefit both their yards and the environment. Here’s how you can care for your lawn organically year-round, from mowing and watering to aerating and fertilizing.


🌱 Why Eco-Friendly Lawn Care Matters

Historically, lawn care has involved heavy use of chemical pesticides and fertilizers. But overuse led to environmental harm and eventual legislation. Today, more homeowners are turning to organic lawn care practices—reducing chemical use while improving soil health, biodiversity, and water retention.

With the right care, your lawn can naturally resist pests and weeds without synthetic treatments. Start by embracing best practices that prioritize soil health, proper mowing, and sustainable watering methods.


💧 Watering Wisely

  • Summer Watering Tips: In hotter months, water deeply but infrequently to encourage strong root systems. Overwatering leads to shallow roots and rotting.

  • New Lawns: Newly seeded lawns need consistent moisture. Consider a sprinkler system or soaker hose to maintain even hydration.

  • Invest in Irrigation: Drip irrigation or programmable systems help reduce water waste and ensure consistent coverage.


🌾 Aerate for Healthy Soil

IMG 8838 Edit Edit scaled

  • When to Aerate: Aerate your lawn during the growing season (spring through fall) when soil is moist—either after a rain or a good watering.

  • Why Aeration Helps: Loosening compacted soil allows roots to breathe and water/nutrients to penetrate deeper. It also prevents thatch buildup and promotes microbial activity.


🌿 Organic Fertilizing and Feeding

  • Use Natural Fertilizers: Apply compost, worm castings, or organic fertilizer blends based on your soil’s needs.

  • Leave the Clippings: Grasscycling—leaving clippings on the lawn—returns nitrogen to the soil naturally.

  • Know Your Seasons:

    • Spring & Summer: Use nitrogen-rich fertilizers to promote growth.

    • Fall: Apply a lower-nitrogen blend to strengthen roots.

Pro Tip: Water within 2–3 days of fertilizing if it doesn’t rain to help nutrients absorb properly.


✂️ Mowing Best Practices

  • Mow by Season:

    • Spring: Expect rapid growth; mow more frequently.

    • Summer: Once a week is often ideal.

    • Fall: Bi-weekly mowing may suffice.

    • Winter: Avoid mowing in cold climates—let the grass rest.

  • Keep It Sharp: Dull mower blades tear grass, leading to browning.

  • Compost the Clippings: Turn them into rich organic matter for your garden or reuse directly on the lawn.


🌾 Weed Control Without Chemicals

penthouse olt cedar 5

  • pH Matters: Test your soil—acidic soil can encourage weed growth.

  • Preventive Measures: A healthy, thick lawn shades out weed seeds naturally.

  • Manual Weeding: Pull weeds by hand or use a weed popper tool.

  • Organic Herbicides: Use vinegar-based solutions or corn gluten meal as a natural pre-emergent.


🌤 Seasonal Lawn Care Schedule

  • Spring: Aerate, fertilize, begin mowing. Watch for new weed growth.

  • Summer: Water early morning or evening; adjust mowing frequency. Spot treat any weed issues.

  • Autumn: Fertilize with root-boosting blends, rake leaves, and mow lower in final weeks.

  • Winter: Rest your lawn. Avoid walking on frozen turf to prevent damage.


🌍 Build a Sustainable Lawn

Lawn care doesn’t need to rely on chemicals. By focusing on soil health, watering smartly, and sticking to an eco-conscious lawn care routine, you’ll cultivate a resilient lawn that looks good—and does good for the environment. Whether you’re a beginner or a lawn care enthusiast, going organic is better for you, your pets, and your planet.

Read More

Transform Your Backyard on a Budget

Space Master 12x16 SM1216 Outdoor Living Today western red cedar Product Image 7

You don’t need a fancy deck, grand cedar gazebo, or in-ground pool to enjoy your backyard. With a little creativity, you can create a fun, relaxing, and entertaining outdoor space your guests and family will love.


1. Hang Solar Lamps from Trees

Bartley BZ1012 650x469 1 300x300 1 300x300 1

Repurpose an old chandelier using solar lights and hang it from a tree branch. No wiring or electrical work needed—just beautiful ambient lighting that charges during the day and glows at night.


2. DIY Bird Nesting Station

Fill a suet feeder with 4–8″ scraps of yarn. Birds will use them to build colorful nests. This simple project attracts local wildlife and offers a fun nature-watching opportunity.


3. Wind Chimes from Old Keys

Craft soothing wind chimes using old keys, acrylic paint, string, and a piece of driftwood. Paint the keys in bright colors, then string and hang them close together so they chime in the breeze.


4. Splash Pad Using a Tarp

Turn a clean tarp into a backyard splash pad. Add a sprinkler or hopscotch mat and let the water do the rest! Kids can slip, slide, and stay cool while you relax nearby with your feet in the water.


5. Kickball Croquet with Pool Noodles

Cut pool noodles in half to form arches, secure them to the lawn with garden stakes, and play a game of croquet—kickball style! Great for backyard parties and family fun.


6. Build a Backyard Movie Theatre

All you need is a projector, DVD player, speakers, and a screen (like a sheet or blank wall). Set up lawn chairs or picnic blankets, make some popcorn, and enjoy movie night under the stars.

Pro Tip: Use a surge protector and outdoor extension cord for power. Don’t forget mosquito repellant or citronella candles!


7. Backyard Scrabble

Make a giant 5-foot Scrabble board with concrete tiles and custom wooden letter pieces. Use adhesive vinyl letters and lacquer to waterproof your tiles. It’s a great family game that gets everyone outdoors and thinking.


Final Thoughts

These budget-friendly backyard projects are perfect for summer weekends, birthday parties, or spontaneous get-togethers. Whether you’re looking for kid-friendly backyard games, relaxing outdoor vibes, or ways to enjoy nature, these ideas bring joy without breaking the bank.


Outdoor Living Today offers everything you need to create your perfect backyard—from cedar sheds to family-friendly accessories. Explore our collection and bring your DIY dreams to life!

Read More

Backyard Play Area Ideas for Kids: How to Clear Space & Create a Fun Outdoor Retreat

lcp66box

Creating a dedicated play space in your backyard doesn’t just offer your kids a safe place to explore — it supports their mental and physical development while giving them the joy of nature. With a few creative changes and smart backyard shed storage, you can transform even the most cluttered yard into a functional play area for children.

Why Natural Outdoor Play Matters

Research shows that kids thrive in outdoor environments rich with natural elements — trees, flowers, insects, and open air. In fact, White and Stoecklin found that if given the chance, children would design play spaces brimming with natural features like ponds, plants, and wildlife. As a parent, you can bring this vision to life right in your backyard.


Step 1: Clear & Clean the Backyard

Remove Overgrown Bushes and Trees

Start by trimming or removing any overgrown shrubs and low-hanging tree branches. An open lawn makes a better canvas for a safe, imaginative play zone. You can replant with colorful flowers and maintain trimmed grass to create an inviting, open space.

Eliminate Rotting Plants and Weeds

Clear away any decaying plant matter and aggressive weeds. Not only does this create more usable space, but it also improves safety and aesthetics — two things kids (and their parents) appreciate.

Declutter the Odds and Ends

Old toys, broken bikes, garden tools, and unused lawn equipment often clutter backyards. Store what you still need in a shed or garage, donate working items, and toss the junk. You’ll reclaim valuable space for your kids to roam.


Step 2: Use Space-Saving Backyard Furniture

Opt for Foldable Furniture

Replace bulky wooden seating with foldable outdoor furniture. Lightweight plastic or collapsible options are ideal — easy to move and even easier to store in a shed when not in use. This keeps your backyard flexible and play-ready.


Step 3: Involve Your Kids in the Design

69 test scaled

Children are full of creativity. Let them help brainstorm how the play area should look. Whether it’s a flower garden, a mini wildlife pond, or just a cozy sandbox — your kids’ ideas will make the space feel like their own.


Step 4: Add a Shed for Storage and Play

Install a backyard shed to serve as both a storage unit and a part-time clubhouse. Opt for something practical like a Western Red Cedar shed — naturally beautiful and durable. Store seasonal furniture, tools, or even create a reading nook or board game station inside.

➡️ Explore cedar sheds at Outdoor Living Today


Step 5: Build Multi-Level Fun

Add depth and wonder to your yard with multi-level flower beds, stair-step planters, or seating platforms. Children love different vantage points and textures, so steps and platforms invite exploration and imaginative play.


Step 6: Install Kid-Friendly Play Features

Water and Sand Elements

Set up a sandbox, water table, or mini pond. Kids love tactile experiences — and these features keep them entertained without screens.

Add Play Equipment

Install a small swing, seesaw, or slide in a clear and safe area. Use natural barriers like flower beds or bushes to define the play zone.


Final Thought: Outdoor Play > Screen Time

OLT a father mother kid in an octogon shaped cedar g 95bbd808 4bbb 4844 b64f b671698e98d4

A well-designed backyard encourages kids to engage with nature and each other. With a few simple changes, you can create a playful sanctuary that your kids will love — and maybe even get them to forget about their tablets for a while.

Read More

How to Organize Your Garden Shed Like a Pro

gc42 7

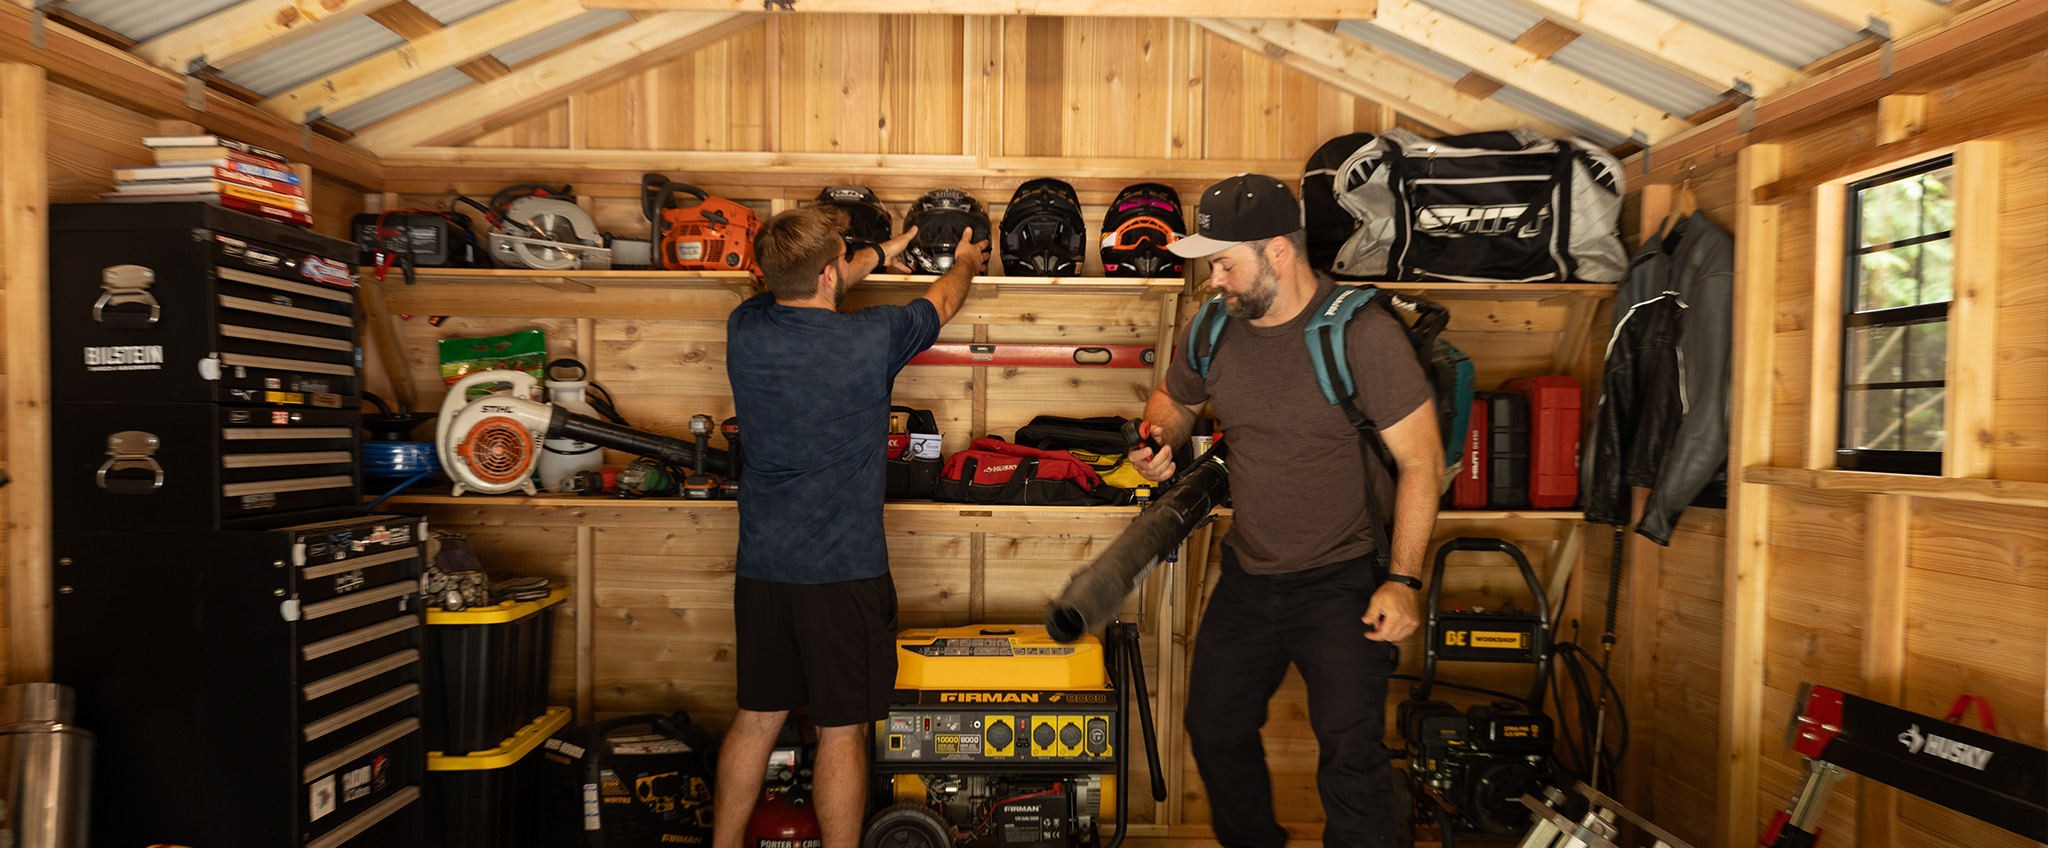
An organized garden shed saves you time, energy, and money. When everything is in its place, you’ll no longer waste time searching for your trowel or spend extra cash replacing items you can’t find. A well-structured tool shed can also reduce stress and improve safety.

Hose Storage Made Safe

Avoid tripping hazards by mounting your garden hose on a sturdy wall hook with a steep angle. This not only keeps your space tidy but prevents painful falls.

Hang Long-Handled Tools
Space Master 12x16 SM1216 Outdoor Living Today western red cedar Banner 2

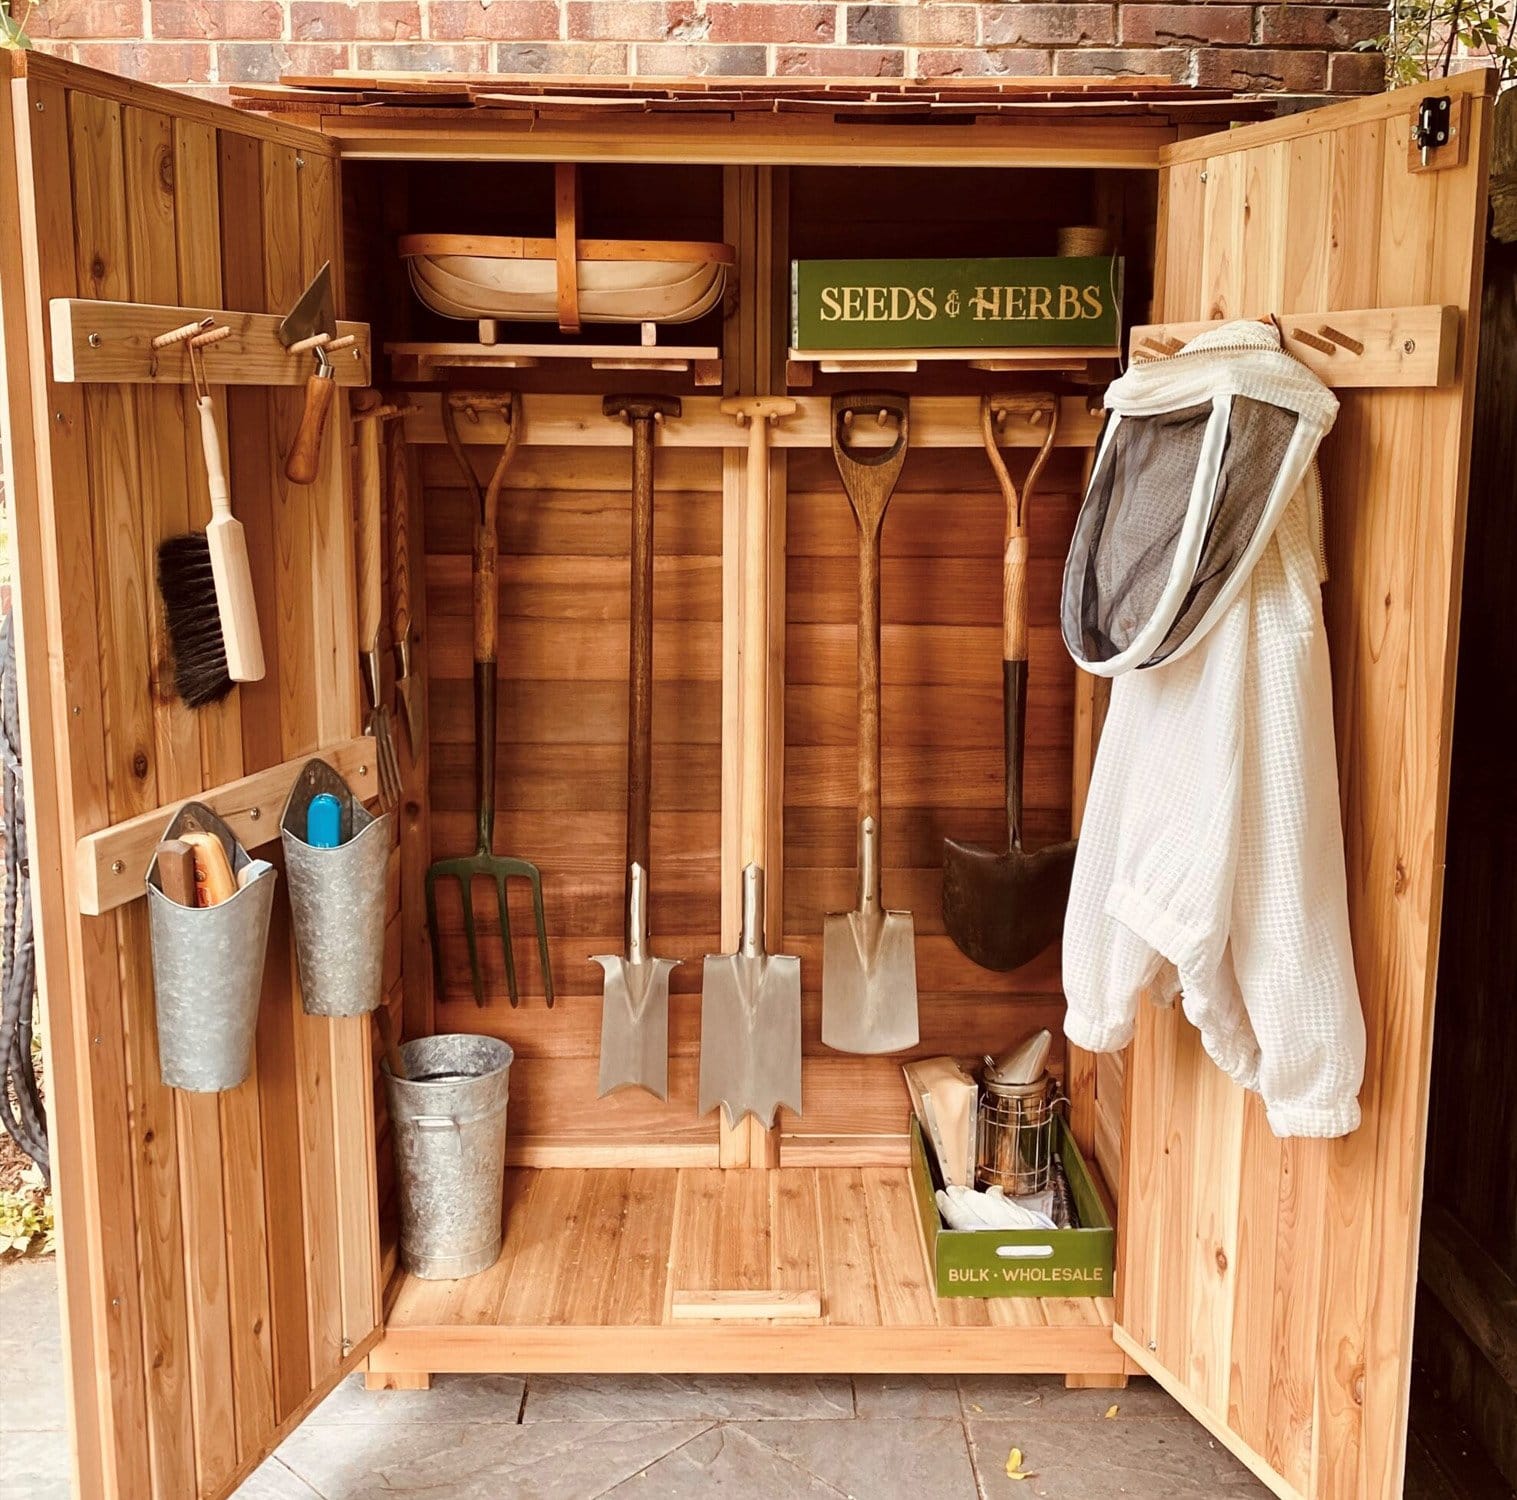
Maximize floor space by installing a tool hanger on the inside of your shed door. Long-handled tools like rakes and shovels stay out of the way but within reach.

Install Open Shelving

Open metal shelves are ideal for tight sheds with limited natural light. They allow sunlight to pass through and make your tools easier to spot. Choose adjustable shelving to fit your tools of all sizes.

Use Bins to Avoid Clutter

Shelves alone won’t prevent chaos. Use plastic or metal storage bins to group and organize smaller items neatly.

Add a Magnetic Tool Strip

Mount a magnetic strip to store metal tools like pruning shears or trowels. Mechanics have used this method for years—apply the same logic to your garden shed for quick access and safe storage.

Create a Potting Bench
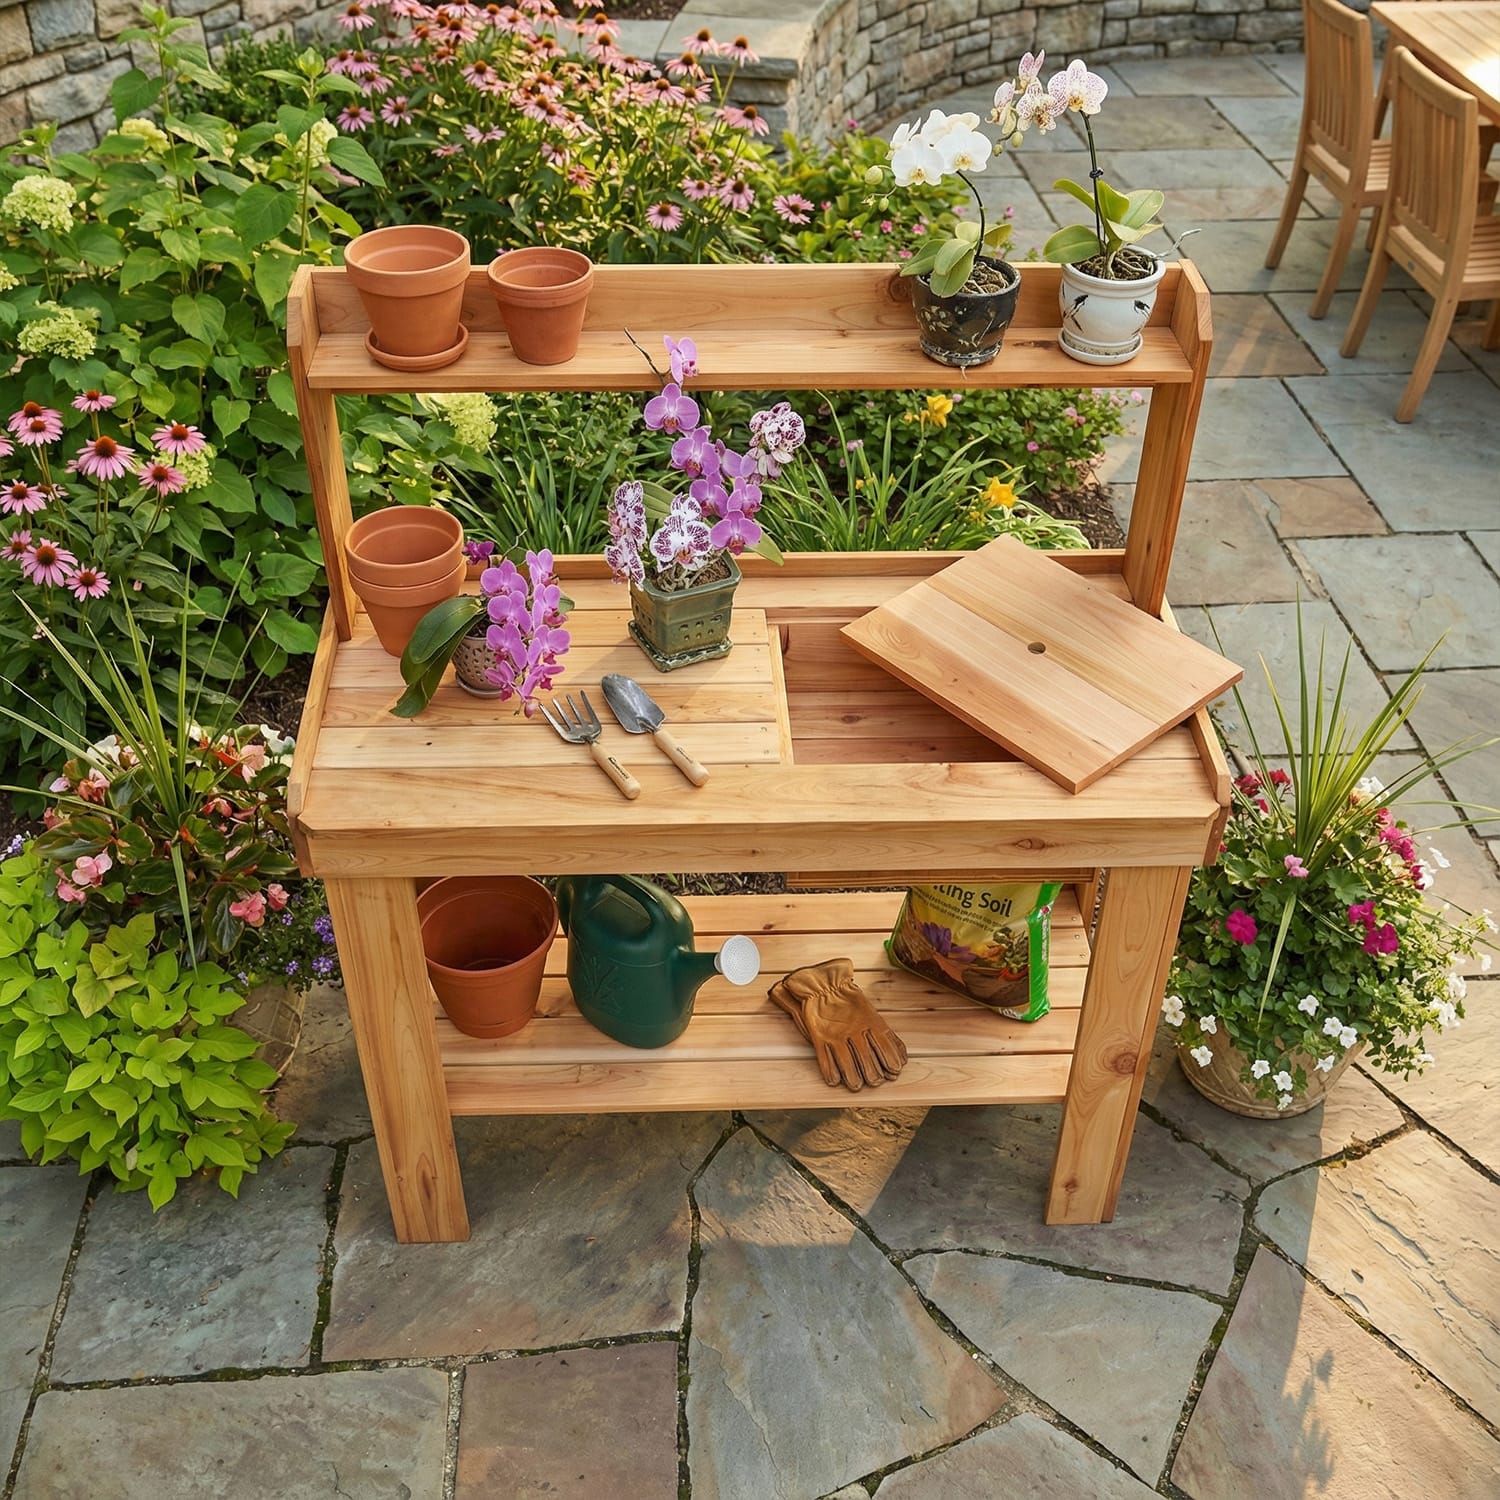
pb42 2 1

A potting bench gives you a dedicated space to plant or repot—even on rainy days. It also keeps potting mix dry and your gardening more enjoyable.

Track Tasks with a Calendar

Install a metal calendar in your shed to track seasonal chores. Bonus: magnetic holders let you store seed packets, plant tags, and more in one place.

Wicker Basket Essentials

Hang a wicker basket on your shed door to stash essentials like gloves, shears, or gardening books. It’s the quickest grab-and-go storage for your most-used items.

Baskets Under the Bench

Place a bushel basket or bin under your potting bench to hold mulch, birdseed, or potting soil. You’ll find great deals at local flea markets or use any weatherproof container you have.

Add a Portable Ramp
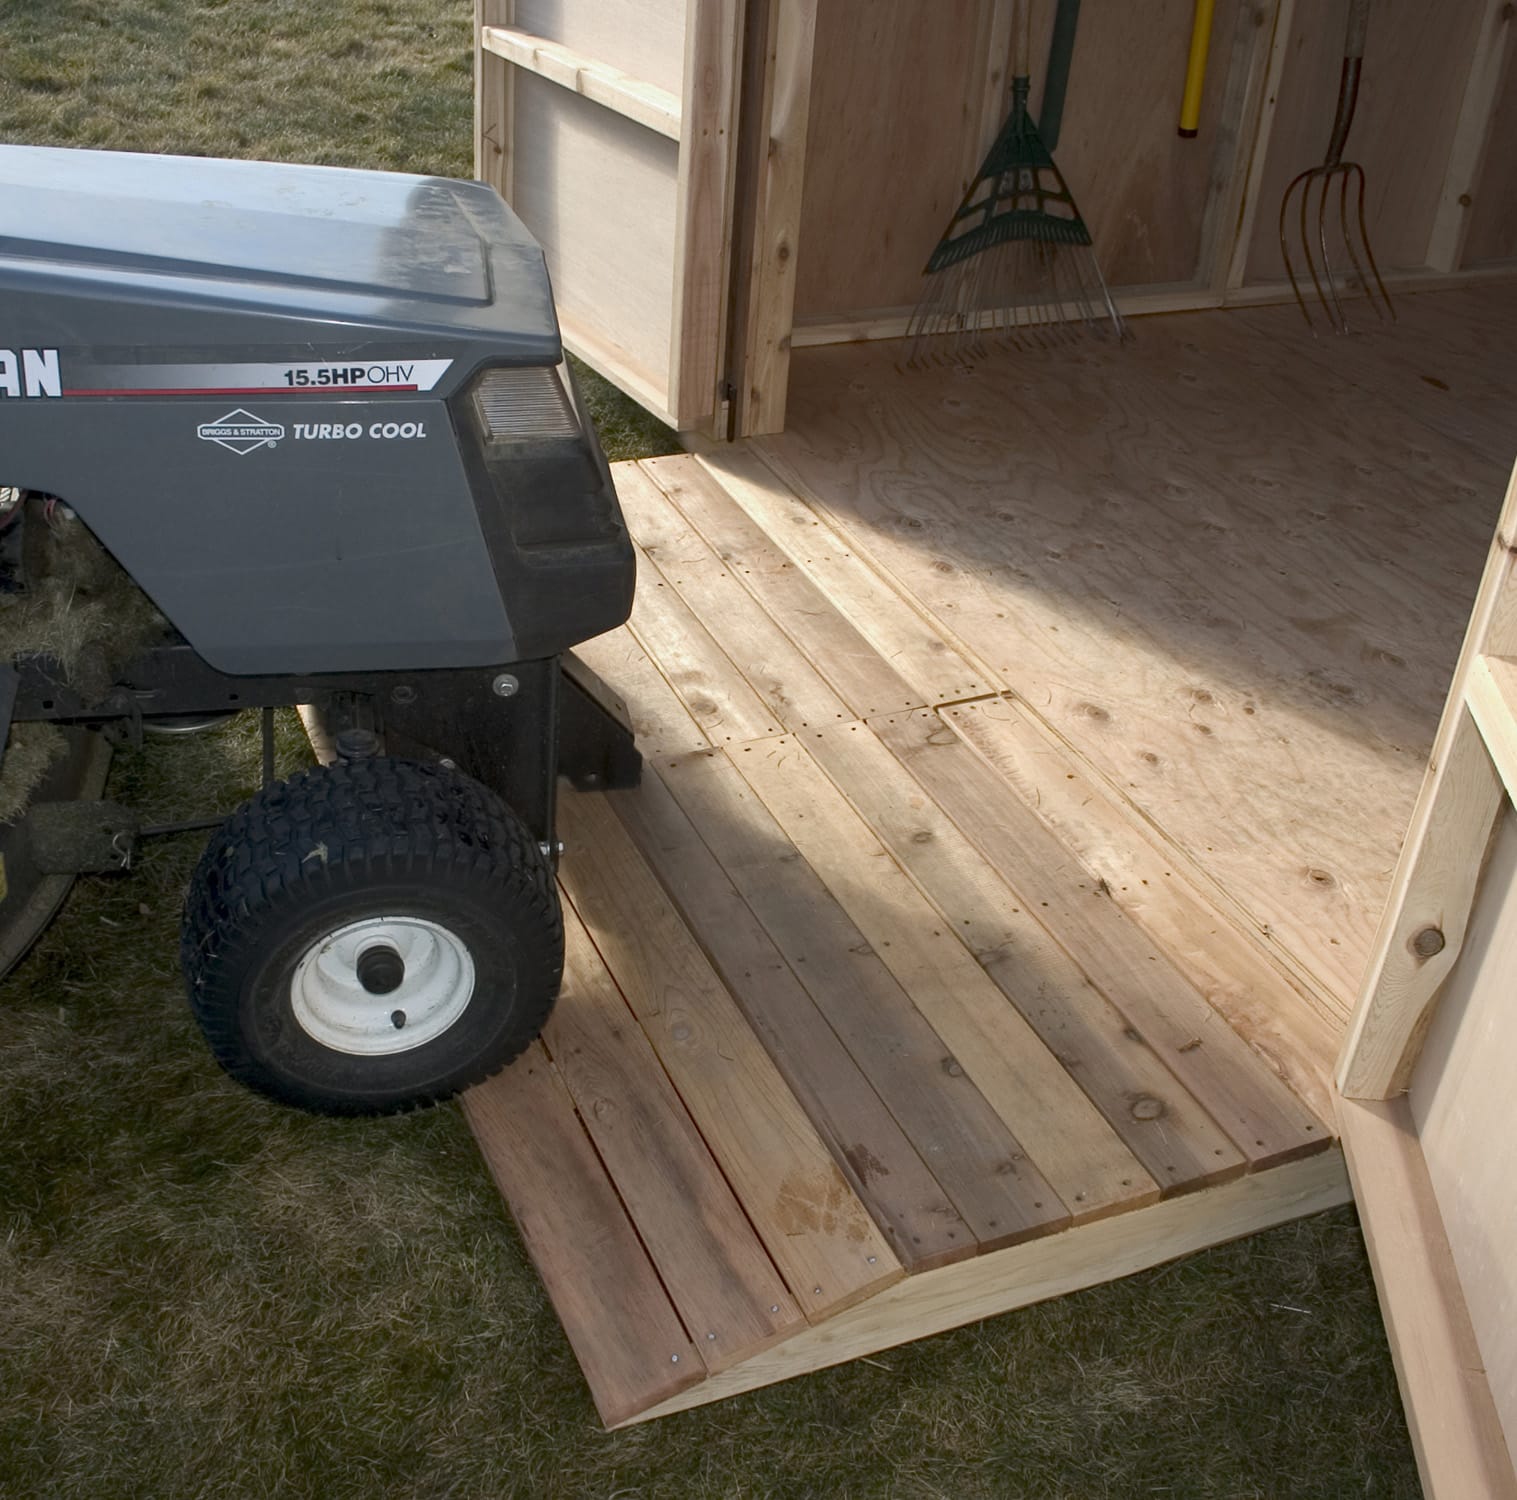
RAMP Option OLT

Make moving heavy equipment easier with a DIY ramp. A couple of 2x4s and a piece of ½” plywood can create a sturdy yet compact ramp that’s easy to store when not in use.

Plan Shed Design Around Your Needs

Before building or buying a shed, pile up your gear and measure its footprint. If you plan to store large power tools, you’ll need more space—plan accordingly.

Prioritize Tool Placement

Keep frequently used tools at the front and center of your shed. Store less-used items at the back. Make sure trowels, gloves, and pruning gear are always easily accessible.

Hang Tools Safely

Mount smaller tools like rakes, saws, and cultivators on the lower section of your shed wall or doors. This keeps blades safe and tools in good condition while protecting you from injuries.

Declutter Ruthlessly

Group similar items—cords, seeds, chemicals—and donate or dispose of broken, rusty, or unnecessary duplicates. An organized shed starts with only what you truly need.

Read More

How to Build a Level Base for Your Shed: Step-by-Step Guide

OLT How To Build A Foundation Graphic Steps 2

If you’re building a garden or storage shed, the single most important step is preparing a solid, level base. Even if your yard looks flat, assuming it’s level can lead to major headaches down the road. From wobbly workbenches to crooked walls, an uneven foundation impacts everything that comes after.

In this guide, we’ll walk you through how to create a strong shed foundation using crushed stone and pressure-treated wood.

Why Leveling Matters


A level base ensures your shed walls, doors, and especially roof panels align properly during assembly. Many DIYers discover too late that an off-kilter base causes misaligned screw holes, unstable framing, and frustrating gaps during roof installation.

And beyond aesthetics, if you plan to install a workbench, shelving, or any equipment, you’ll need it sitting perfectly level—not tilted like a funhouse.

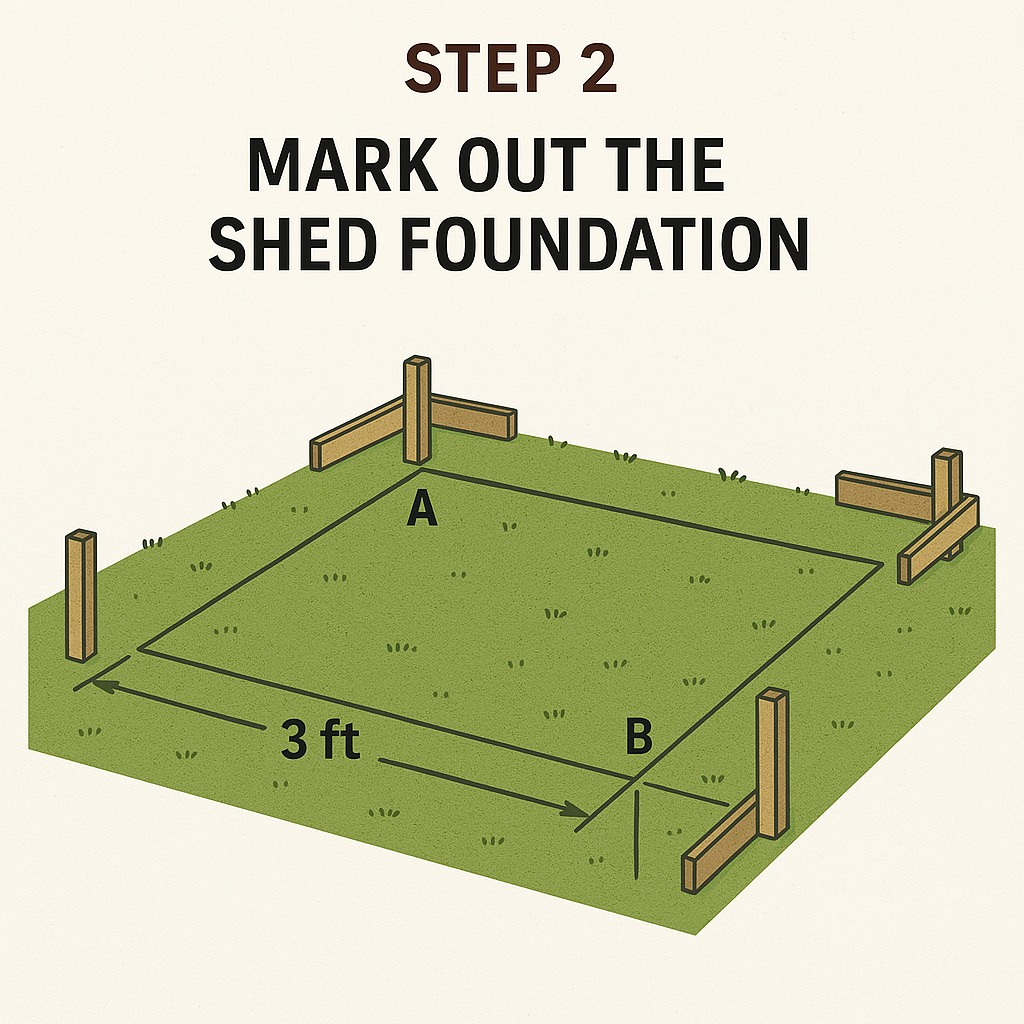
Step 1: Mark and Measure Your Shed Footprint

OLT How To Build A Foundation Graphic Steps 8

Start by choosing your shed’s final position. Consider:

  • Sun exposure

  • Drainage

  • Obstruction of views or light

Use four wooden stakes to mark out a slightly larger footprint than the shed base. This ensures enough room for installation and airflow.

Step 2: Identify Your High Corner

Use a long 2×4 and spirit level to determine which corner of your base is the highest point. Tap the stake in until it’s 4-6” above ground. This will be your reference height for the other corners.

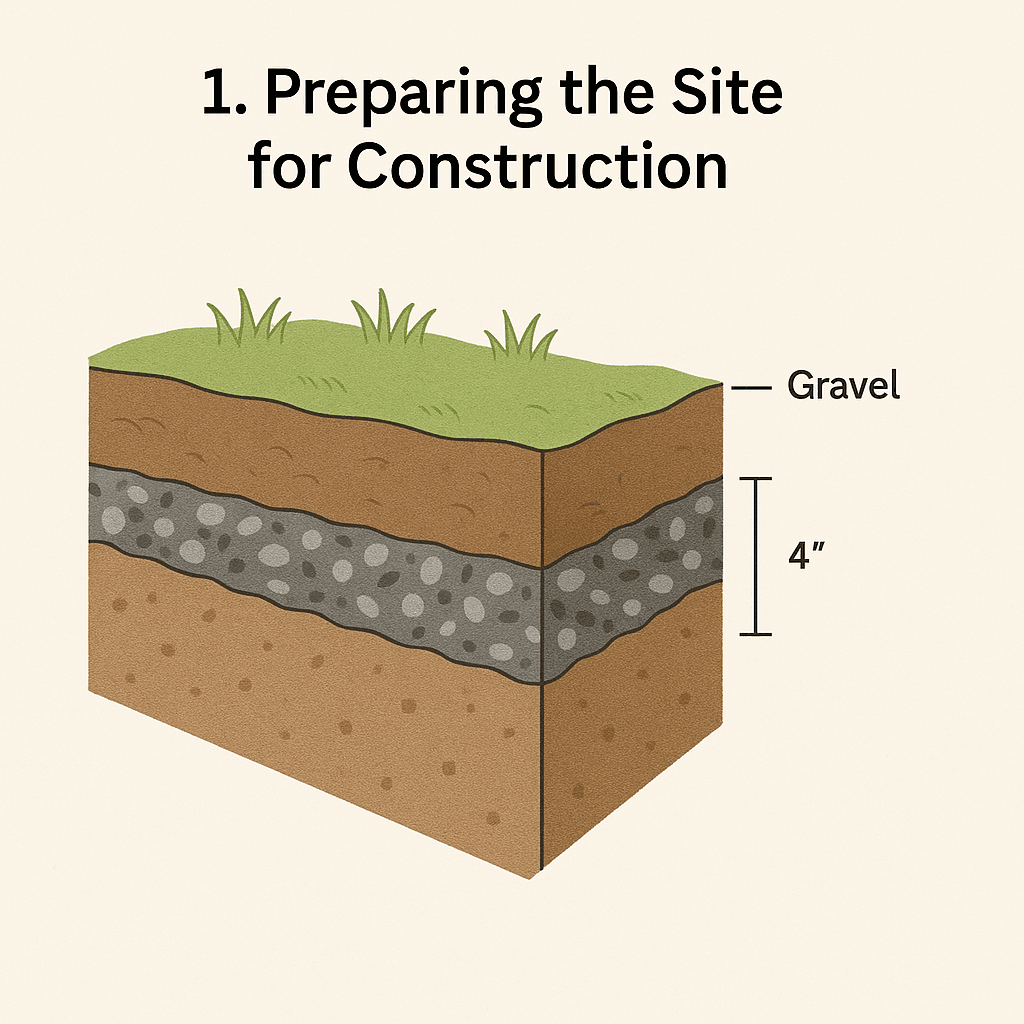
Measure down from this point to determine how much soil needs to be excavated from the remaining corners to make the base level. Strip turf and excavate to 3″ depth minimum (ideally 3″ to 5″).

Step 3: Add and Compact Crushed Stone

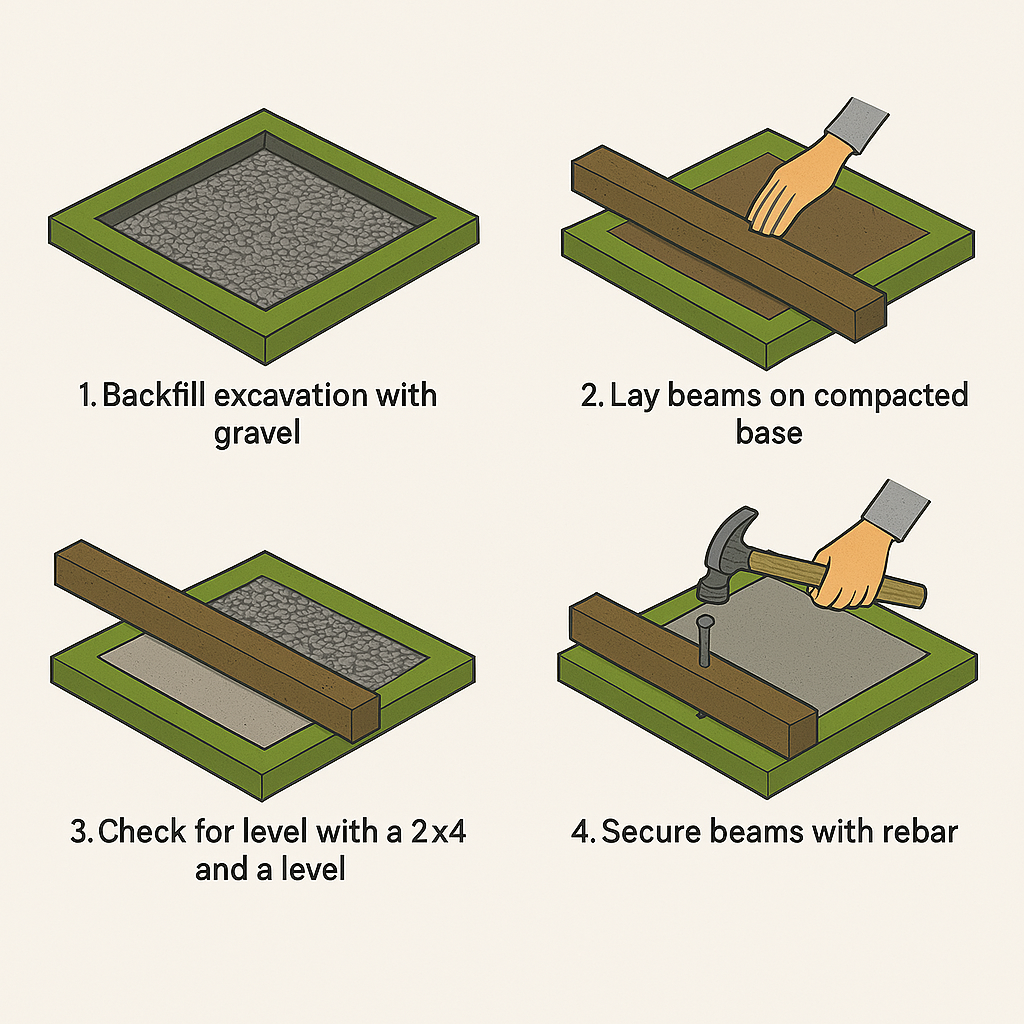
Lay down a weed barrier, then spread crushed aggregate (crushed stone with fine dust). Rake it as level as possible.

To compact it:

  • Rent a vibrating plate compactor or

  • Use a 25 lb hand tamper to pound the stone flat

Keep checking your levels between corners using your 2×4 and spirit level. Add or remove stone as needed until the entire base is flat and compact.

Step 4: Add Pressure-Treated Wood Timbers

OLT How To Build A Foundation Graphic Steps 8 1

Lay 4×4 pressure-treated timbers perpendicular to your planned shed floor joists. These elevate the shed for better air circulation and help prevent water damage. Ensure the wood sits flush and level across the stone base.

Tip: Use stainless steel or aluminum fasteners to prevent staining or corrosion.

Step 5: Maintain Dryness for Longevity

Moisture is the main cause of wood decay. Crushed stone allows water to drain, and elevating your shed with pressure-treated wood adds another layer of protection. Together, they dramatically extend the life of your shed.

Summary

Building a proper shed foundation takes time, but it prevents costly errors and repairs later. A few key tools and steps ensure a long-lasting, stable base:

  • Mark your site carefully

  • Level it out thoroughly

  • Compact crushed stone

  • Add pressure-treated support timbers

With these steps, you’ll have a rock-solid base for whatever you build on top—from garden sheds to backyard studios.


Read More

12 Affordable Ways to Personalize Your Pergola or Gazebo

B. Baker 10x16 Cedar Pergola Kit 2 scaled 1

When it comes to building a pergola or gazebo, there’s a wide range of options to suit any style and budget — from classic Western Red Cedar pergolas to sleek vinyl and metal structures. Whether you’re looking for added comfort, shade, or visual appeal, there are countless cost-effective ways to personalize your pergola or gazebo and make it a centerpiece of your outdoor space.

1. Add Some Furniture

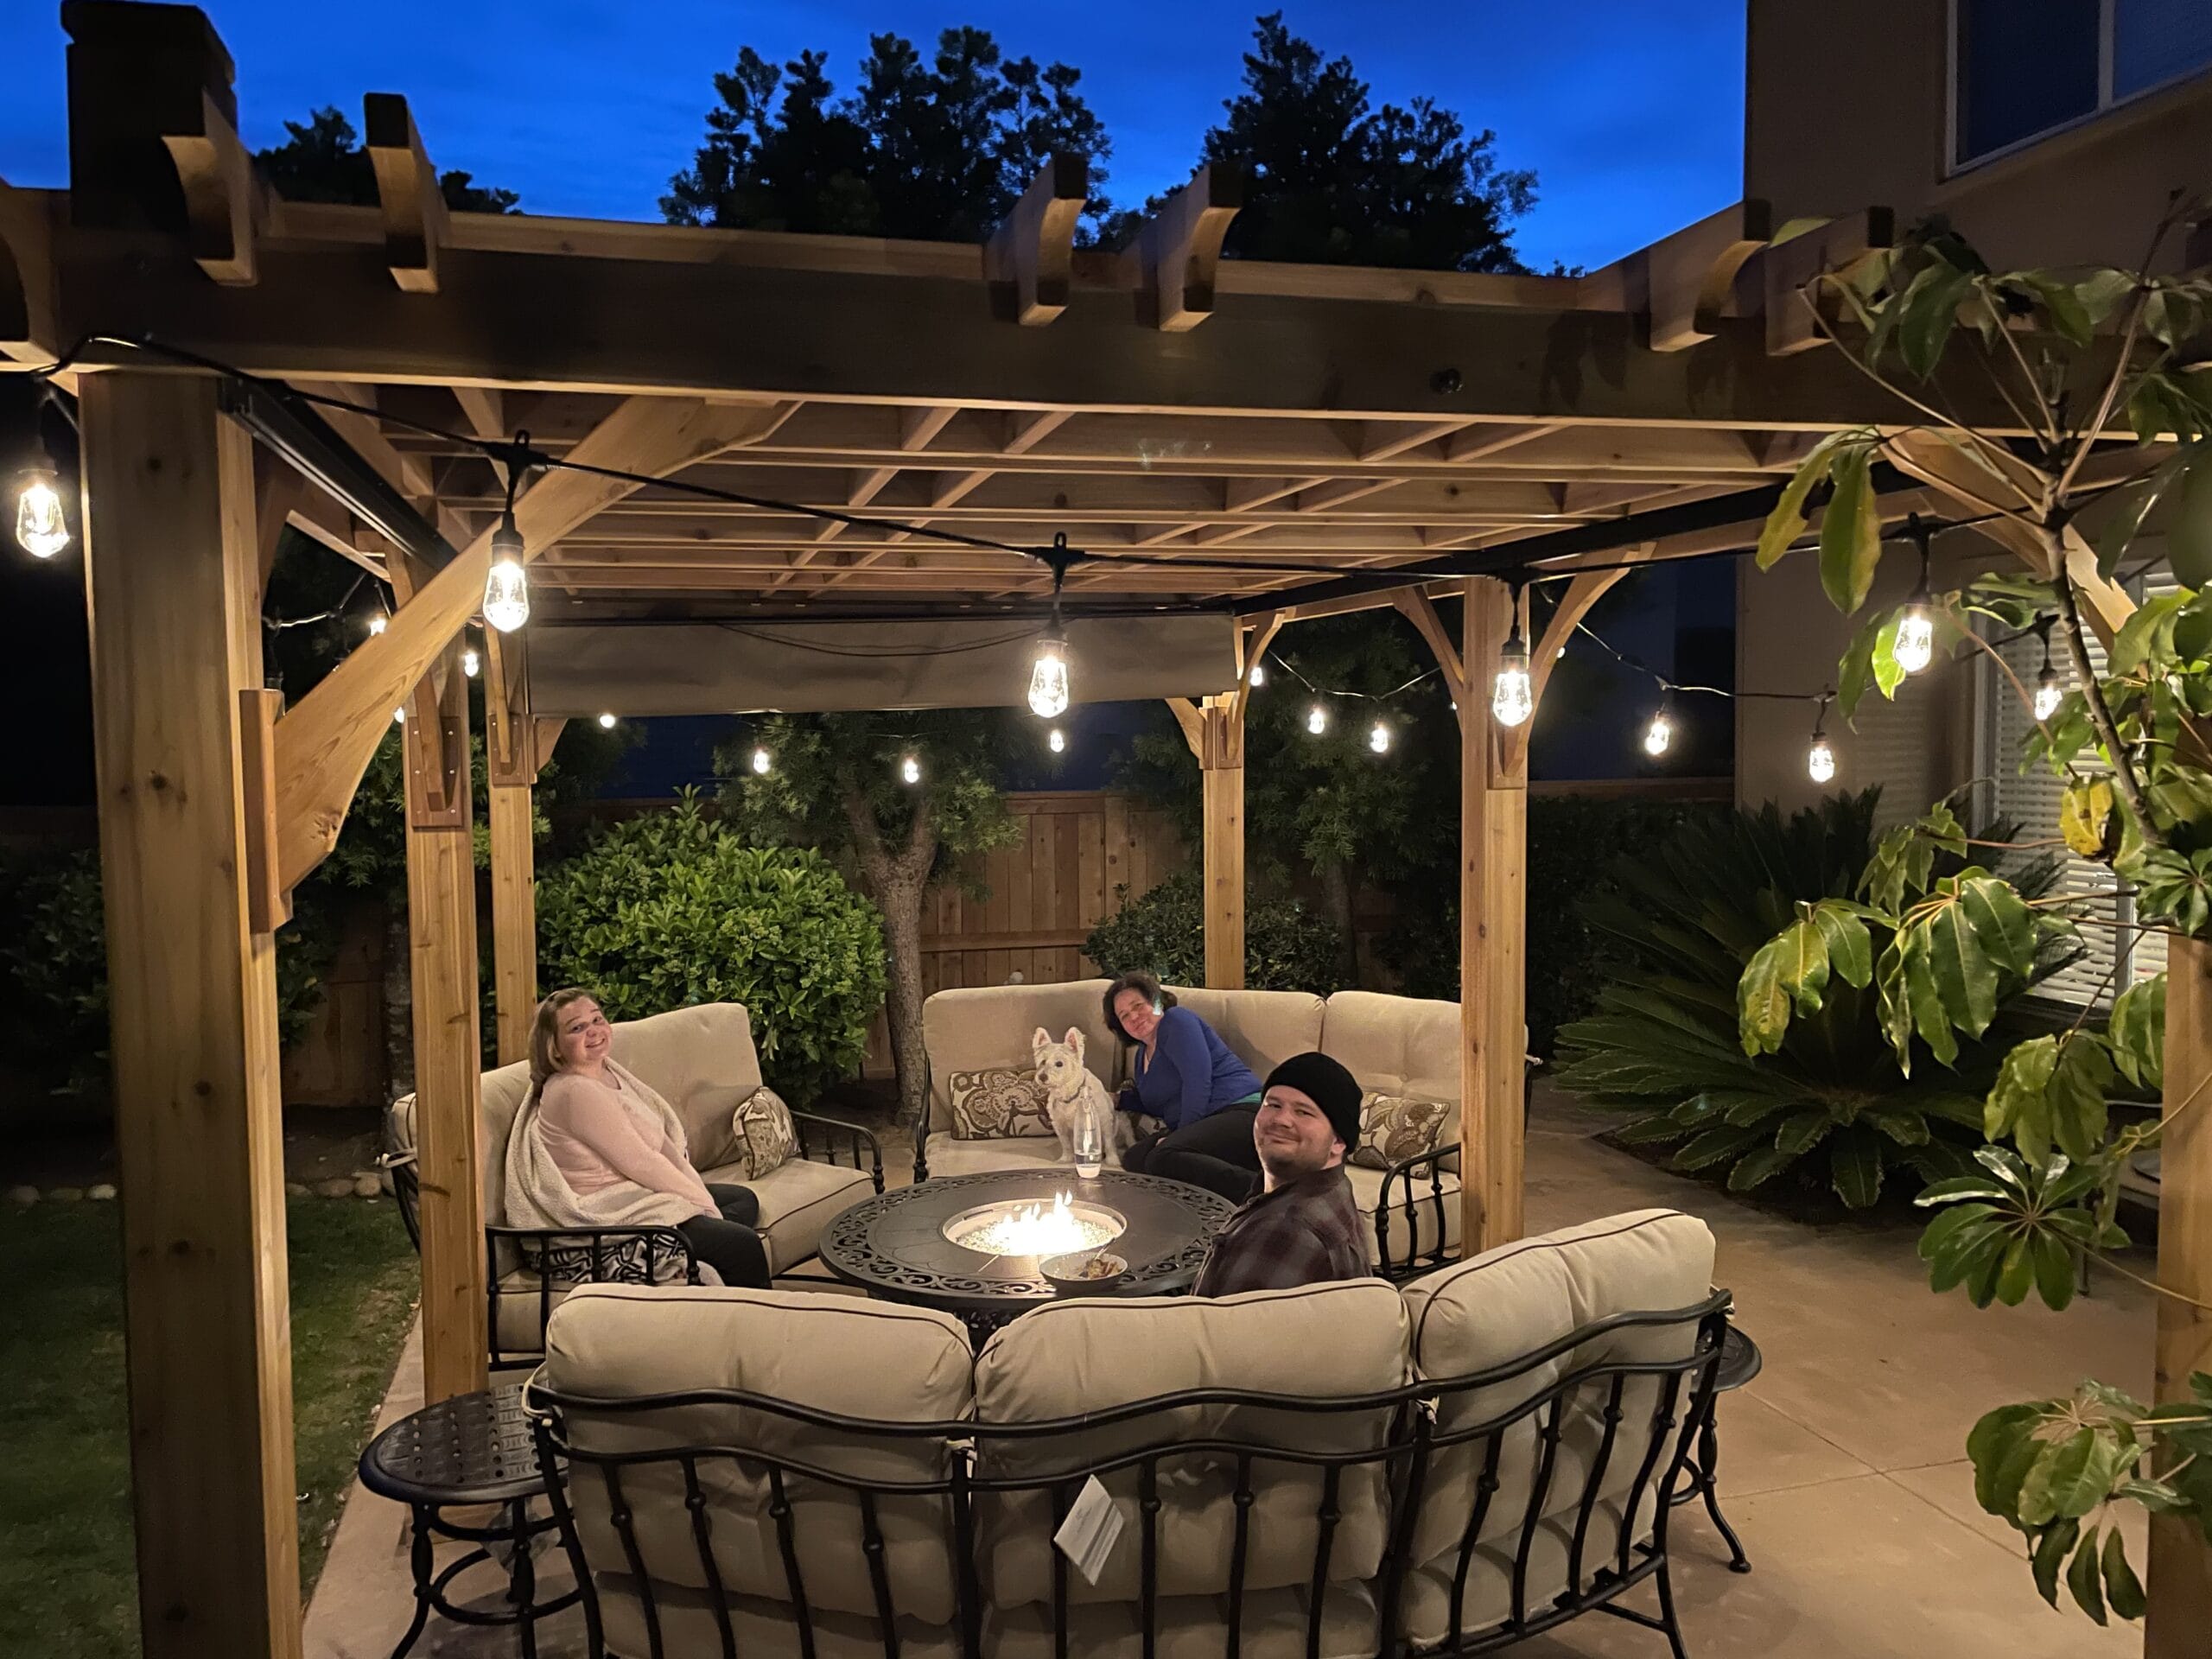
Turn your pergola-covered space into a cozy seating area with a patio table, chairs, or even a hammock. Painting the furniture to match the tone of your pergola adds a thoughtful touch, while placing a hot tub underneath can transform it into the ultimate relaxation zone.

2. Add Extra Rafters or Joists

Most pergola kits come with essential rafters or joists, offering partial shade. But if you want more coverage or support for hanging baskets or climbing plants, consider adding extra joist beams. This customization adds functionality and visual interest.

3. Erect Trellis or Lattice

Trellis or lattice panels can be installed on one or more sides to create a “garden room” feel. Ideal for climbing plants like roses, clematis, or honeysuckle, lattice also provides privacy and shade. Be sure to use durable 1/2- to 1-inch thick wood, and pre-drill holes to avoid splitting.

4. Close One End for Added Privacy

While pergolas are often open-air structures, adding a lattice wall or solid panel to one or two sides offers both privacy and a decorative touch. It softens the lines of the structure and enhances its room-like feel.

5. Include Colorful Flowers

Introduce vibrancy with flowering plants like sweet alyssum, marguerite daisies, or spider flowers. Whether they climb up a lattice or sit in pots around the base, flowers bring warmth and seasonal beauty to your pergola.

OLT 68378af1 a62e 40fb a60b a2418e53ebe2

6. Opt for All-Season Use

Protect your pergola with a solid polycarbonate roof or retractable canopy. These additions allow you to enjoy your outdoor space through rain, snow, or scorching sun — extending usability year-round.

7. Swing Seating Pergolas

Add a built-in swing beneath your pergola for a fun and relaxing touch. Perfect for two people, swing seating makes the space more dynamic and provides a great spot to unwind.

8. Hanging Seats from the Rafters

Replace standard seating with hanging cushioned chairs to create a laid-back, breezy vibe. Hanging seats add movement and charm, making the pergola feel more like a retreat.gaz screen 1024x1013 1

9. Match Pergola to Your Deck

Stain your pergola to match the deck it stands on to create a cohesive look. Add potted plants and soft seating for a secluded, calming vibe that feels like a natural extension of your home.

10. Paint for a Bright Finish

Choose a classic white or go bold with color. Painting your pergola can give it a refreshed look that aligns with your backyard’s style. For cedar pergolas, use an acrylic, non-toxic paint that won’t harm nearby plants.

11. Install Glass Blocks for Privacy

Want a unique twist? Sporadically placed glass blocks provide privacy and visual interest while letting light through. Pairing wood and glass creates a stunning modern contrast.

12. Mix Function with Fun

Add pillows, fairy lights, or outdoor curtains to complete your pergola personalization. These finishing touches offer comfort, style, and charm for entertaining or unwinding outdoors.


At Outdoor Living Today, we offer premium cedar pergola kits that are easy to assemble and ready to personalize. Whether you’re looking for shade, structure, or a statement piece, our customizable backyard structures are built to last.

Read More

How to Maintain Your Outdoor Pergola and Keep It Looking Beautiful Year-Round

1212 3

An outdoor pergola is a stylish open-air structure perfect for creating shade and adding ambiance to your backyard. Whether covered in climbing vines or paired with retractable canopies, pergolas made of wood, vinyl, plastic, or metal require regular care to maintain their appearance and structural integrity. Here’s a complete guide on how to properly maintain your pergola and ensure it lasts for many years.


1. Hose It Down Regularly

Regardless of your pergola’s material, the first step in maintenance is a thorough rinse. Use a high-pressure hose to remove surface dirt, pollen, or debris. Start at the top and work your way downward. Be sure to clear the area of furniture and décor to avoid damage during the process.

2. Clean with the Right Tools

Choose a bristle brush and a suitable cleaner for your pergola’s material:

  • Wood: Use a wood-safe cleaner and remove any peeling paint or splinters.

  • Metal: Scrub away any rust buildup using a wire or bristle brush.

  • Vinyl: Follow manufacturer guidelines—usually, mild detergent works well. Use a toothbrush to reach tight corners or areas around hardware.

3. Remove Mildew and Rust Stains

Combat mildew with a mix of one cup of oxygen bleach and one gallon of water. Apply this solution after the initial rinse and let it sit until the mildew stains begin to fade. Rinse again thoroughly with soap and water.

If you notice black or brown rust stains from fasteners, consider replacing corroded hardware with stainless steel or aluminum options.

4. Rinse Thoroughly

After applying cleaning solutions, rinse again using a hose to remove all residue. Check for spots that may need a second round of cleaning and repeat as necessary.

5. Touch-Up and Repair Damage

1212a 1

Use a touch-up or repair kit to fix cuts, dings, or gouges. Wood or metal putty can patch small damage, and many vinyl pergolas include specialized kits for surface restoration. Sand down any rough spots before refinishing.

6. Seal and Stain for Longevity

If you have a cedar pergola, you’ll notice it gradually turns from a rich reddish tone to a silvery gray. To preserve its original hue:

  • Clean thoroughly

  • Apply a translucent oil-based wood stain for cedar

  • Let it dry and then seal Reapply stain and sealant every other year to maintain appearance and protection.

7. Address Fasteners and Loose Hardware

Inspect all fasteners and replace any that show corrosion. Use rust-resistant stainless steel or aluminum. Tighten loose bolts and screws to keep the structure secure.

8. Paint for Added Protection

1216 5
1216 5

In hot, dry climates, UV rays can cause wood pergolas to crack and fade. Apply a durable, heat-resistant exterior paint for long-term protection and aesthetic appeal.

9. Trim Vines and Greenery

While creeping vines add beauty and shade, overgrowth can increase the pergola’s weight load. Trim vines a few times a year to reduce stress on the frame. They’ll grow back quickly and stay healthy with regular care.


Conclusion With proper maintenance, your outdoor pergola can remain an attractive and functional centerpiece in your backyard for years. Regular cleaning, careful inspection, and minor seasonal upkeep can prevent costly repairs and preserve the pergola’s beauty and strength.

Read More

🏗️ The Best Foundation Options for Your Gazebo
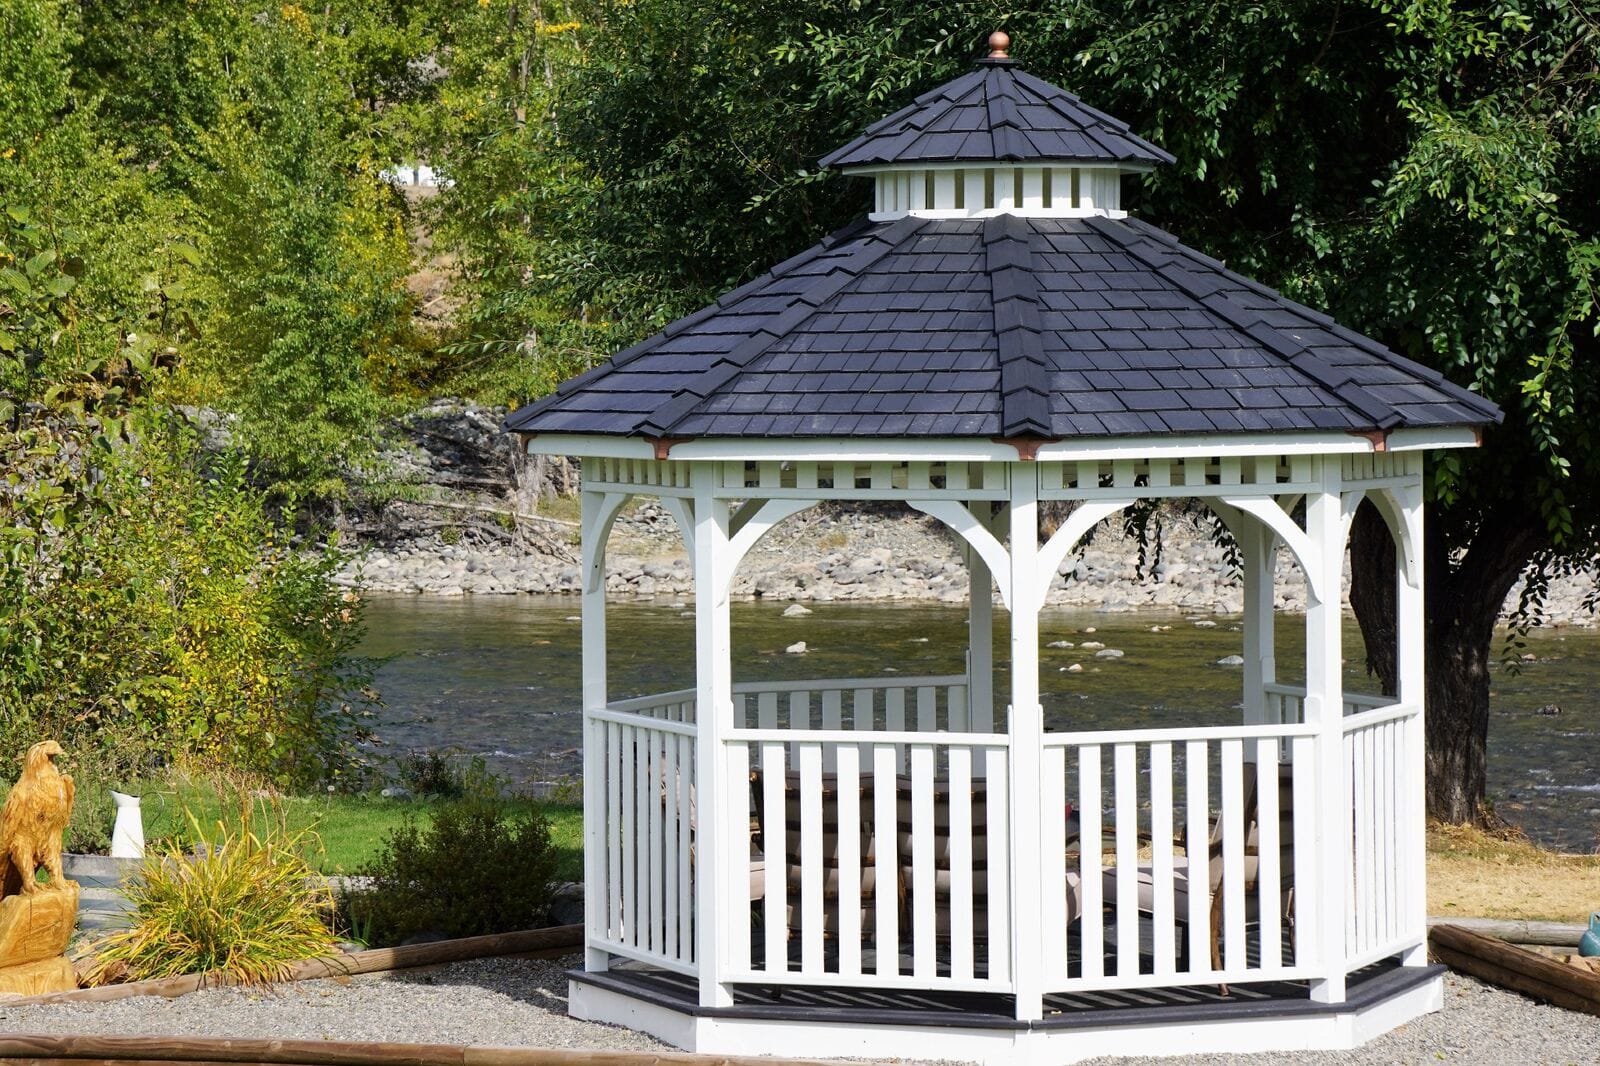
BAY12

Not all yards are flat, and not all gazebos are the same — but every solid outdoor structure begins with a stable foundation. Whether you’re building on soft soil, a slope, or a rugged backyard, choosing the right gazebo base will ensure your structure stays level, secure, and long-lasting.

Here are five of the most common (and effective) foundation types you can use when installing a gazebo.


🪨 1. Patio Stones

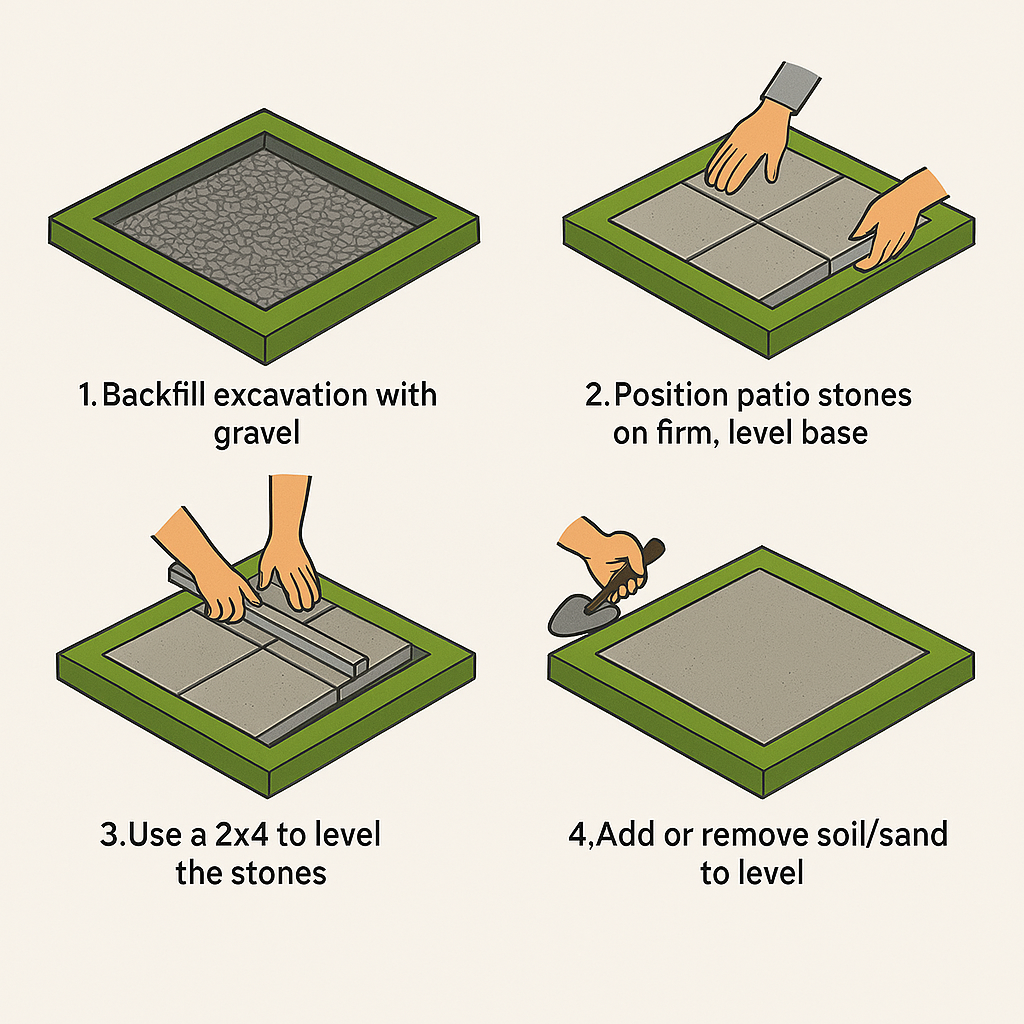
OLT How To Build A Foundation Graphic Steps 7

Best for: Flat terrain, structures under 14 ft.

Patio stones are the simplest and most cost-effective option for small- to medium-sized gazebos. Available at most building suppliers, they provide even weight distribution and a level surface without the need for concrete.

Tips:

  • Place one stone under each corner and a few under the center.

  • Ensure stones don’t extend past the gazebo’s floor perimeter (so skirting fits properly).

  • Use cedar shims or other materials to level the floor.

  • For added support and drainage, place the patio stones on top of compacted crushed gravel.


🧱 2. Cinder Blocks

Best for: Slightly uneven terrain where affordability and strength are priorities.

Cinder blocks (8″x16″) are easy to use and provide reliable support. However, they can sink into soft ground unless properly installed.

Tips:

  • Use overlapping rows of blocks for stability on soft ground.

  • Add a cedar skirt to hide the foundation and prevent critters from nesting underneath.


🪛 3. Super Spikes

Best for: Raising one side of the gazebo on uneven surfaces — without pouring concrete.

Super spikes are metal ground anchors that can help level a structure on sloped terrain. They’re especially useful in warmer regions without ground frost.

Tips:

  • Always check your local building codes before using them.

  • If elevating the structure, consider adding a skirt, lattice, or steps for a polished look.


🏗️ 4. Sonotube / Concrete Footings

Best for: Larger structures, uneven terrain, or when permits are required.

Sonotubes provide a permanent and code-compliant solution for supporting heavier gazebos. These concrete columns are sunk into the ground to create a rock-solid base.

Tips:

  • Hire a contractor familiar with local regulations.

  • Not included in gazebo kits — must be purchased and installed separately.


🧱 5. Concrete Pads

Best for: Large gazebos, hot tubs, pool equipment, or permanent structures.

Concrete pads offer the strongest and most durable base. While expensive, they’re ideal for setups that involve plumbing, heating, or electrical components.

Tips:

  • Professional installation highly recommended.

  • Consider topping the pad with flagstone for a stylish, rustic finish.


✅ Final Word

SetWidth530 BAYSIDE12GSKOPS2575x400

Whatever your ground type or structure size, there’s a foundation option that will support your gazebo for years to come. From simple stone pads to professional-grade concrete, the right base ensures durability, safety, and peace of mind.

Browse our full collection of Western Red Cedar gazebo kits and start planning your project today!

Read More

How to Know If an Online Business Is Legit: 10 Trust Tips for Smarter Shopping

Painted 42 Ken scaled

Found the perfect pergola or shed online, but never heard of the company before? You’re not alone.

With e-commerce booming, especially for big-ticket backyard purchases, it’s more important than ever to verify the trustworthiness of a site before handing over your credit card. Here’s how to evaluate any online business — and avoid scams, frustration, or costly mistakes.


🔍 1. Search the Company Name + “Reviews” or “Scam”

Before anything else, do a quick Google search:

  • Type the business name or website + “reviews”

  • Try variations like “[company] scam” or “[company] customer complaints”

If red flags pop up, dig deeper. One or two negative reviews isn’t uncommon — but a pattern of issues? Walk away.


🕰 2. Check How Long the Website Has Been Online

New websites aren’t automatically untrustworthy — but a company with 5+ years of online presence is a better bet.

Use Whois Lookup to check:

  • Domain age

  • Ownership

  • Hosting history

A well-established site suggests long-term commitment and reliability.


🧭 3. Verify a Physical Address

Legitimate businesses list their office or warehouse address. Enter it in Google Maps or Street View.

If a business claims to be a “gazebo manufacturer” but the address leads to a sketchy apartment complex or PO box, move on.

You can find our Contact Page here, including full address and phone support.


☎️ 4. Contact the Company Directly

Memorial day sale 3 1 scaled

Call the number listed or send an email. Trustworthy businesses:

  • Answer promptly

  • Respond professionally

  • Offer clear answers about products, shipping, or policies

If you get no response within 24–48 hours, that’s a red flag.


🛡 5. Look for Security Seals and Trust Affiliations

Secure, professional websites often feature:

  • SSL certificates (HTTPS)

  • Trust badges (e.g., BBB, Shopify Secure, Trustpilot)

  • Memberships in professional associations

But beware: some scams display fake trust seals. Always click the badge — it should lead to a live verification page.


📄 6. Read the Terms & Cancellation Policy

Before checking out, review the site’s:

  • Return & refund policy

  • Cancellation terms

  • Warranty details

  • Legal terms

Reputable businesses keep these visible, clear, and fair. Ours are always available at:


✍️ 7. Check for Original Content & Quality

A sloppy website with plagiarized content, pixelated images, and poor grammar is a red flag. Credible businesses:

  • Invest in original photos

  • Write clear, informative copy

  • Showcase their own product visuals

Want to see what authentic content looks like? Browse our blog or Decorating Ideas section.


🔗 8. Look for Reputable Backlinks

Established businesses are often mentioned or linked on other credible sites.

Try:
link:example.com in Google to see who’s referencing the site.

Bonus tip: Check their Reviews page and search the brand on independent platforms like Google Reviews or BBB.


💳 9. Ensure Secure Payment Options

A legitimate online store should accept:

  • Major credit cards (Visa, MasterCard, Amex)

  • PayPal or similar secure gateways

Credit card purchases are protected under the Fair Credit Billing Act, so you can dispute charges if something goes wrong. Avoid websites that only accept e-transfers or cryptocurrency.


🧠 10. Trust Your Instincts (Seriously)

A trustworthy site should send you:

  • An order confirmation within minutes

  • A detailed receipt with tracking

  • Contact and return policy info

If that doesn’t happen, follow up. And if you’re feeling uneasy — listen to your gut.


Final Word: Smart Online Shopping Starts with You

IMG 8849 Edit 1 scaled

Following these 10 steps can help you safely navigate online purchases — especially when investing in something like a shed, gazebo, or pergola kit.

At Outdoor Living Today, we’ve been building high-quality Western Red Cedar kits for over 20 years — and we’re proud to offer secure shopping, clear warranties, and real customer service.

Have questions? Visit our Customer Care page or contact us directly.

Read More

The History and Modern Use of Western Red Cedar Wood

Western Red Cedar Pergola Canopy Outdoor Living Today

Western Red Cedar has long been a symbol of strength, sustainability, and natural beauty. With a legacy stretching back thousands of years and a growing reputation in modern landscaping, this remarkable wood species continues to shape outdoor living spaces across North America.

From ancient Indigenous tools to premium DIY garden structures, here’s everything you should know about Western Red Cedar wood — including why it remains one of the most trusted and eco-friendly building materials today.


🌲 A Brief History of Western Red Cedar

Known scientifically as Thuja plicata, Western Red Cedar is a large evergreen native to the Pacific Northwest of North America. Despite not being a “true cedar,” this tree holds deep cultural and practical significance — especially for the Indigenous peoples of British Columbia, Alaska, Washington, and Oregon.

Indigenous Use & Cultural Importance

Native communities have relied on Western Red Cedar for over 8,000 years, using virtually every part of the tree:

  • Bark: woven into mats, baskets, rain hats, and ropes

  • Wood: carved into dugout canoes, bentwood boxes, planks, and homes

  • Branches: shaped into bows, fishing lines, and cords

Some coastal Indigenous groups even refer to themselves as “People of the Red Cedar,” with oral legends describing the tree as a divine gift from the Great Spirit to provide shelter, tools, clothing, and protection.


🌿 Natural Characteristics

OLT western red cedar forest wide angle shot ebb705b7 7bc5 4e05 971f 7391e37b1c51

Western Red Cedar is instantly recognizable for its:

  • Soft red-brown coloring

  • Scale-like leaves in opposing rows

  • Drooping lower branches and towering, conical form (up to 60 meters tall!)

  • Aromatic scent (from natural tannins)

It thrives in cool, wet climates and can live for over 1,000 years. Today, most natural growth occurs along the wet coastal belt of the Pacific Northwest.


🧰 Why Western Red Cedar Is Ideal for Outdoor Projects

Western Red Cedar’s durability, light weight, and natural resistance to decay make it one of the most trusted woods for outdoor construction.

🪵 Key Benefits:

  • Naturally Rot-Resistant: The wood contains natural oils and tannins that repel moisture and decay.

  • Bug-Repelling Properties: Its strong aroma helps deter termites and other pests.

  • Weather Friendly: Unfinished cedar weathers to a silvery-gray but also holds paint or stain well.

  • Thermal Insulation: Cedar keeps spaces cool in summer and warm in winter, making it ideal for greenhouses or sheds.

  • Workability: It’s light, easy to cut, and simple to fasten — making it a favorite for DIYers.


🛠 Modern-Day Uses

Today, Western Red Cedar is one of the most sought-after materials for:

It’s available in clear and knotty grades, and comes in everything from rough timbers to 1×4 fence boards, making it suitable for virtually any backyard build.


🛒 Where to Buy Western Red Cedar

Western Red Cedar is widely available through:

  • Local lumber dealers

  • Specialty manufacturers that sell pre-cut DIY kits like Outdoor Living Today

  • Online retailers focused on sustainable cedar structures

Looking for something ready to assemble? Browse our curated collection of Western Red Cedar kits — sustainably sourced, pre-drilled, and easy to build.

For more technical specs, finishes, and sourcing details, visit the Western Red Cedar Lumber Association (WRCLA), the industry’s leading authority on cedar wood products.


Final Thoughts

Western Red Cedar’s long history, natural durability, and ecological sourcing make it one of the best materials for anyone looking to build outdoor structures that last. Whether you’re a seasoned carpenter or weekend DIYer, cedar delivers on beauty, strength, and sustainability — with a legacy to match.

Read More