How to Organize Your Garden Shed Like a Pro

gc42 7

An organized garden shed saves you time, energy, and money. When everything is in its place, you’ll no longer waste time searching for your trowel or spend extra cash replacing items you can’t find. A well-structured tool shed can also reduce stress and improve safety.

Hose Storage Made Safe

Avoid tripping hazards by mounting your garden hose on a sturdy wall hook with a steep angle. This not only keeps your space tidy but prevents painful falls.

Hang Long-Handled Tools

Space Master 12x16 SM1216 Outdoor Living Today western red cedar Banner 2

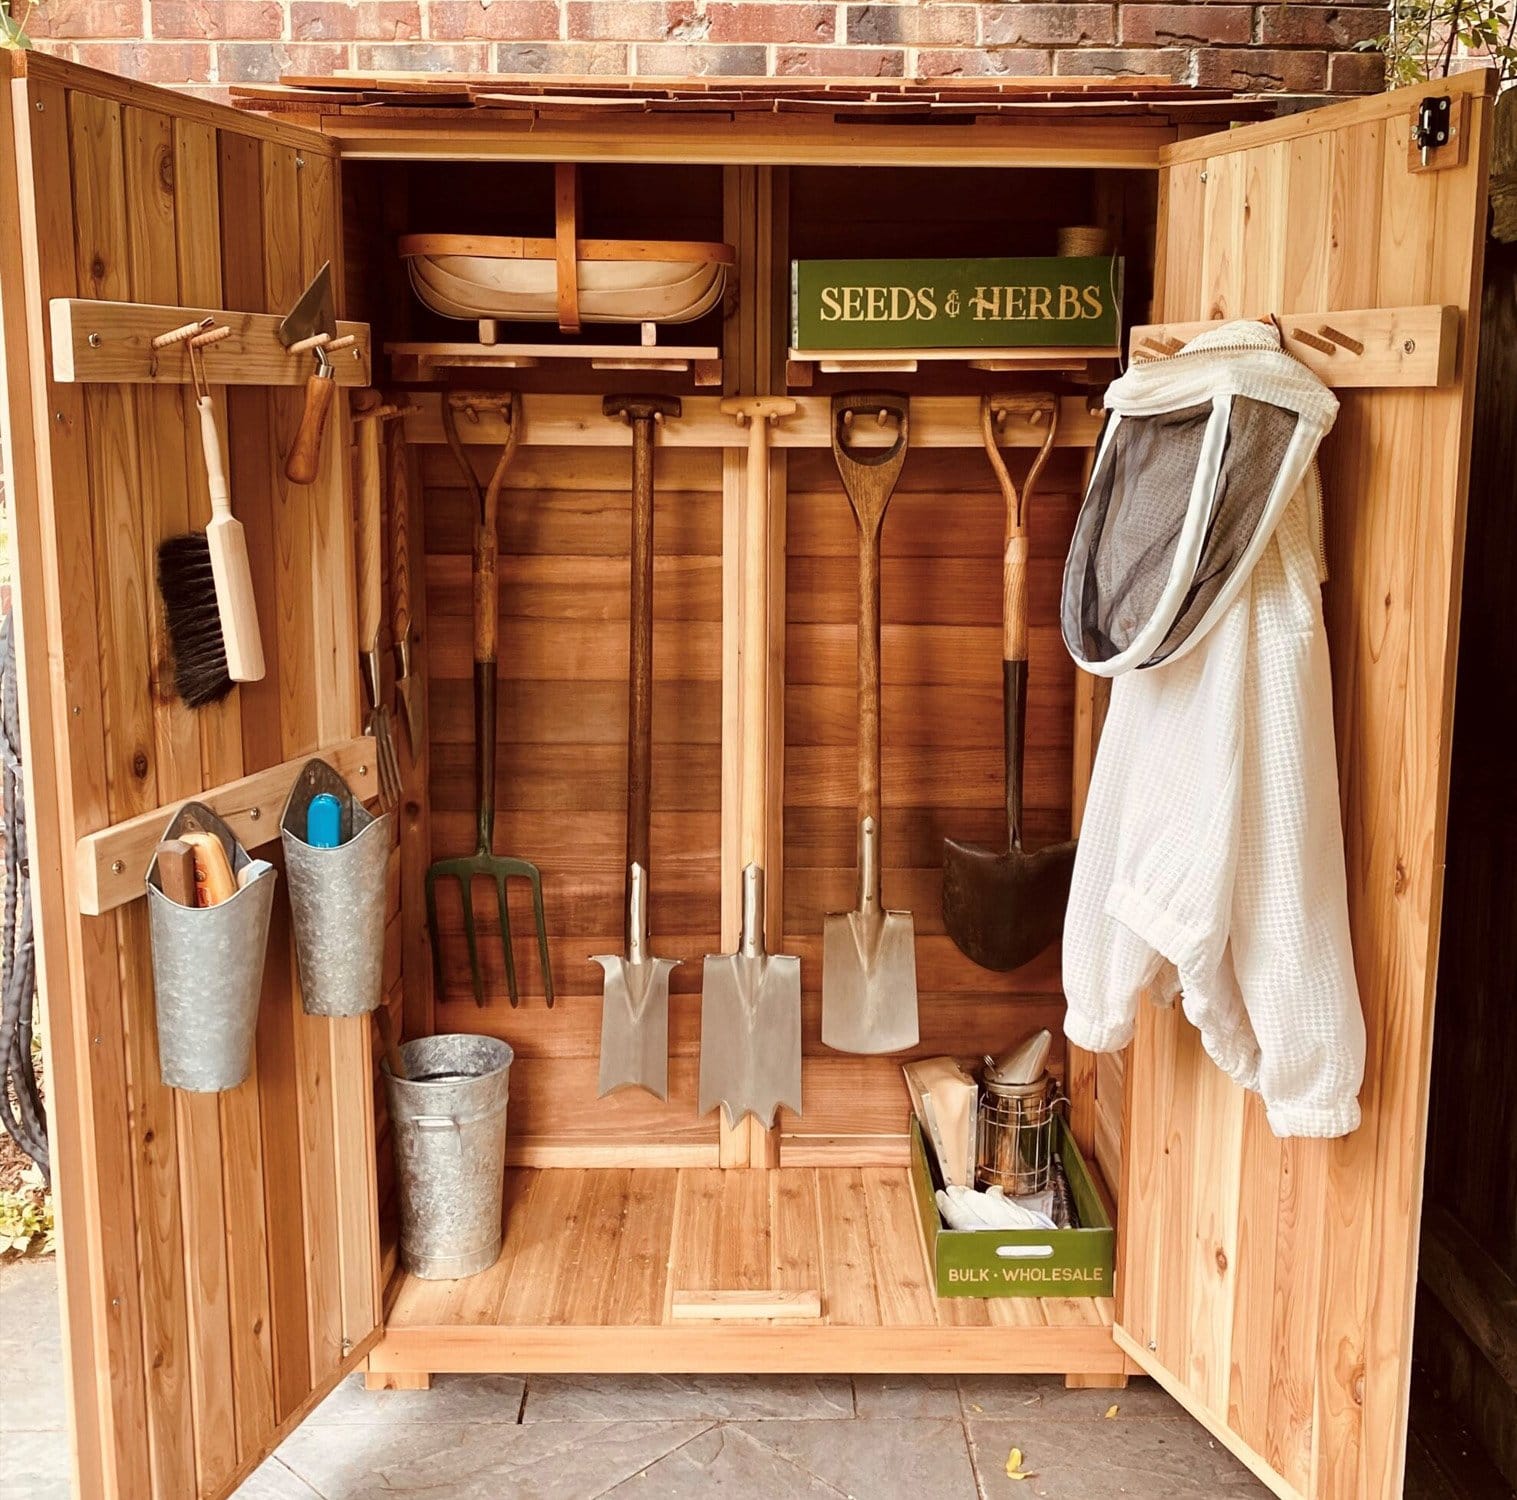
Maximize floor space by installing a tool hanger on the inside of your shed door. Long-handled tools like rakes and shovels stay out of the way but within reach.

Install Open Shelving

Open metal shelves are ideal for tight sheds with limited natural light. They allow sunlight to pass through and make your tools easier to spot. Choose adjustable shelving to fit your tools of all sizes.

Use Bins to Avoid Clutter

Shelves alone won’t prevent chaos. Use plastic or metal storage bins to group and organize smaller items neatly.

Add a Magnetic Tool Strip

Mount a magnetic strip to store metal tools like pruning shears or trowels. Mechanics have used this method for years—apply the same logic to your garden shed for quick access and safe storage.

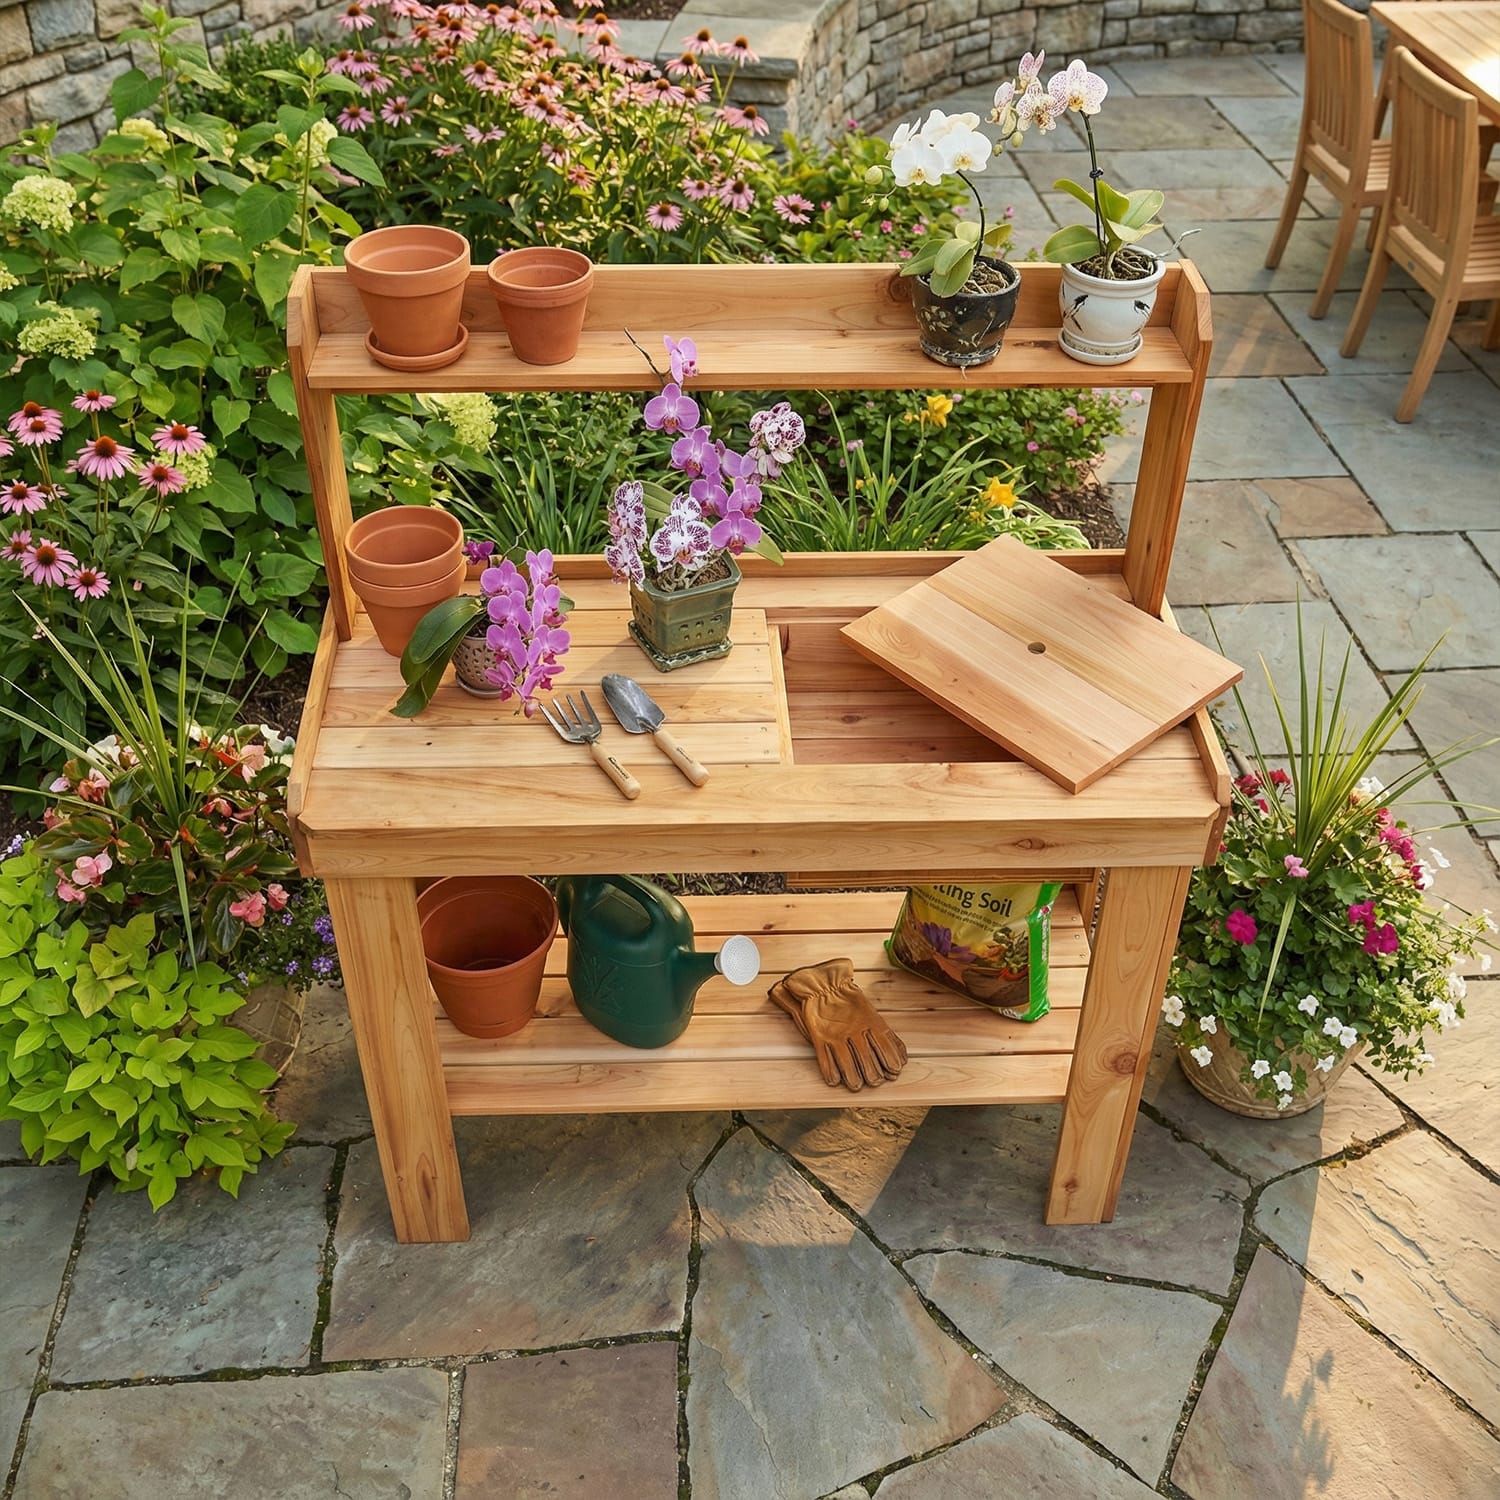
Create a Potting Bench

pb42 2 1

A potting bench gives you a dedicated space to plant or repot—even on rainy days. It also keeps potting mix dry and your gardening more enjoyable.

Track Tasks with a Calendar

Install a metal calendar in your shed to track seasonal chores. Bonus: magnetic holders let you store seed packets, plant tags, and more in one place.

Wicker Basket Essentials

Hang a wicker basket on your shed door to stash essentials like gloves, shears, or gardening books. It’s the quickest grab-and-go storage for your most-used items.

Baskets Under the Bench

Place a bushel basket or bin under your potting bench to hold mulch, birdseed, or potting soil. You’ll find great deals at local flea markets or use any weatherproof container you have.

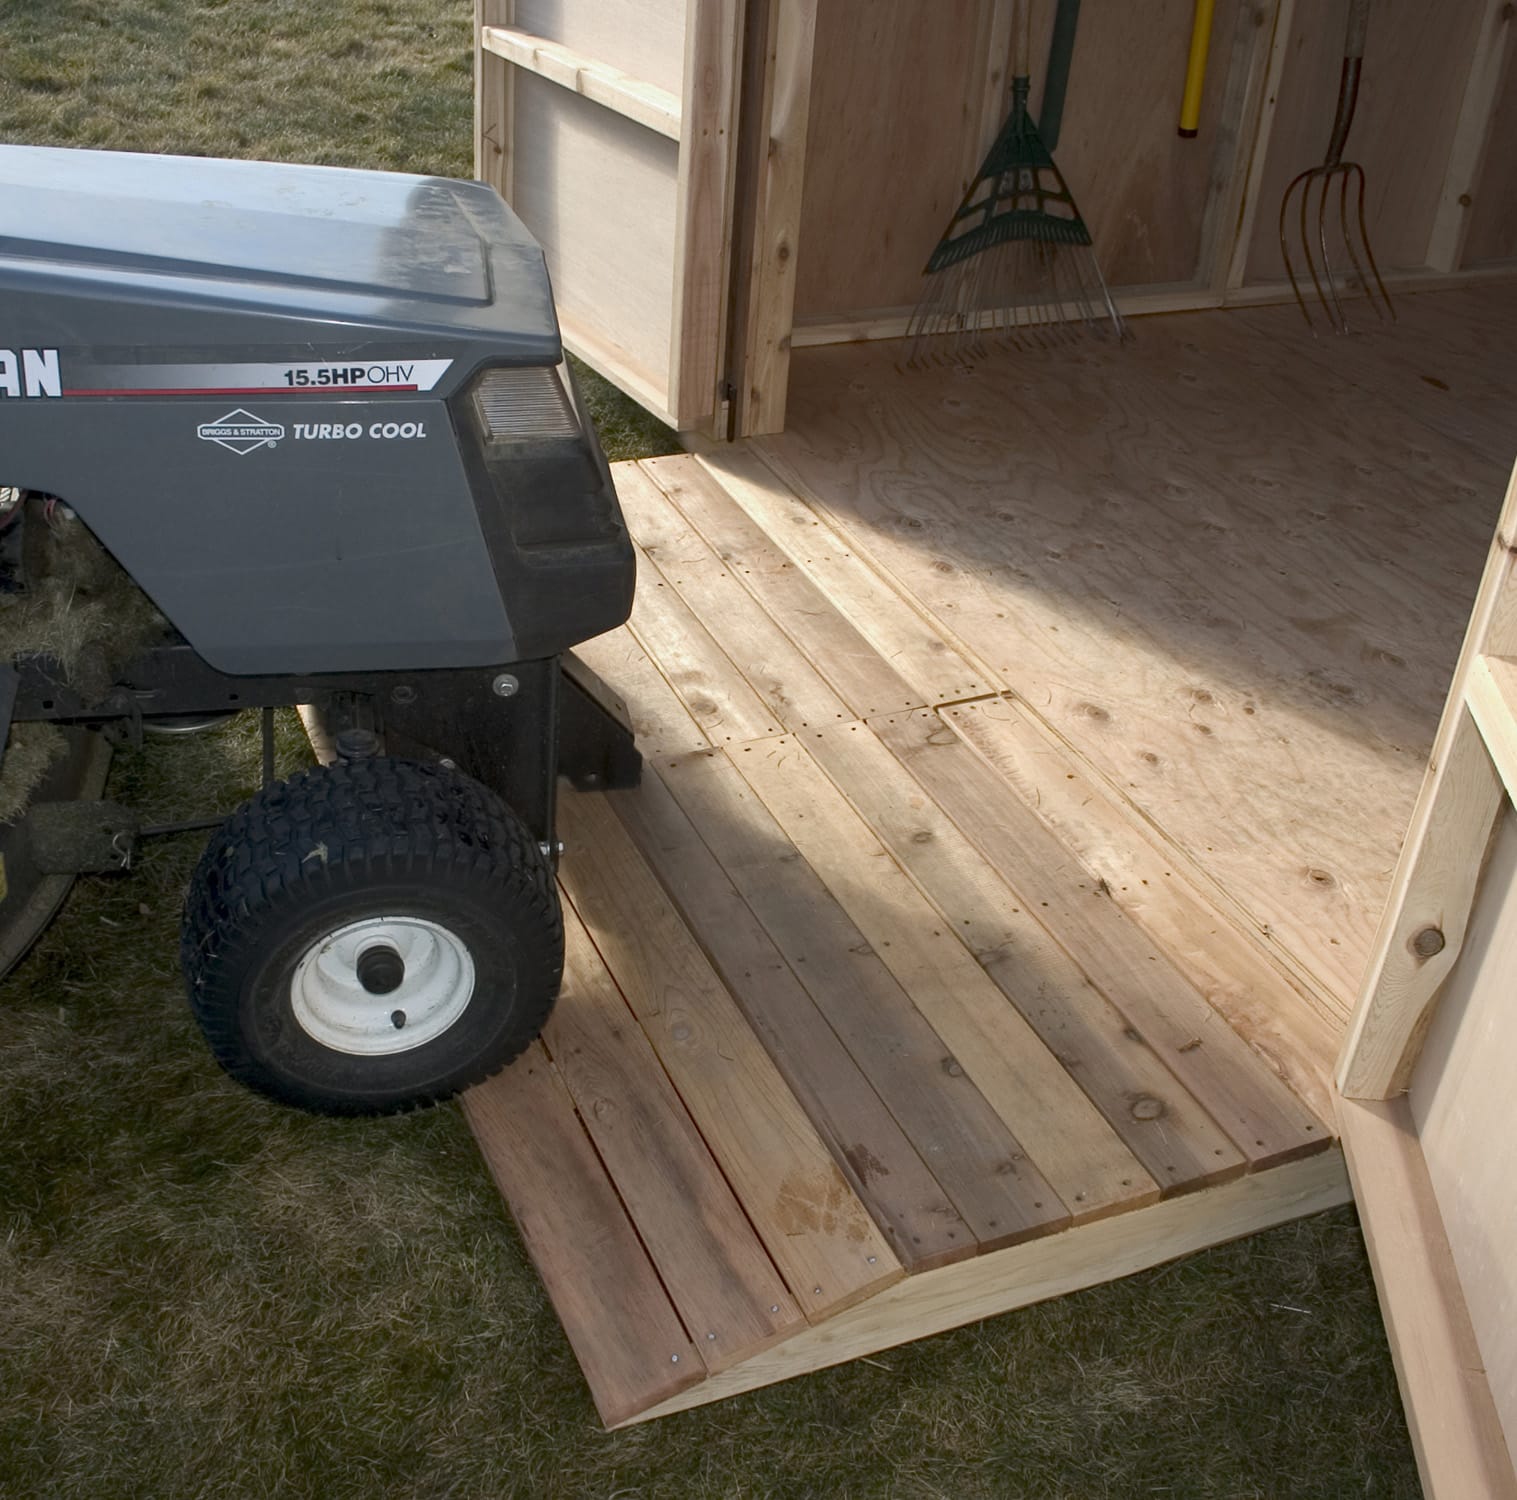
Add a Portable Ramp

RAMP Option OLT

Make moving heavy equipment easier with a DIY ramp. A couple of 2x4s and a piece of ½” plywood can create a sturdy yet compact ramp that’s easy to store when not in use.

Plan Shed Design Around Your Needs

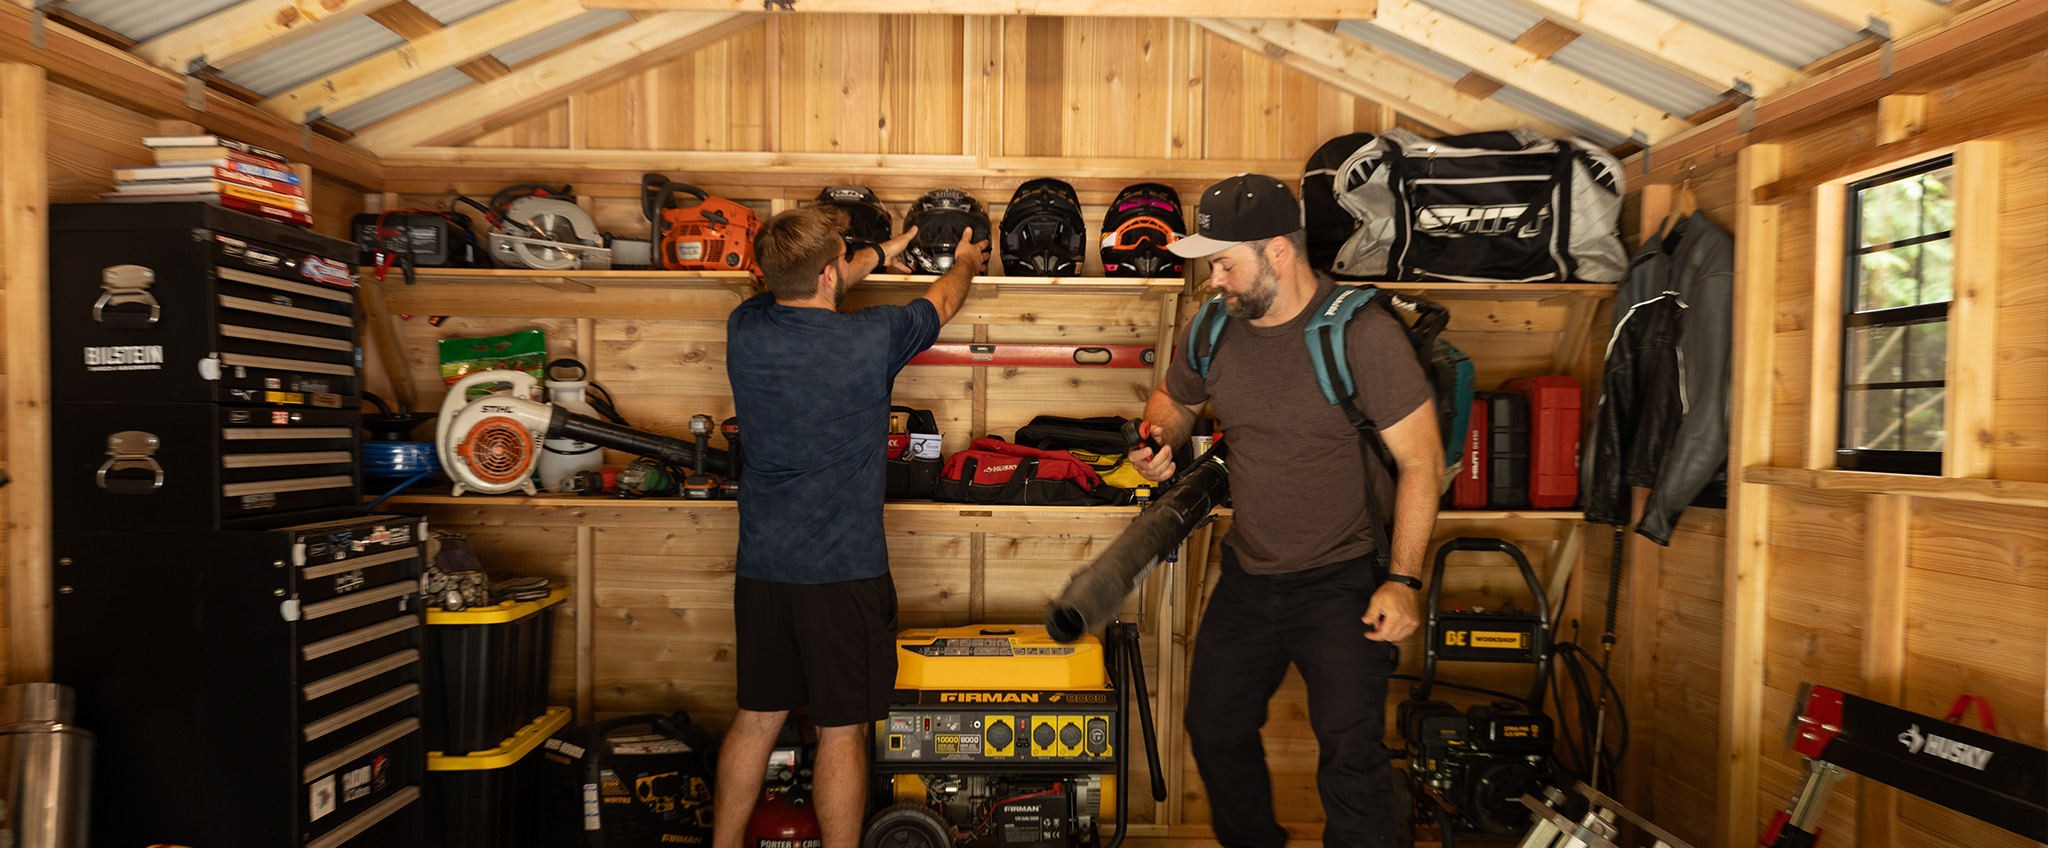
Before building or buying a shed, pile up your gear and measure its footprint. If you plan to store large power tools, you’ll need more space—plan accordingly.

Prioritize Tool Placement

Keep frequently used tools at the front and center of your shed. Store less-used items at the back. Make sure trowels, gloves, and pruning gear are always easily accessible.

Hang Tools Safely

Mount smaller tools like rakes, saws, and cultivators on the lower section of your shed wall or doors. This keeps blades safe and tools in good condition while protecting you from injuries.

Declutter Ruthlessly

Group similar items—cords, seeds, chemicals—and donate or dispose of broken, rusty, or unnecessary duplicates. An organized shed starts with only what you truly need.

Read More

How to Build a Level Base for Your Shed: Step-by-Step Guide

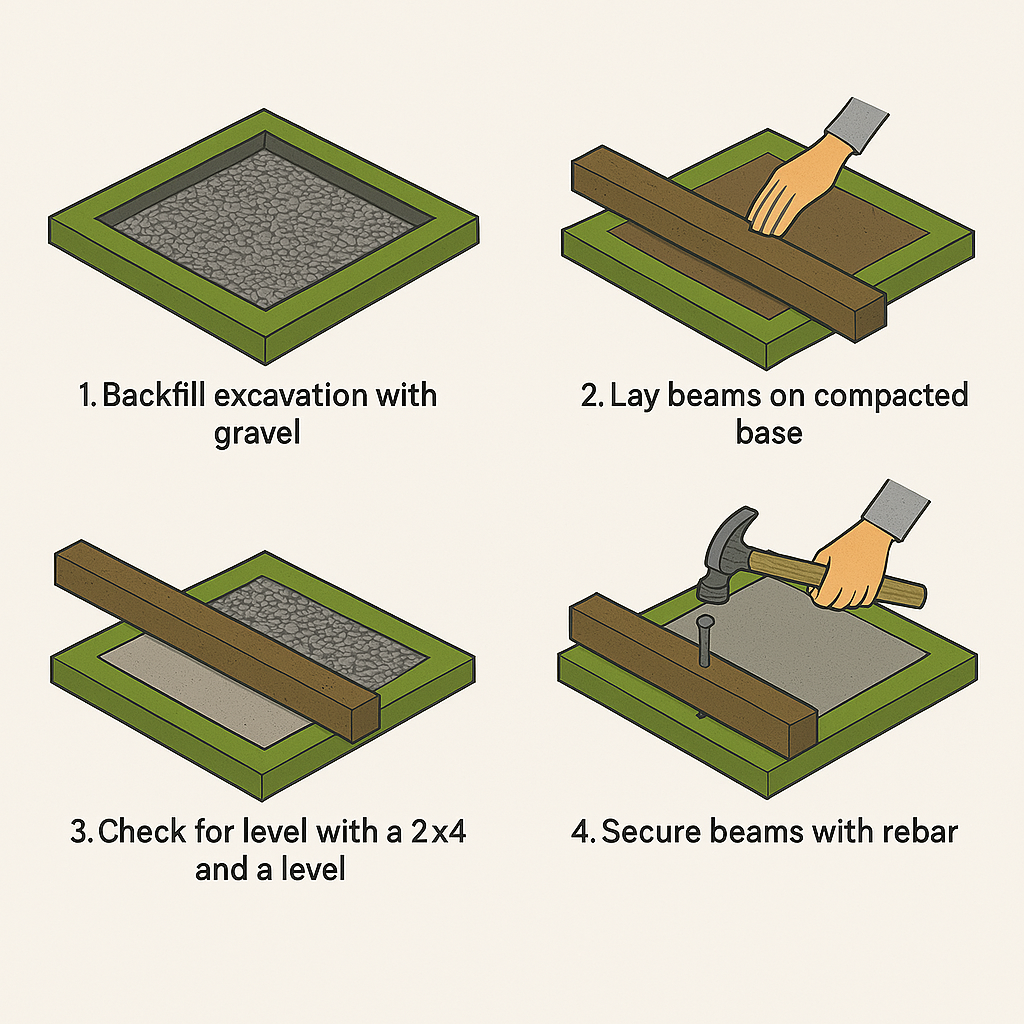
OLT How To Build A Foundation Graphic Steps 2

If you’re building a garden or storage shed, the single most important step is preparing a solid, level base. Even if your yard looks flat, assuming it’s level can lead to major headaches down the road. From wobbly workbenches to crooked walls, an uneven foundation impacts everything that comes after.

In this guide, we’ll walk you through how to create a strong shed foundation using crushed stone and pressure-treated wood.

Why Leveling Matters


A level base ensures your shed walls, doors, and especially roof panels align properly during assembly. Many DIYers discover too late that an off-kilter base causes misaligned screw holes, unstable framing, and frustrating gaps during roof installation.

And beyond aesthetics, if you plan to install a workbench, shelving, or any equipment, you’ll need it sitting perfectly level—not tilted like a funhouse.

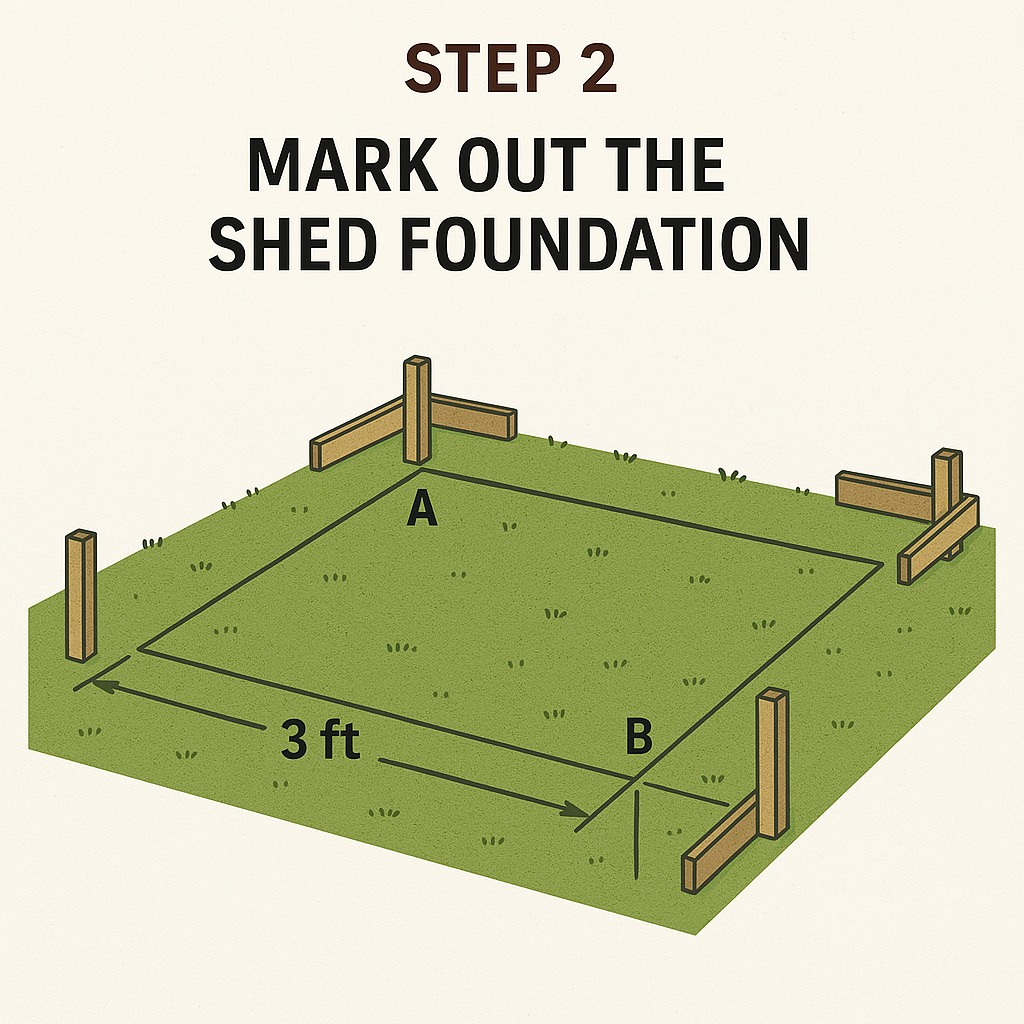
Step 1: Mark and Measure Your Shed Footprint

OLT How To Build A Foundation Graphic Steps 8

Start by choosing your shed’s final position. Consider:

  • Sun exposure

  • Drainage

  • Obstruction of views or light

Use four wooden stakes to mark out a slightly larger footprint than the shed base. This ensures enough room for installation and airflow.

Step 2: Identify Your High Corner

Use a long 2×4 and spirit level to determine which corner of your base is the highest point. Tap the stake in until it’s 4-6” above ground. This will be your reference height for the other corners.

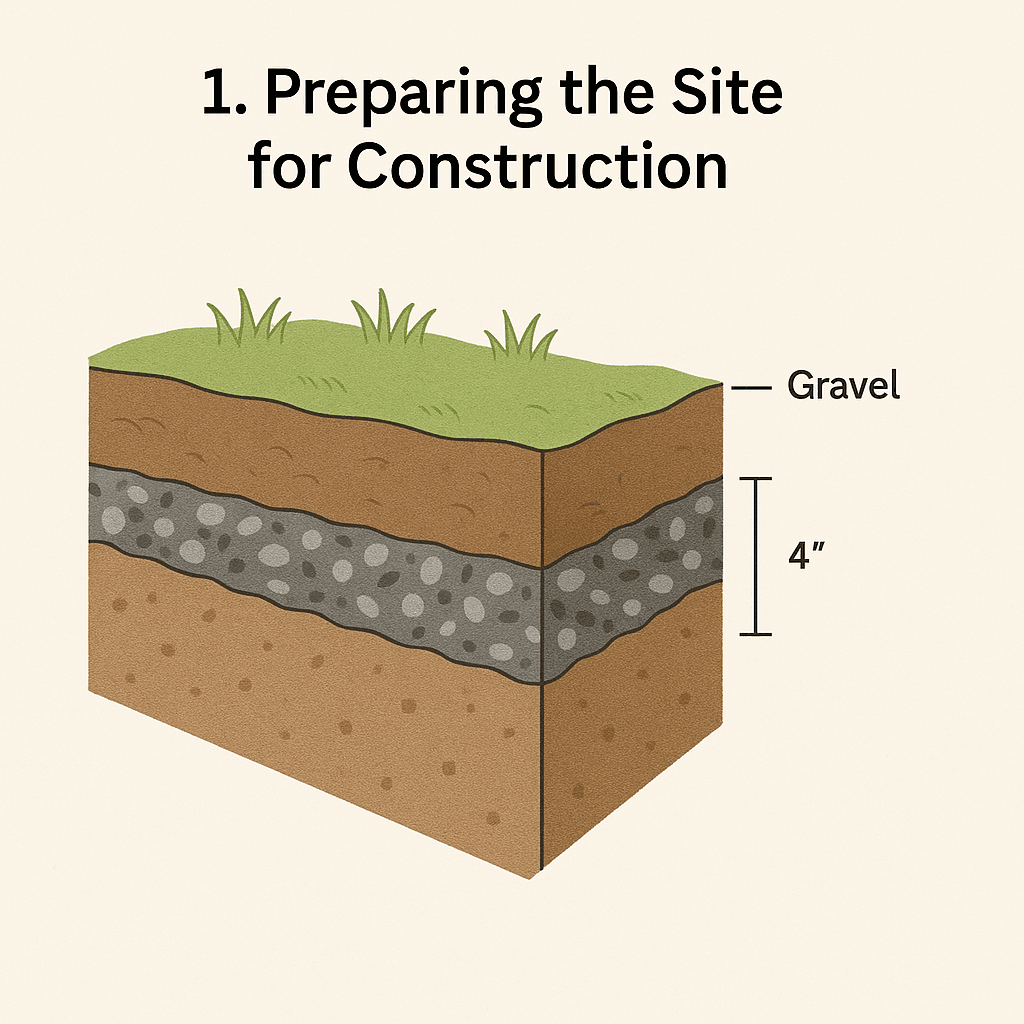
Measure down from this point to determine how much soil needs to be excavated from the remaining corners to make the base level. Strip turf and excavate to 3″ depth minimum (ideally 3″ to 5″).

Step 3: Add and Compact Crushed Stone

Lay down a weed barrier, then spread crushed aggregate (crushed stone with fine dust). Rake it as level as possible.

To compact it:

  • Rent a vibrating plate compactor or

  • Use a 25 lb hand tamper to pound the stone flat

Keep checking your levels between corners using your 2×4 and spirit level. Add or remove stone as needed until the entire base is flat and compact.

Step 4: Add Pressure-Treated Wood Timbers

OLT How To Build A Foundation Graphic Steps 8 1

Lay 4×4 pressure-treated timbers perpendicular to your planned shed floor joists. These elevate the shed for better air circulation and help prevent water damage. Ensure the wood sits flush and level across the stone base.

Tip: Use stainless steel or aluminum fasteners to prevent staining or corrosion.

Step 5: Maintain Dryness for Longevity

Moisture is the main cause of wood decay. Crushed stone allows water to drain, and elevating your shed with pressure-treated wood adds another layer of protection. Together, they dramatically extend the life of your shed.

Summary

Building a proper shed foundation takes time, but it prevents costly errors and repairs later. A few key tools and steps ensure a long-lasting, stable base:

  • Mark your site carefully

  • Level it out thoroughly

  • Compact crushed stone

  • Add pressure-treated support timbers

With these steps, you’ll have a rock-solid base for whatever you build on top—from garden sheds to backyard studios.


Read More

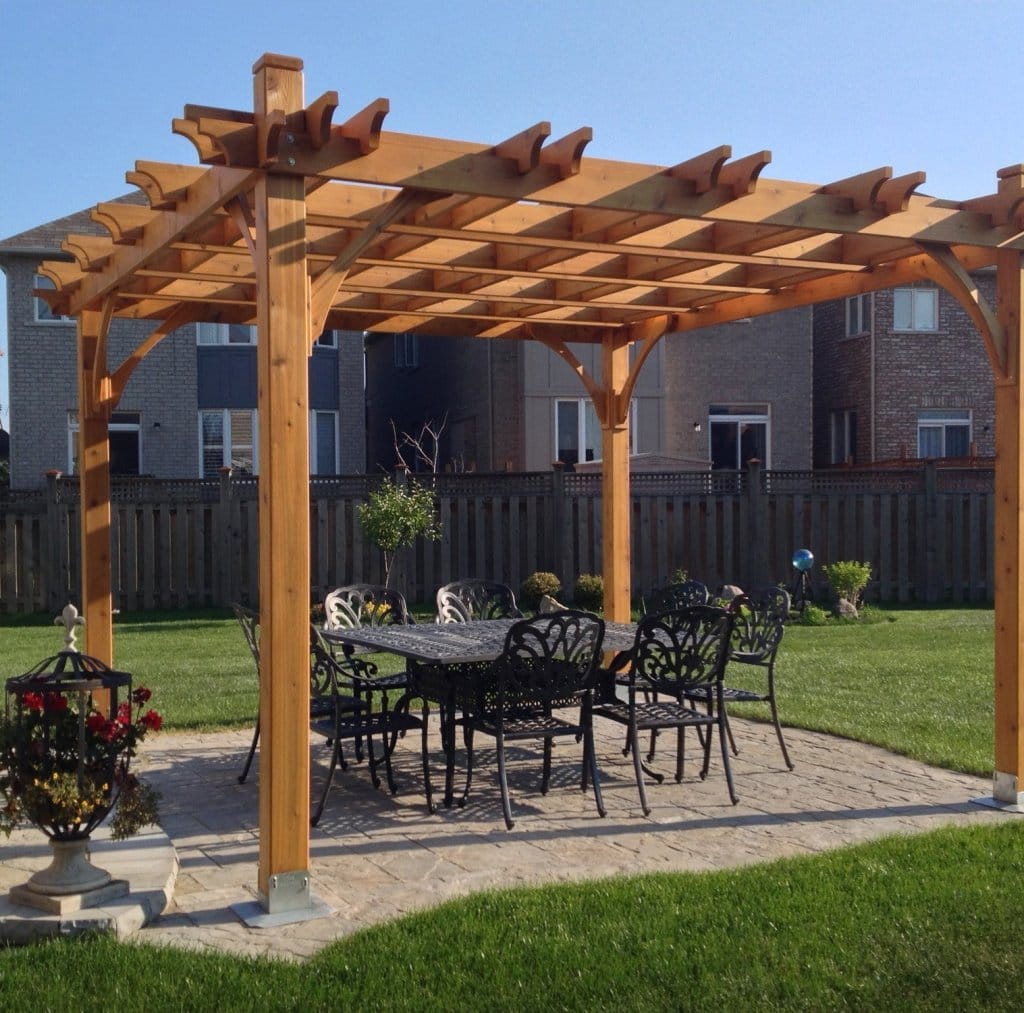
12 Affordable Ways to Personalize Your Pergola or Gazebo

B. Baker 10x16 Cedar Pergola Kit 2 scaled 1

When it comes to building a pergola or gazebo, there’s a wide range of options to suit any style and budget — from classic Western Red Cedar pergolas to sleek vinyl and metal structures. Whether you’re looking for added comfort, shade, or visual appeal, there are countless cost-effective ways to personalize your pergola or gazebo and make it a centerpiece of your outdoor space.

1. Add Some Furniture

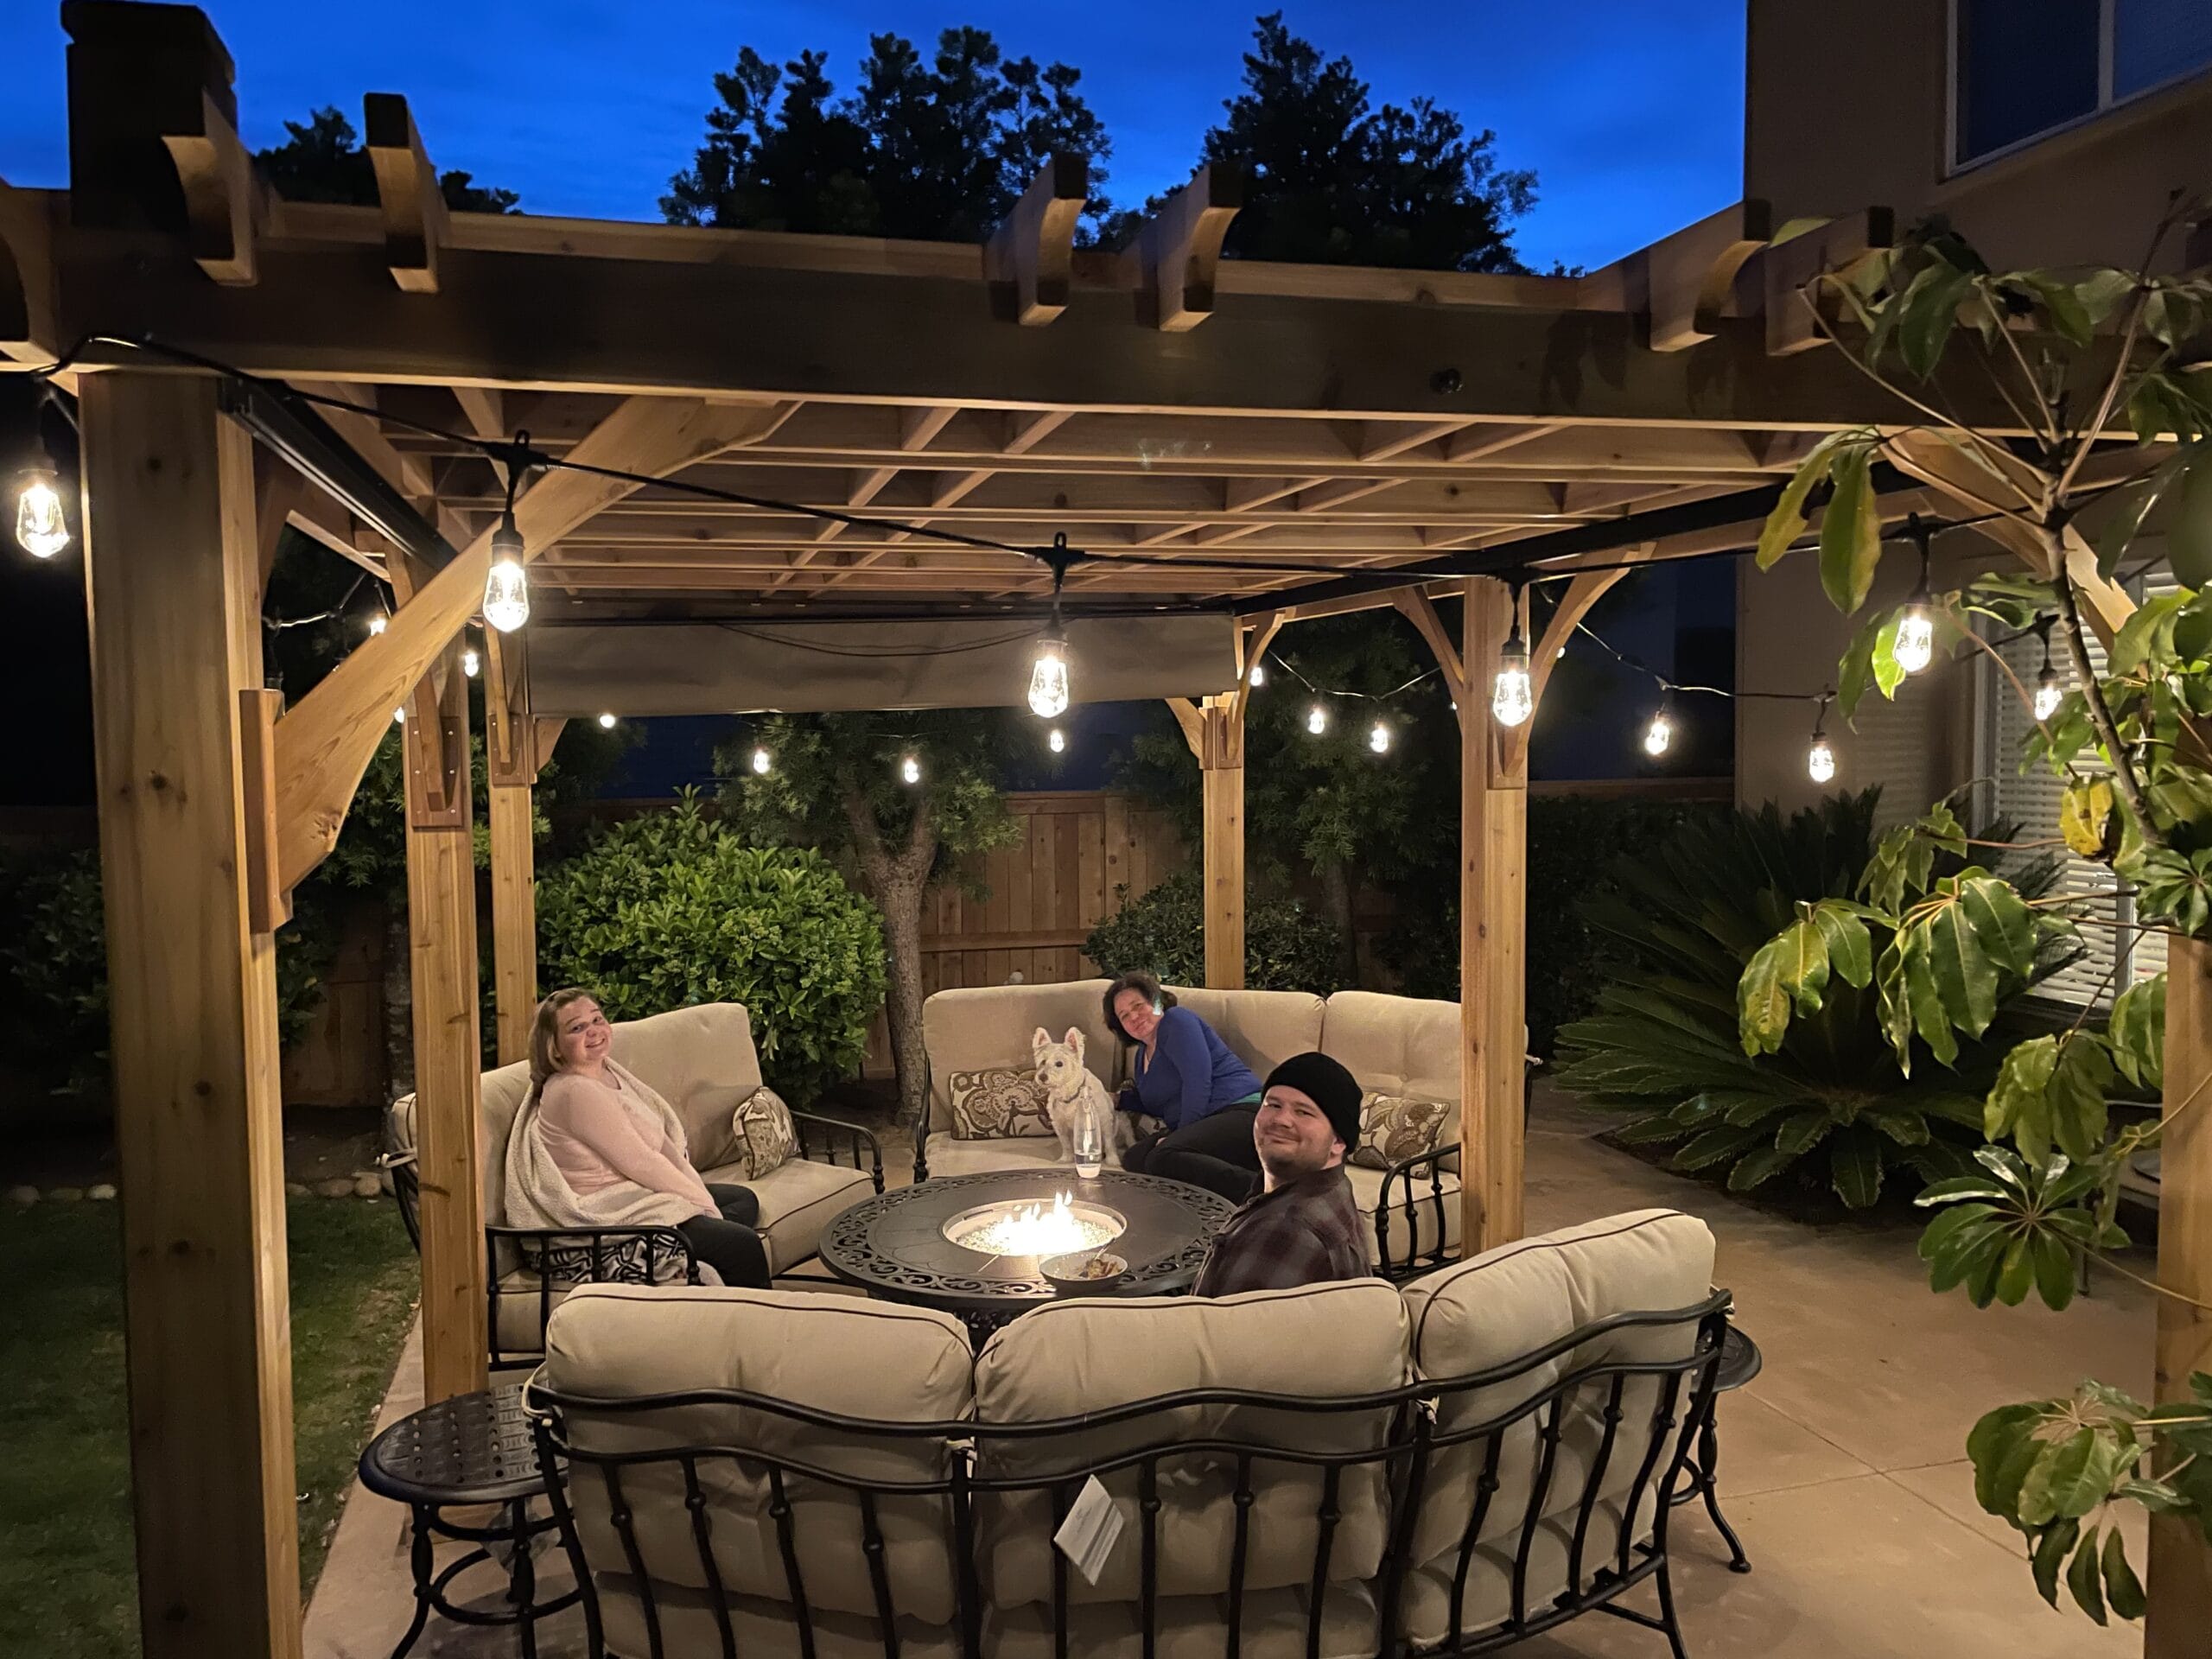
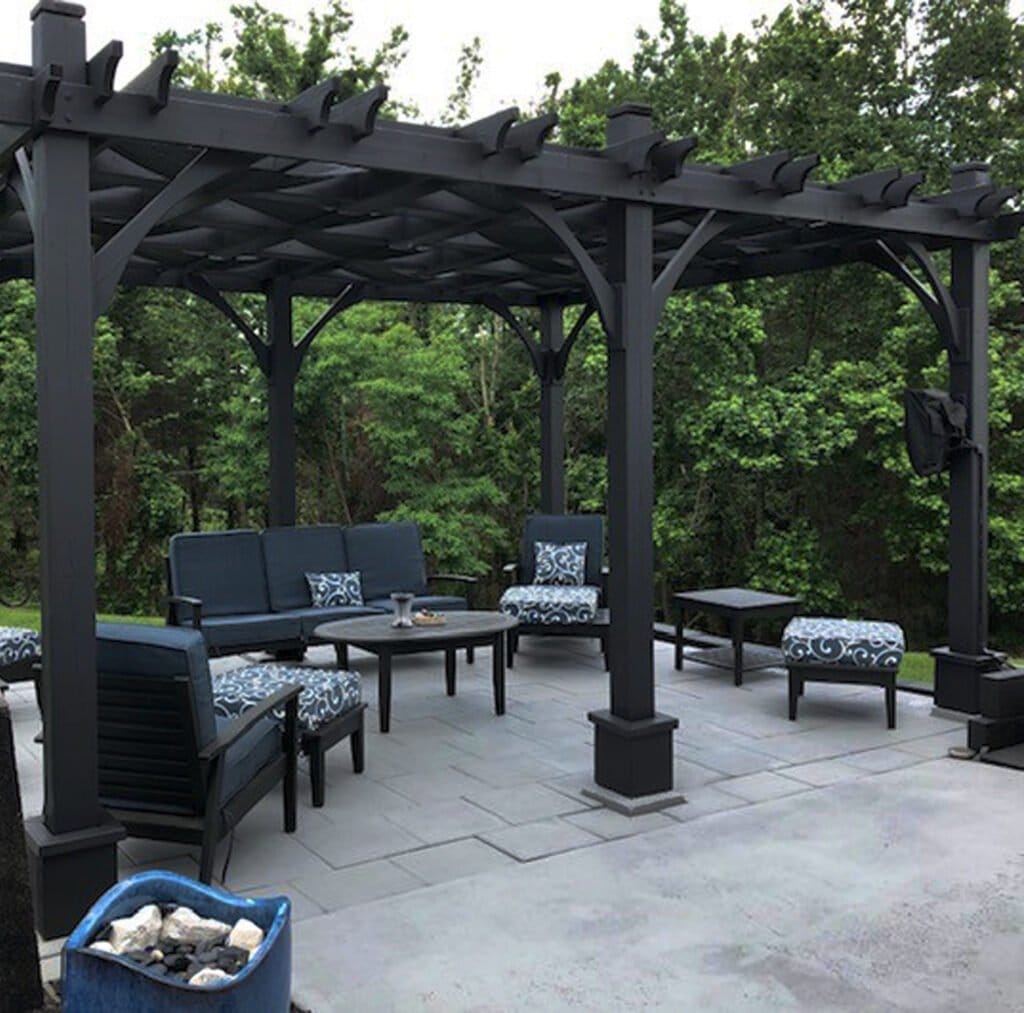
Turn your pergola-covered space into a cozy seating area with a patio table, chairs, or even a hammock. Painting the furniture to match the tone of your pergola adds a thoughtful touch, while placing a hot tub underneath can transform it into the ultimate relaxation zone.

2. Add Extra Rafters or Joists

Most pergola kits come with essential rafters or joists, offering partial shade. But if you want more coverage or support for hanging baskets or climbing plants, consider adding extra joist beams. This customization adds functionality and visual interest.

3. Erect Trellis or Lattice

Trellis or lattice panels can be installed on one or more sides to create a “garden room” feel. Ideal for climbing plants like roses, clematis, or honeysuckle, lattice also provides privacy and shade. Be sure to use durable 1/2- to 1-inch thick wood, and pre-drill holes to avoid splitting.

4. Close One End for Added Privacy

While pergolas are often open-air structures, adding a lattice wall or solid panel to one or two sides offers both privacy and a decorative touch. It softens the lines of the structure and enhances its room-like feel.

5. Include Colorful Flowers

Introduce vibrancy with flowering plants like sweet alyssum, marguerite daisies, or spider flowers. Whether they climb up a lattice or sit in pots around the base, flowers bring warmth and seasonal beauty to your pergola.

OLT 68378af1 a62e 40fb a60b a2418e53ebe2

6. Opt for All-Season Use

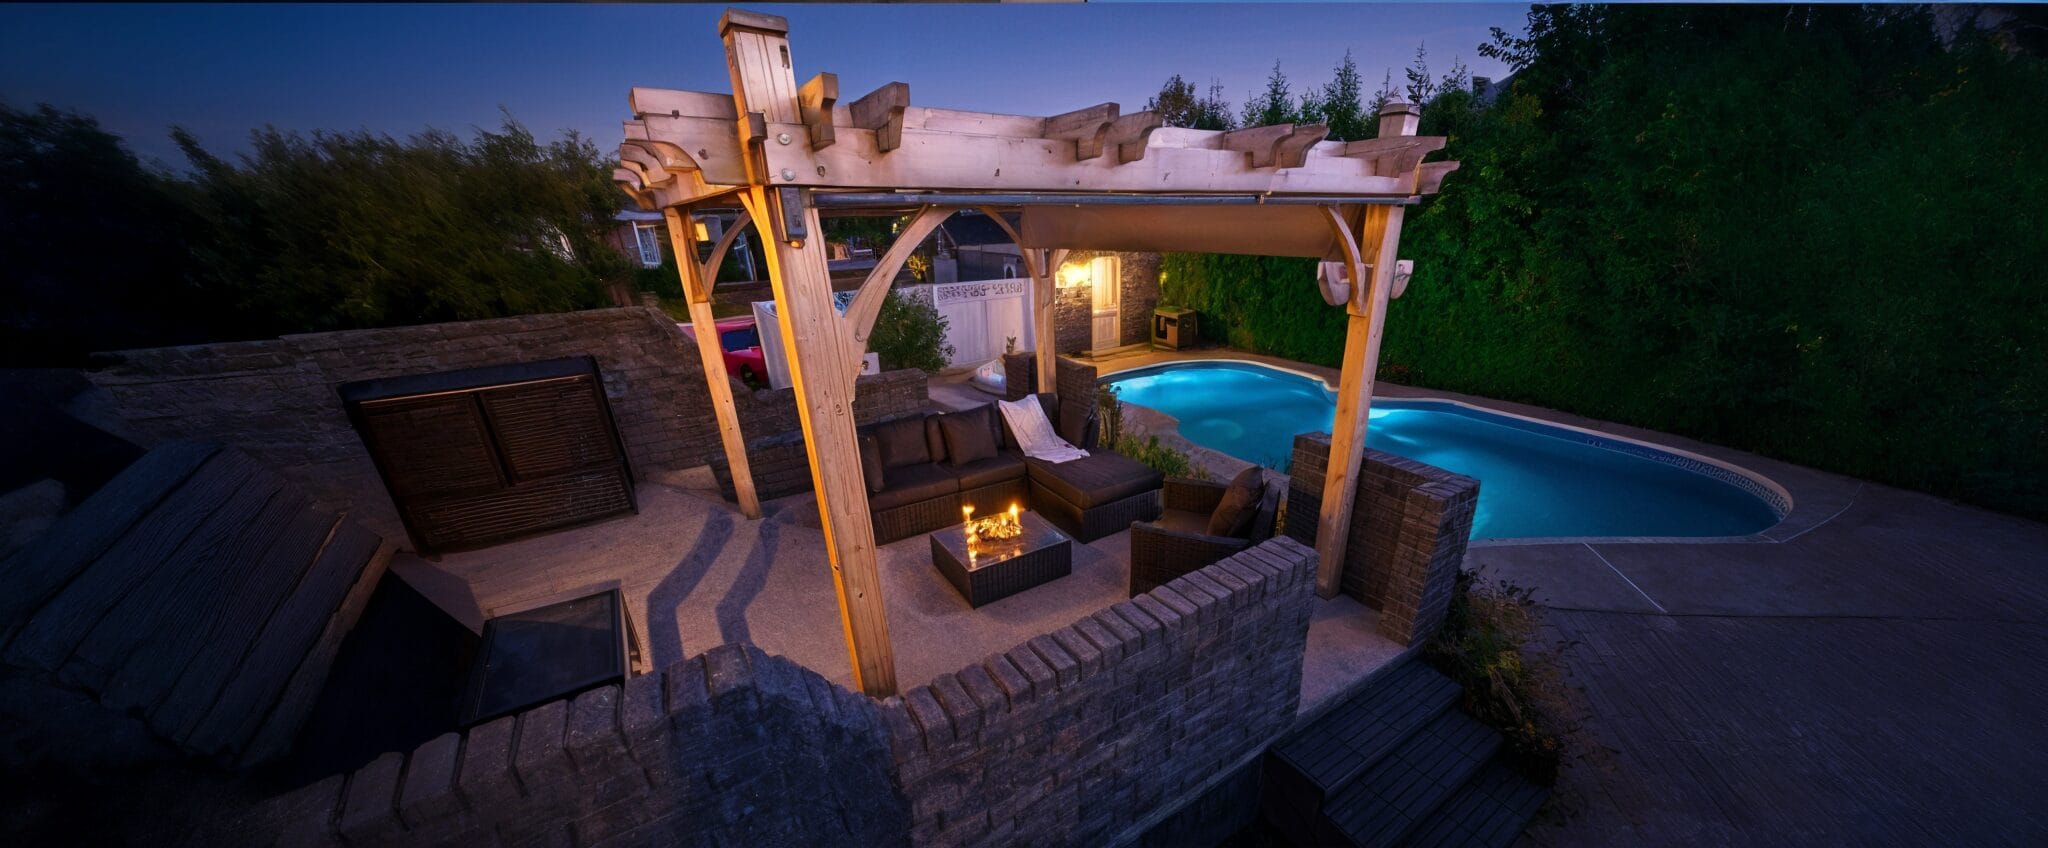
Protect your pergola with a solid polycarbonate roof or retractable canopy. These additions allow you to enjoy your outdoor space through rain, snow, or scorching sun — extending usability year-round.

7. Swing Seating Pergolas

Add a built-in swing beneath your pergola for a fun and relaxing touch. Perfect for two people, swing seating makes the space more dynamic and provides a great spot to unwind.

8. Hanging Seats from the Rafters

Replace standard seating with hanging cushioned chairs to create a laid-back, breezy vibe. Hanging seats add movement and charm, making the pergola feel more like a retreat.gaz screen 1024x1013 1

9. Match Pergola to Your Deck

Stain your pergola to match the deck it stands on to create a cohesive look. Add potted plants and soft seating for a secluded, calming vibe that feels like a natural extension of your home.

10. Paint for a Bright Finish

Choose a classic white or go bold with color. Painting your pergola can give it a refreshed look that aligns with your backyard’s style. For cedar pergolas, use an acrylic, non-toxic paint that won’t harm nearby plants.

11. Install Glass Blocks for Privacy

Want a unique twist? Sporadically placed glass blocks provide privacy and visual interest while letting light through. Pairing wood and glass creates a stunning modern contrast.

12. Mix Function with Fun

Add pillows, fairy lights, or outdoor curtains to complete your pergola personalization. These finishing touches offer comfort, style, and charm for entertaining or unwinding outdoors.


At Outdoor Living Today, we offer premium cedar pergola kits that are easy to assemble and ready to personalize. Whether you’re looking for shade, structure, or a statement piece, our customizable backyard structures are built to last.

Read More

How to Maintain Your Outdoor Pergola and Keep It Looking Beautiful Year-Round

1212 3

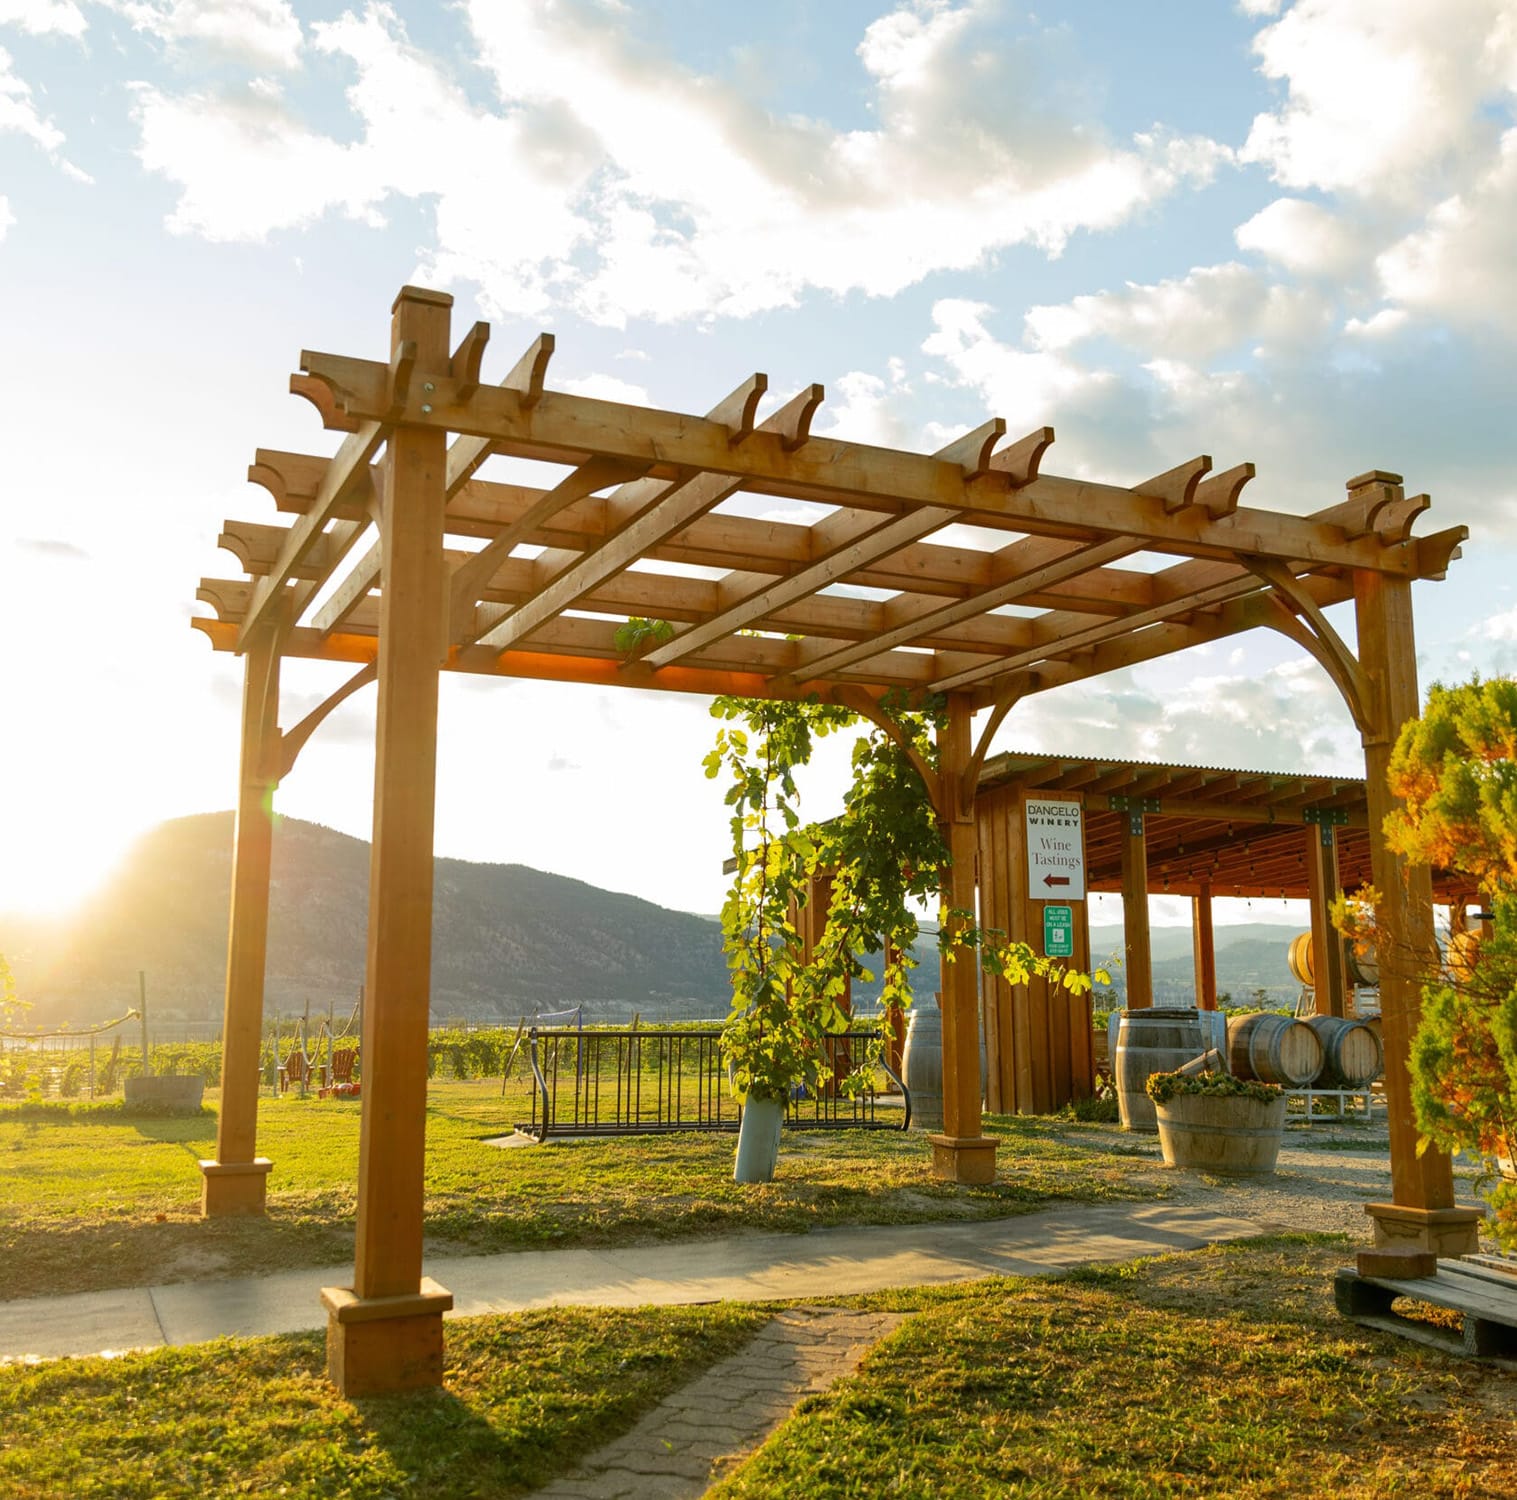
An outdoor pergola is a stylish open-air structure perfect for creating shade and adding ambiance to your backyard. Whether covered in climbing vines or paired with retractable canopies, pergolas made of wood, vinyl, plastic, or metal require regular care to maintain their appearance and structural integrity. Here’s a complete guide on how to properly maintain your pergola and ensure it lasts for many years.


1. Hose It Down Regularly

Regardless of your pergola’s material, the first step in maintenance is a thorough rinse. Use a high-pressure hose to remove surface dirt, pollen, or debris. Start at the top and work your way downward. Be sure to clear the area of furniture and décor to avoid damage during the process.

2. Clean with the Right Tools

Choose a bristle brush and a suitable cleaner for your pergola’s material:

  • Wood: Use a wood-safe cleaner and remove any peeling paint or splinters.

  • Metal: Scrub away any rust buildup using a wire or bristle brush.

  • Vinyl: Follow manufacturer guidelines—usually, mild detergent works well. Use a toothbrush to reach tight corners or areas around hardware.

3. Remove Mildew and Rust Stains

Combat mildew with a mix of one cup of oxygen bleach and one gallon of water. Apply this solution after the initial rinse and let it sit until the mildew stains begin to fade. Rinse again thoroughly with soap and water.

If you notice black or brown rust stains from fasteners, consider replacing corroded hardware with stainless steel or aluminum options.

4. Rinse Thoroughly

After applying cleaning solutions, rinse again using a hose to remove all residue. Check for spots that may need a second round of cleaning and repeat as necessary.

5. Touch-Up and Repair Damage

1212a 1

Use a touch-up or repair kit to fix cuts, dings, or gouges. Wood or metal putty can patch small damage, and many vinyl pergolas include specialized kits for surface restoration. Sand down any rough spots before refinishing.

6. Seal and Stain for Longevity

If you have a cedar pergola, you’ll notice it gradually turns from a rich reddish tone to a silvery gray. To preserve its original hue:

  • Clean thoroughly

  • Apply a translucent oil-based wood stain for cedar

  • Let it dry and then seal Reapply stain and sealant every other year to maintain appearance and protection.

7. Address Fasteners and Loose Hardware

Inspect all fasteners and replace any that show corrosion. Use rust-resistant stainless steel or aluminum. Tighten loose bolts and screws to keep the structure secure.

8. Paint for Added Protection

1216 5
1216 5

In hot, dry climates, UV rays can cause wood pergolas to crack and fade. Apply a durable, heat-resistant exterior paint for long-term protection and aesthetic appeal.

9. Trim Vines and Greenery

While creeping vines add beauty and shade, overgrowth can increase the pergola’s weight load. Trim vines a few times a year to reduce stress on the frame. They’ll grow back quickly and stay healthy with regular care.


Conclusion With proper maintenance, your outdoor pergola can remain an attractive and functional centerpiece in your backyard for years. Regular cleaning, careful inspection, and minor seasonal upkeep can prevent costly repairs and preserve the pergola’s beauty and strength.

Read More

🏗️ The Best Foundation Options for Your Gazebo
BAY12

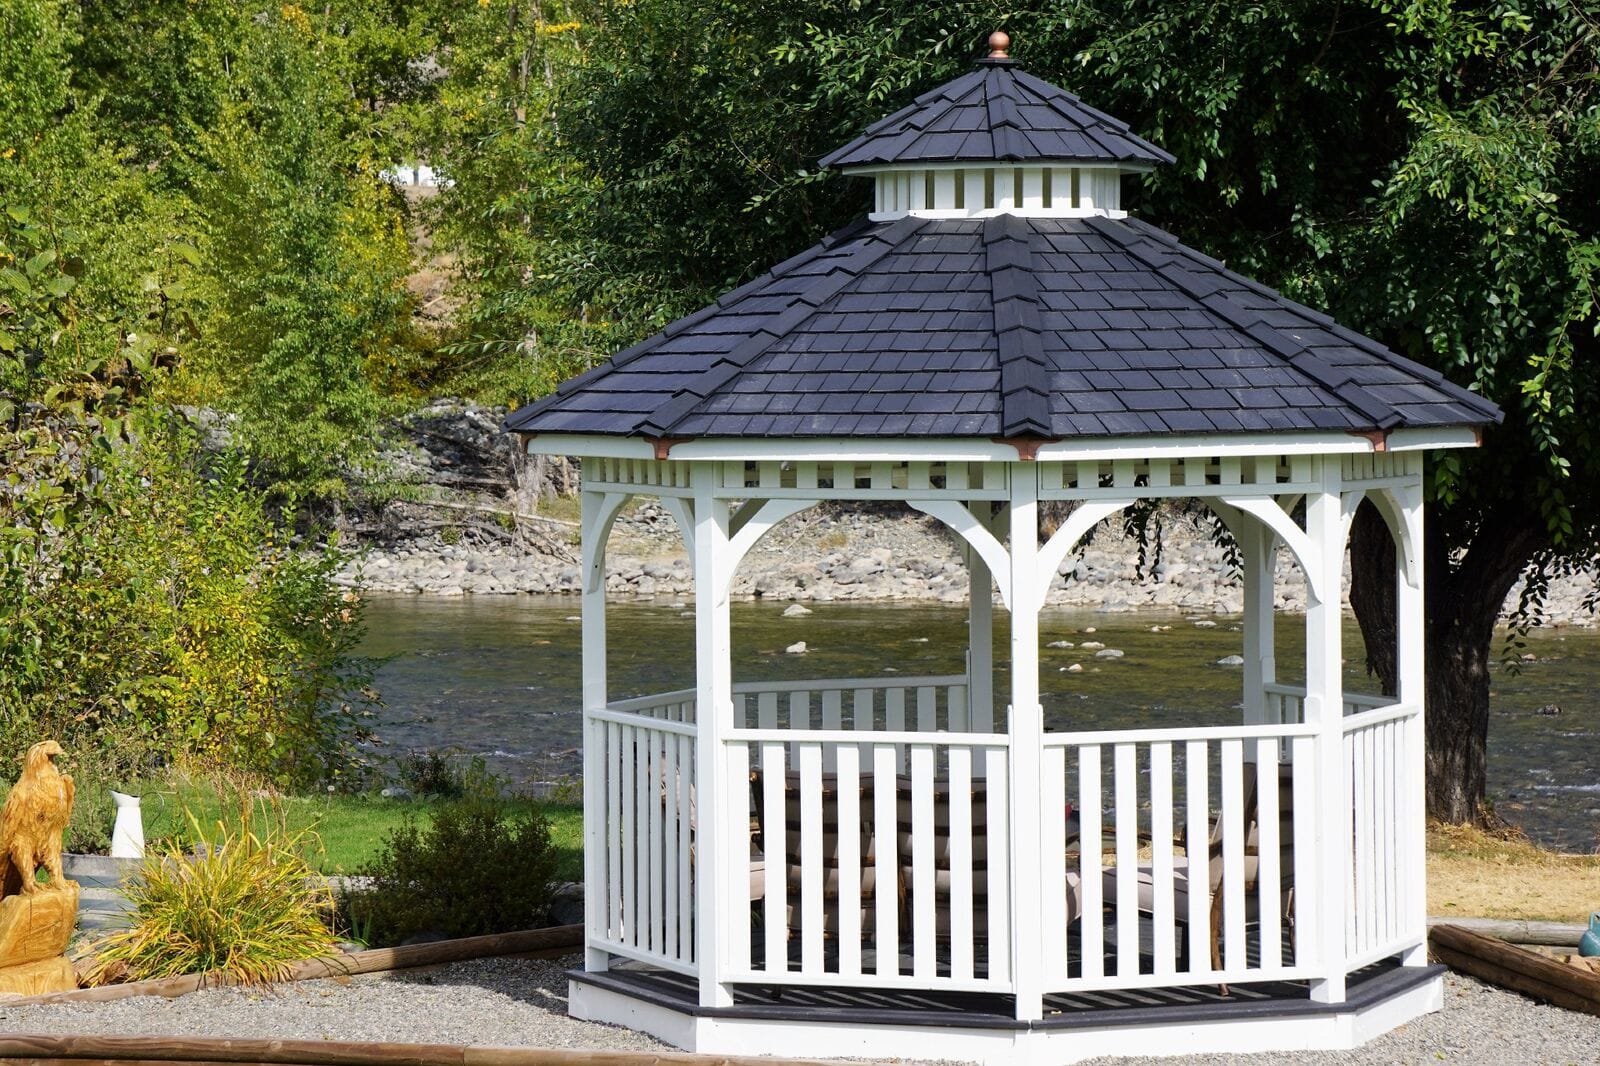
Not all yards are flat, and not all gazebos are the same — but every solid outdoor structure begins with a stable foundation. Whether you’re building on soft soil, a slope, or a rugged backyard, choosing the right gazebo base will ensure your structure stays level, secure, and long-lasting.

Here are five of the most common (and effective) foundation types you can use when installing a gazebo.


🪨 1. Patio Stones

OLT How To Build A Foundation Graphic Steps 7

Best for: Flat terrain, structures under 14 ft.

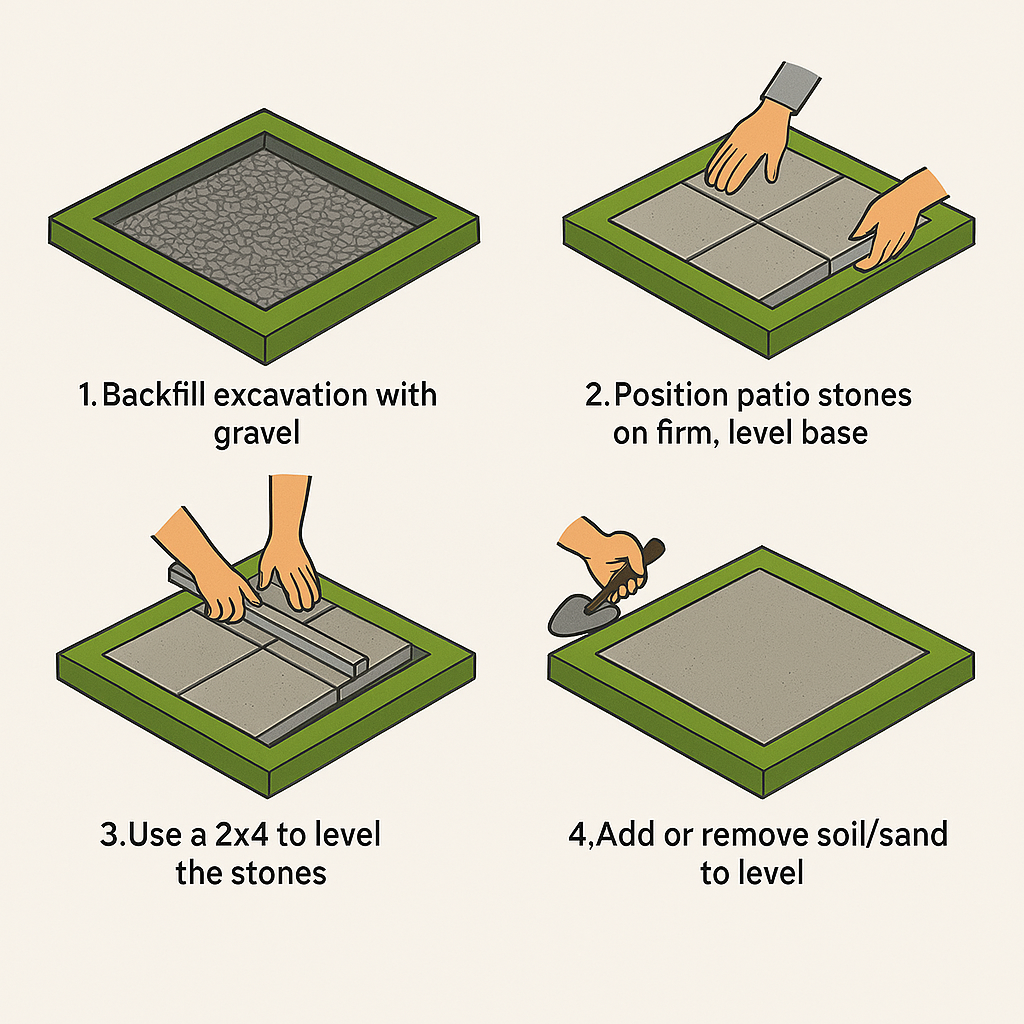
Patio stones are the simplest and most cost-effective option for small- to medium-sized gazebos. Available at most building suppliers, they provide even weight distribution and a level surface without the need for concrete.

Tips:

  • Place one stone under each corner and a few under the center.

  • Ensure stones don’t extend past the gazebo’s floor perimeter (so skirting fits properly).

  • Use cedar shims or other materials to level the floor.

  • For added support and drainage, place the patio stones on top of compacted crushed gravel.


🧱 2. Cinder Blocks

Best for: Slightly uneven terrain where affordability and strength are priorities.

Cinder blocks (8″x16″) are easy to use and provide reliable support. However, they can sink into soft ground unless properly installed.

Tips:

  • Use overlapping rows of blocks for stability on soft ground.

  • Add a cedar skirt to hide the foundation and prevent critters from nesting underneath.


🪛 3. Super Spikes

Best for: Raising one side of the gazebo on uneven surfaces — without pouring concrete.

Super spikes are metal ground anchors that can help level a structure on sloped terrain. They’re especially useful in warmer regions without ground frost.

Tips:

  • Always check your local building codes before using them.

  • If elevating the structure, consider adding a skirt, lattice, or steps for a polished look.


🏗️ 4. Sonotube / Concrete Footings

Best for: Larger structures, uneven terrain, or when permits are required.

Sonotubes provide a permanent and code-compliant solution for supporting heavier gazebos. These concrete columns are sunk into the ground to create a rock-solid base.

Tips:

  • Hire a contractor familiar with local regulations.

  • Not included in gazebo kits — must be purchased and installed separately.


🧱 5. Concrete Pads

Best for: Large gazebos, hot tubs, pool equipment, or permanent structures.

Concrete pads offer the strongest and most durable base. While expensive, they’re ideal for setups that involve plumbing, heating, or electrical components.

Tips:

  • Professional installation highly recommended.

  • Consider topping the pad with flagstone for a stylish, rustic finish.


✅ Final Word

SetWidth530 BAYSIDE12GSKOPS2575x400

Whatever your ground type or structure size, there’s a foundation option that will support your gazebo for years to come. From simple stone pads to professional-grade concrete, the right base ensures durability, safety, and peace of mind.

Browse our full collection of Western Red Cedar gazebo kits and start planning your project today!

Read More

The History and Modern Use of Western Red Cedar Wood

Western Red Cedar Pergola Canopy Outdoor Living Today

Western Red Cedar has long been a symbol of strength, sustainability, and natural beauty. With a legacy stretching back thousands of years and a growing reputation in modern landscaping, this remarkable wood species continues to shape outdoor living spaces across North America.

From ancient Indigenous tools to premium DIY garden structures, here’s everything you should know about Western Red Cedar wood — including why it remains one of the most trusted and eco-friendly building materials today.


🌲 A Brief History of Western Red Cedar

Known scientifically as Thuja plicata, Western Red Cedar is a large evergreen native to the Pacific Northwest of North America. Despite not being a “true cedar,” this tree holds deep cultural and practical significance — especially for the Indigenous peoples of British Columbia, Alaska, Washington, and Oregon.

Indigenous Use & Cultural Importance

Native communities have relied on Western Red Cedar for over 8,000 years, using virtually every part of the tree:

  • Bark: woven into mats, baskets, rain hats, and ropes

  • Wood: carved into dugout canoes, bentwood boxes, planks, and homes

  • Branches: shaped into bows, fishing lines, and cords

Some coastal Indigenous groups even refer to themselves as “People of the Red Cedar,” with oral legends describing the tree as a divine gift from the Great Spirit to provide shelter, tools, clothing, and protection.


🌿 Natural Characteristics

OLT western red cedar forest wide angle shot ebb705b7 7bc5 4e05 971f 7391e37b1c51

Western Red Cedar is instantly recognizable for its:

  • Soft red-brown coloring

  • Scale-like leaves in opposing rows

  • Drooping lower branches and towering, conical form (up to 60 meters tall!)

  • Aromatic scent (from natural tannins)

It thrives in cool, wet climates and can live for over 1,000 years. Today, most natural growth occurs along the wet coastal belt of the Pacific Northwest.


🧰 Why Western Red Cedar Is Ideal for Outdoor Projects

Western Red Cedar’s durability, light weight, and natural resistance to decay make it one of the most trusted woods for outdoor construction.

🪵 Key Benefits:

  • Naturally Rot-Resistant: The wood contains natural oils and tannins that repel moisture and decay.

  • Bug-Repelling Properties: Its strong aroma helps deter termites and other pests.

  • Weather Friendly: Unfinished cedar weathers to a silvery-gray but also holds paint or stain well.

  • Thermal Insulation: Cedar keeps spaces cool in summer and warm in winter, making it ideal for greenhouses or sheds.

  • Workability: It’s light, easy to cut, and simple to fasten — making it a favorite for DIYers.


🛠 Modern-Day Uses

Today, Western Red Cedar is one of the most sought-after materials for:

It’s available in clear and knotty grades, and comes in everything from rough timbers to 1×4 fence boards, making it suitable for virtually any backyard build.


🛒 Where to Buy Western Red Cedar

Western Red Cedar is widely available through:

  • Local lumber dealers

  • Specialty manufacturers that sell pre-cut DIY kits like Outdoor Living Today

  • Online retailers focused on sustainable cedar structures

Looking for something ready to assemble? Browse our curated collection of Western Red Cedar kits — sustainably sourced, pre-drilled, and easy to build.

For more technical specs, finishes, and sourcing details, visit the Western Red Cedar Lumber Association (WRCLA), the industry’s leading authority on cedar wood products.


Final Thoughts

Western Red Cedar’s long history, natural durability, and ecological sourcing make it one of the best materials for anyone looking to build outdoor structures that last. Whether you’re a seasoned carpenter or weekend DIYer, cedar delivers on beauty, strength, and sustainability — with a legacy to match.

Read More

How to Be a Smart and Successful Backyard DIYer

man in yellow shirt and blue denim jeans jumping on brown wooden railings under blue and

DIY backyard projects can be incredibly satisfying — but only if you follow through. Too often, ambitious remodels stall out halfway, leaving a patchwork of unfinished ideas. Whether you’re building a shed, laying out a garden, or planning a complete outdoor makeover, it takes more than enthusiasm to finish strong.

Here’s a step-by-step guide to help you become a smarter, more effective backyard DIYer — so your projects don’t just start with promise but finish with pride.


🧭 Step 1: Evaluate Your Outdoor Space

Before lifting a shovel, take time to assess your yard:

  • Measure your available space

  • Consider how the space will be shared

  • Think about zoning areas — e.g., play zone, BBQ zone, lounge area, or garden space

Start by identifying your top backyard priorities — is it entertaining, relaxing, gardening, or something else?

Planning a structure? Consider one of our DIY shed kits or pergolas as a functional anchor.


🏛 Step 2: Know Your Local Rules & Limits

seven construction workers standing on white field

Before sketching out your dream design, check:

  • Local zoning and building codes

  • Homeowner association (HOA) guidelines

  • Permit requirements for structures like sheds, decks, or gazebos

Knowing your boundaries early on will save you time, stress, and potential fines.


💸 Step 3: Set a Realistic Budget

The average backyard remodel in the U.S. can exceed $10,000, but as a DIYer you’ll save on labor. However, materials and tools still add up — especially if you’re building large structures or installing lighting or irrigation.

Tips:

  • Break your project into phases

  • Get estimates for materials early

  • Add a 10–15% buffer for unexpected costs

Need inspiration? Our DIY garden beds and accessories are great, budget-friendly additions.


🧱 Step 4: Design with Simplicity in Mind

Match your backyard design to the architecture of your home for visual harmony. Avoid adding too many complex elements at once. Focus on a few core features like:

  • A fire pit

  • A gazebo

  • A child’s play zone

  • A raised bed garden

You can always expand later — but overcomplicating the first round often leads to burnout.


📅 Step 5: Plan It, Then Work It

Create a detailed project plan:

  • Set target completion dates for each phase

  • Stock up on all required tools and materials before starting

  • Commit to 3–5 hours per week or allocate full weekends to stay on track

Not sure what tools you need? Check out our Top 10 DIY Tools for Backyard Projects guide.


🌿 Step 6: Simplify Your Landscaping

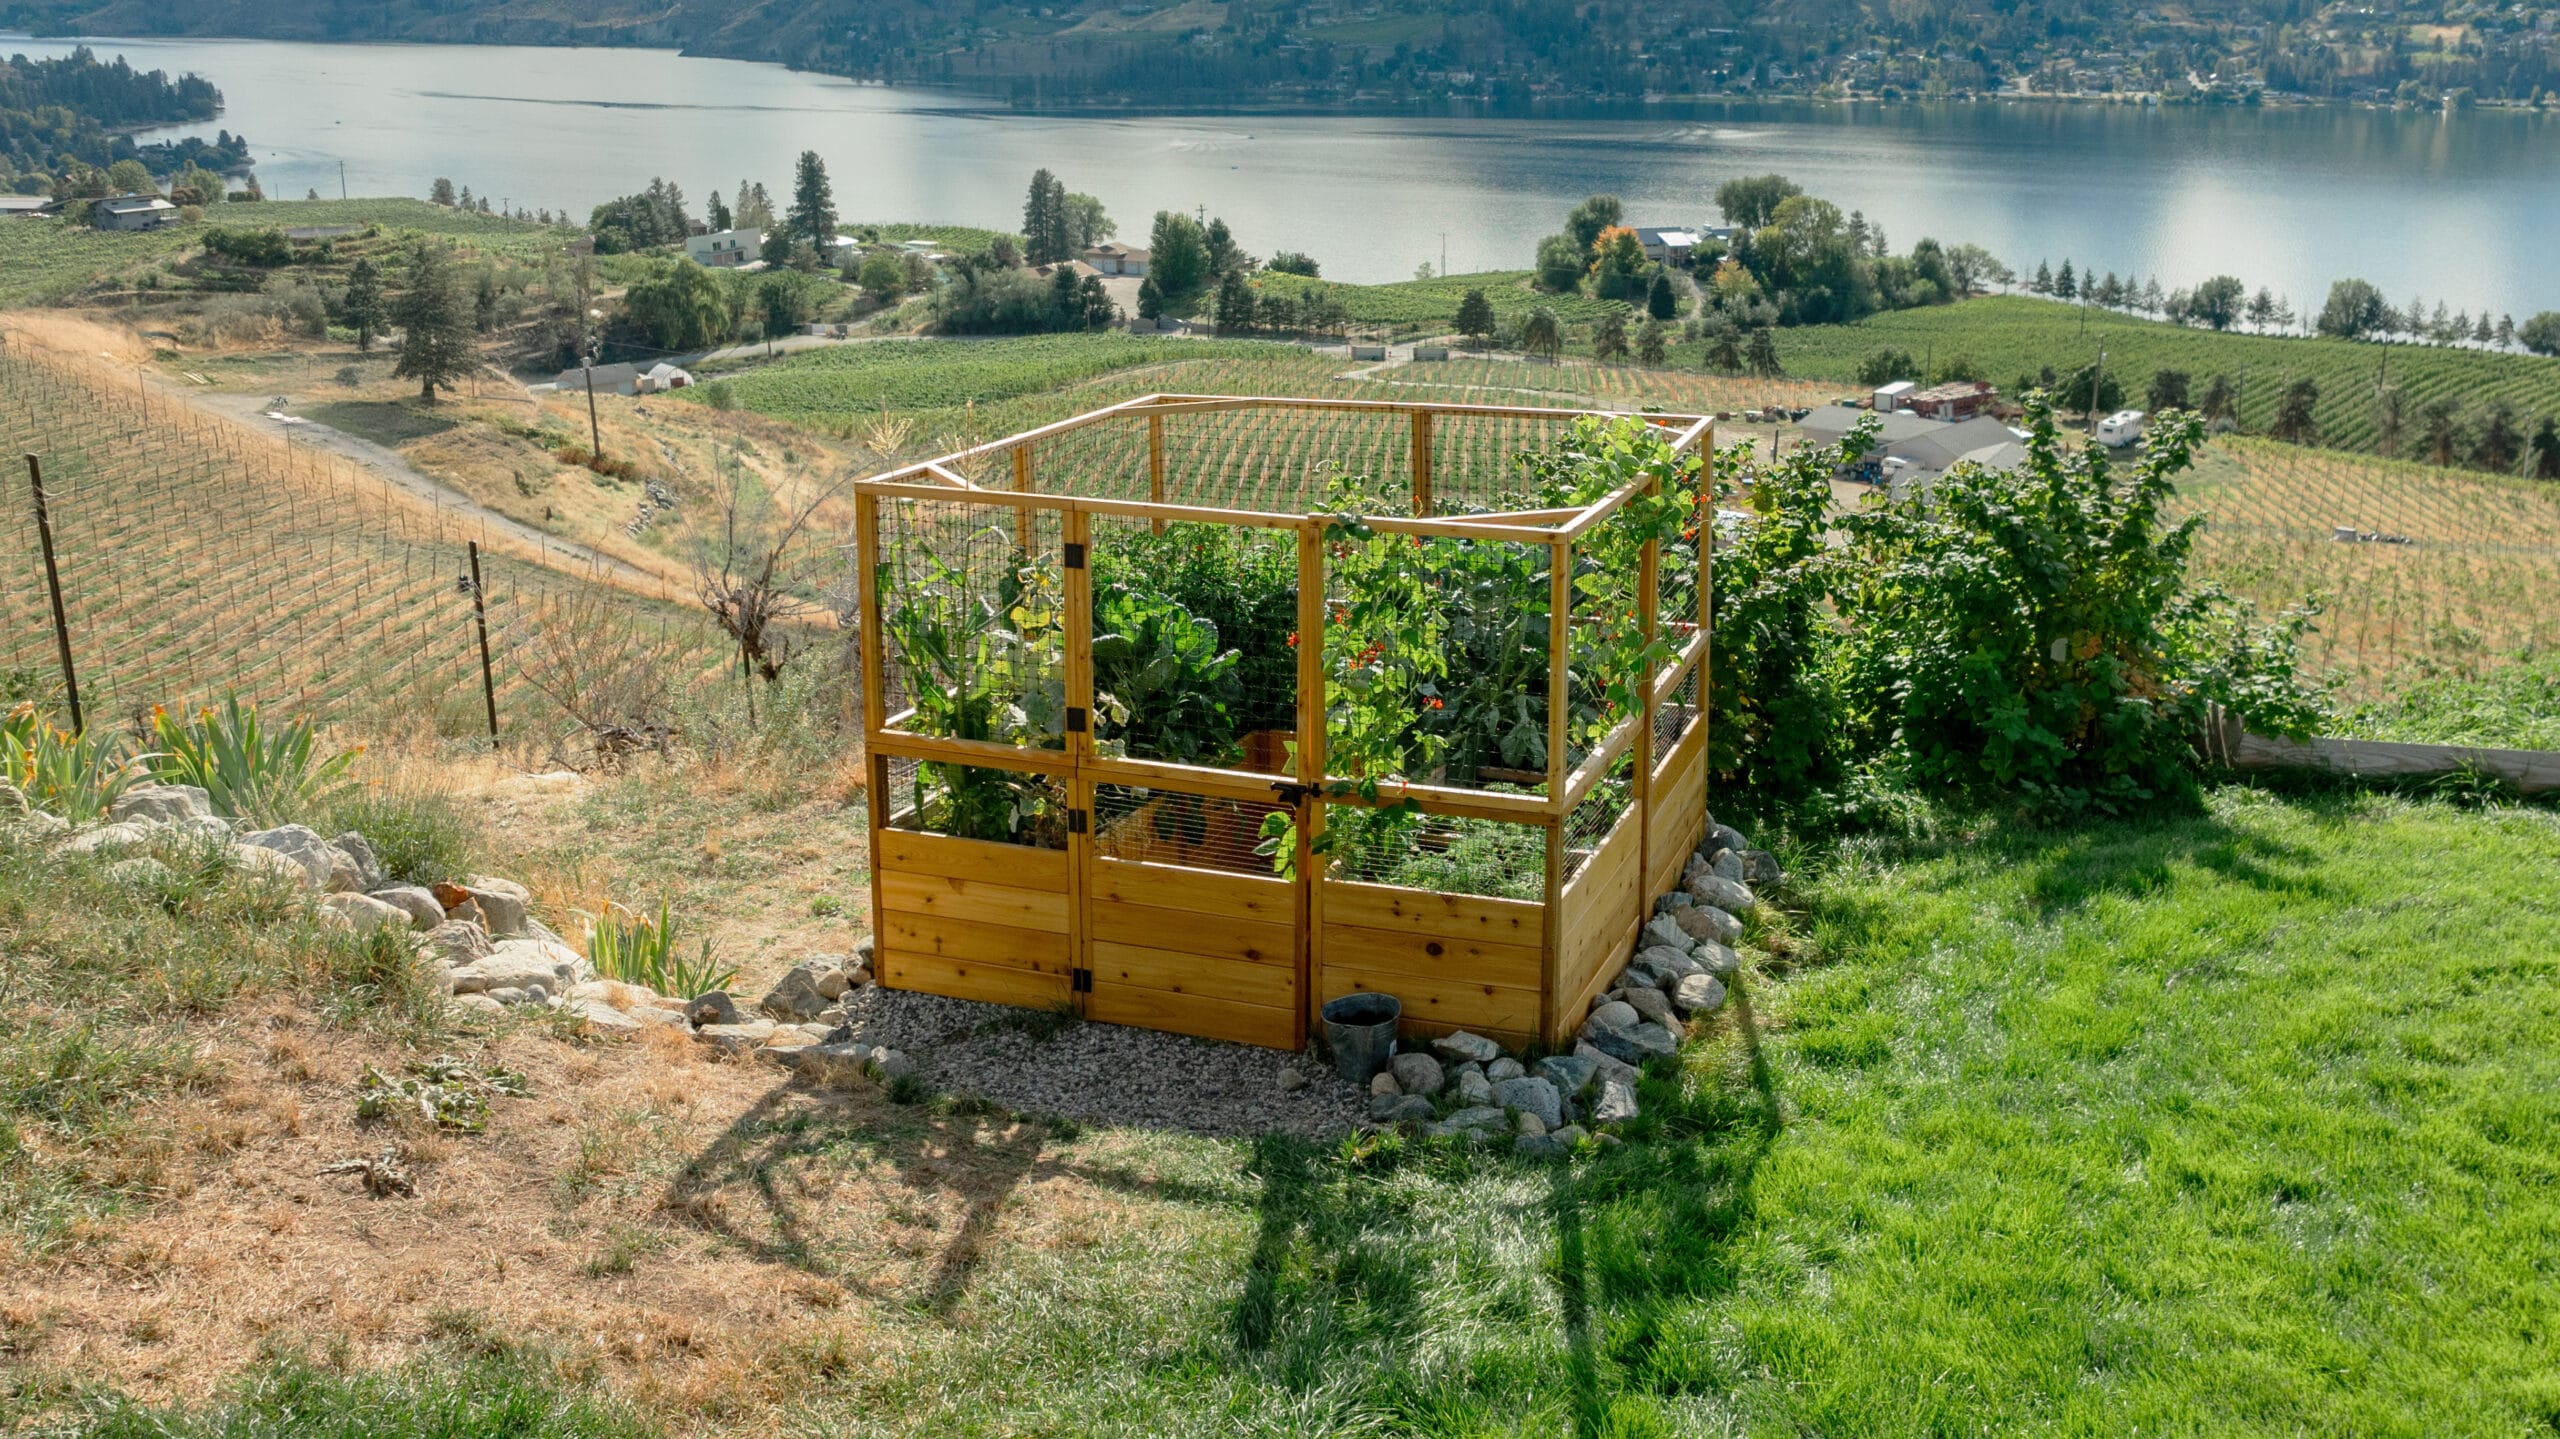
Western Red Cedar Raised Garden Bed With Deer Proof Fence Outdoor Living Today scaled

Low-maintenance doesn’t have to mean boring. Choose hardy perennials, shrubs, and native plants that require less upkeep and water.

Enhance the space with:

  • Potted plants in decorative containers

  • Climbing vines on trellises

  • Groundcover to reduce weeding

Want low-fuss solutions? Our urban raised beds help organize space and reduce digging.


🧰 Step 7: Know When to Call a Pro

DIY doesn’t have to mean do everything alone. Be smart about when to bring in help for:

  • Electrical wiring

  • Plumbing for outdoor kitchens or showers

  • Complex carpentry or landscaping

Hiring a professional for a consultation — even just an hour — can help you avoid costly mistakes and stay on schedule.


🪑 Step 8: Add Outdoor Furniture & Accessories

Once your layout and landscaping are done, complete your backyard with:

  • Comfortable seating and tables

  • A shaded structure like a cedar pergola

  • Decorative elements like lighting, rugs, and cushions

This is where your space becomes truly livable.


Ready to Start Your Backyard DIY Journey?

J.Hansen 1 scaled 1

By planning thoroughly and staying organized, your backyard transformation doesn’t have to drag on for months. Be realistic with your time and budget, call in help when needed, and most importantly — enjoy the process.

Want the easiest way to get started? Check out our collection of DIY-ready outdoor kits:

Everything is pre-cut, pre-drilled, and built to last — so you can focus on creating something beautiful.

Read More

10 Must-Have Tools for Building Your Own Outdoor Structure

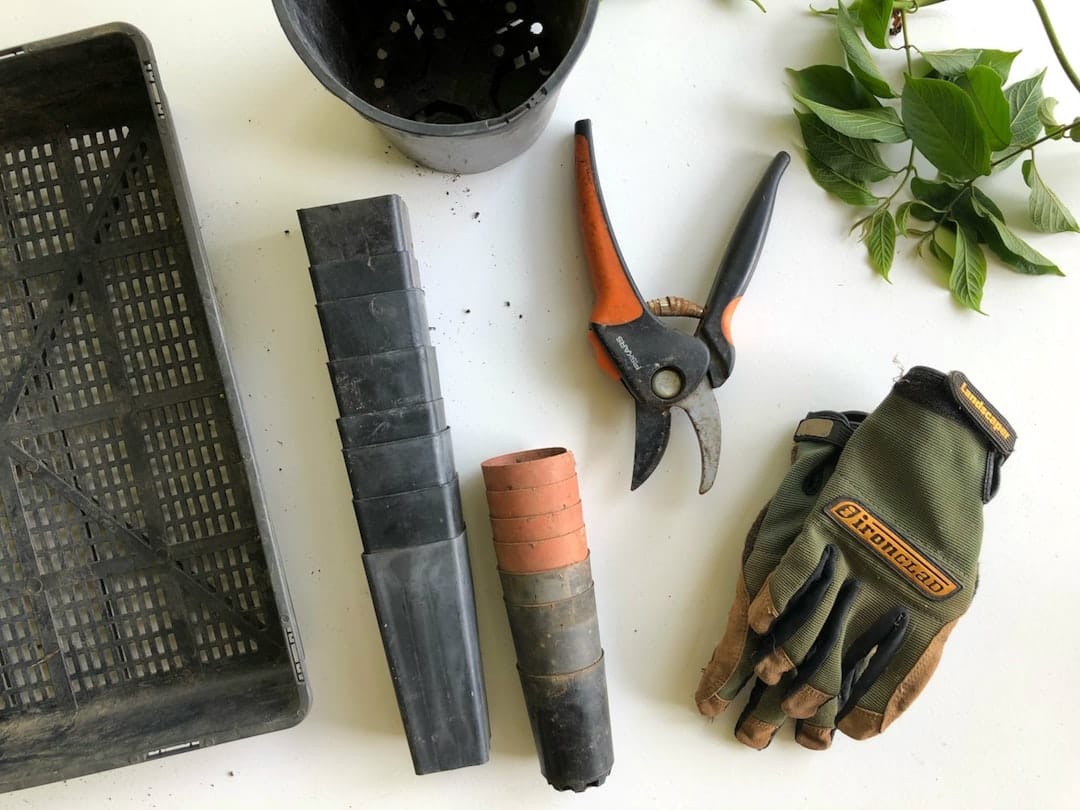
black pruning shears beside green gloves

Planning to build a DIY shed, playhouse, gazebo, or pergola? One of the smartest ways to ensure a smooth, stress-free experience (and avoid frustration with your spouse or your sanity) is to start with the right tools.

From cutting and fastening to leveling and measuring, here are the top 10 essential tools that will help you complete your outdoor structure confidently and safely.


🛠 10. Utility Knife

A retractable utility knife with a locking mechanism and replaceable blade is perfect for:

  • Opening shipping boxes

  • Cutting strapping

  • Trimming material during setup

Just be sure to keep it out of reach of children — the blades are extremely sharp.


🧰 9. Multi-Tool (with Pliers, Screwdrivers & Knife)

Think of this as your DIY pocket assistant. A good multi-tool combines pliers, screwdrivers, a knife, and sometimes a file into a compact unit — ideal for small fixes or adjustments on the fly.

Bonus: It fits right in your tool belt for quick access during setup.


🔧 8. Wood Clamps

One-handed bar clamps are incredibly helpful when working solo. They:

  • Hold panels or boards in place

  • Allow one-handed tightening and releasing

  • Help with alignment during screw installation

Perfect for holding roof panels, pergola beams, or wall frames in position during assembly.


🔨 7. Hammer

If you need to buy one, opt for a 16-ounce straight claw hammer. It’s:

  • Lightweight

  • Easy to control

  • Great for basic framing or tapping parts into place

Pair it with one of our DIY shed kits for a simple, satisfying weekend project.


📏 6. Level

Arguably the most important tool in your outdoor structure build. A proper level ensures:

  • Your foundation is flat and square

  • Rooflines and panels align properly

While apps work in a pinch, we recommend a 3–4 foot metal level that also doubles as a straight edge.


🪚 5. Saw (Hand, Circular, or Miter)

Choose your saw based on the precision required:

  • Hand or circular saw for rough cuts and basic trimming

  • Miter saw (ideally 12″ compound) for angles, rafters, and clean crosscuts

A miter saw is safer and more accurate when working with cedar pergolas or trim work.


📐 4. Tape Measure

You’ll use your tape measure dozens of times during a single build. Look for:

  • 12–16 ft length

  • ¾” wide for stability

  • Smooth locking mechanism

You can’t build it right if you don’t measure it right.


🧵 3. Tool Belt

A tool belt may feel bulky at first, but trust us — not having to walk back and forth to grab a screwdriver or screw will save you major time (and annoyance). It keeps everything from fasteners to pencils right at your fingertips.


📱 2. Smartphone

Yes, it’s a legit DIY tool:

  • Watch step-by-step assembly videos

  • Use calculator or level apps

  • Look up measurements or framing angles

  • Text your partner when you’re “this close” to being done!


🔋 1. Cordless Drill (With Extra Battery)

If you buy one power tool — make it a cordless drill:

  • Choose a 12V compact model for ease of use

  • Get one with 2 batteries so you’re never stuck waiting on a charge

  • Look for a drill bit accessory kit for flexibility

Most OLT structures — like sheds, gazebos, and playhouses — are designed for easy cordless drill assembly.


CGH OLT

Build with Confidence

Having the right tools on hand makes a world of difference. You’ll work faster, more safely, and enjoy the process a whole lot more.

Want a DIY project that’s already cut, labeled, and ready to assemble? Explore our wide selection of Western Red Cedar kits — perfect for weekend warriors and first-time builders alike.

Read More

8 Reasons to Start Your Own DIY Backyard Project

OLT RB88 Cedar OLT 6

Looking for a way to make your backyard more personal, functional, and unforgettable? A DIY backyard project is a rewarding, budget-friendly way to transform your outdoor space — and it comes with far more benefits than just curb appeal.

Whether you’re building a garden oasis, crafting your own furniture, or setting up a cedar shed, here are 8 compelling reasons why doing it yourself is worth it.


💰 1. It’s More Affordable Than Hiring a Pro

Hiring a landscaper or contractor can get expensive fast. With a DIY approach:

  • You save on labor costs.

  • You can repurpose materials you already have.

  • You control your budget every step of the way.

You don’t need a big wallet — just a weekend, some tools, and a little sweat equity.

Looking for affordable, premium-quality kits? Explore our shed and pergola kits that are perfect for DIYers.


🎨 2. Unleash Your Creativity

SSGS812 2 Western Red Cedar Outdoor Living Today

Not feeling inspired by cookie-cutter landscaping? A DIY project lets you tap into your creative side:

  • Use unique materials like reclaimed wood or vintage planters.

  • Paint, stain, or decorate however you like.

  • Create something that truly expresses your personality.

Your backyard becomes your canvas, and the possibilities are endless.


🪴 3. Reflect Your Personal Style

Do you love rustic charm or prefer a sleek, modern vibe? A DIY backyard lets you showcase your taste, whether that’s:

  • Crisscross trellises with fairy lights

  • Giant planters filled with wildflowers

  • A minimalist seating zone with a fire pit

Whatever your vibe, your outdoor space can mirror your indoor aesthetic — or take on a completely new identity.


🌟 4. Stand Out With a Unique Space

When you build it yourself, no one else will have a backyard like yours. DIY projects allow you to break from the mold and create something one-of-a-kind — not a landscaper’s template they’ve used 50 times before.

From custom-built seating to repurposed stone walkways, your yard becomes a conversation piece.


👨‍👩‍👧‍👦 5. Great for Family Bonding

OLT Mother and daughter gardening in a cedar greenhous b272f406 c5e9 464b a37e 1d9b8971775a

DIY projects are a fantastic way to spend quality time with the family. Kids can help with simple tasks like:

  • Weeding or raking

  • Painting planters

  • Designing signs or decorations

For a bigger adventure, consider building a treehouse, raised bed garden, or playhouse together. It’s a memorable way to create something as a team.


🗣 6. A Natural Conversation Starter

Entertaining guests in your yard? Imagine their reactions when you say, “I built this myself.” From design choices to clever material reuse, people love hearing about DIY journeys — and you’ll have a great story to tell.

Tip: Incorporate a theme — like a cottage garden, boho patio, or movie-inspired corner — to make it even more memorable.


🌿 7. A Stress-Relieving Hobby

DIY backyard projects, like gardening or woodworking, are excellent ways to de-stress. The rhythm of physical work and the satisfaction of tangible results are therapeutic. You’ll focus your energy, unplug from screens, and unwind.

And when Monday rolls around? You’ll return to your week with a clear mind and a sense of accomplishment.


🏡 8. You’ll Be Proud of What You Created

Nothing beats the feeling of standing in a space you brought to life with your own hands. From idea to execution, you’ll know every detail reflects your vision and effort. Plus, a well-done project adds to your home’s long-term value.

Whether it’s a shed, a garden nook, or a complete backyard makeover, your DIY effort is something to admire — and show off.


Ready to Get Started?

Redesigning your backyard doesn’t have to be expensive or intimidating. With a little effort and inspiration, you can create a personal retreat that’s uniquely yours.

Start with our beginner-friendly DIY shed kits, raised garden beds, or cedar pergolas — all crafted for easy assembly and long-term durability.

Read More

10 Creative Ways to Use Your Gazebo Year-Round

gaz 12 scaled

Think a gazebo is just for summer lounging? Think again. With the right setup, your gazebo can become one of the most versatile, multi-season structures in your backyard — useful for everything from movie nights to pop-up shops.

Whether you’re working with a permanent wooden gazebo or a portable canopy, here are 10 creative and practical ways to use your gazebo all year long.


🎬 1. Outdoor Movie Theater

Transform your gazebo into a cozy open-air theater by setting up a flat-screen TV, speakers, and a few lounge chairs or floor cushions. Want to go next-level? Add string lights and a projector screen for a magical movie night experience.

Tip: Use heavy-duty PVC sidewalls or weatherproof curtains to block out wind and keep the space warm.

Explore our Western Red Cedar Gazebo Kits for the perfect year-round entertainment space.


🚗 2. Temporary Shade Shelter for Your Vehicle

In hot summer months, a portable gazebo can double as a shaded carport. Set it up on your driveway to protect your vehicle from the sun’s harsh UV rays and keep it cool.


🌱 3. DIY Greenhouse Garden

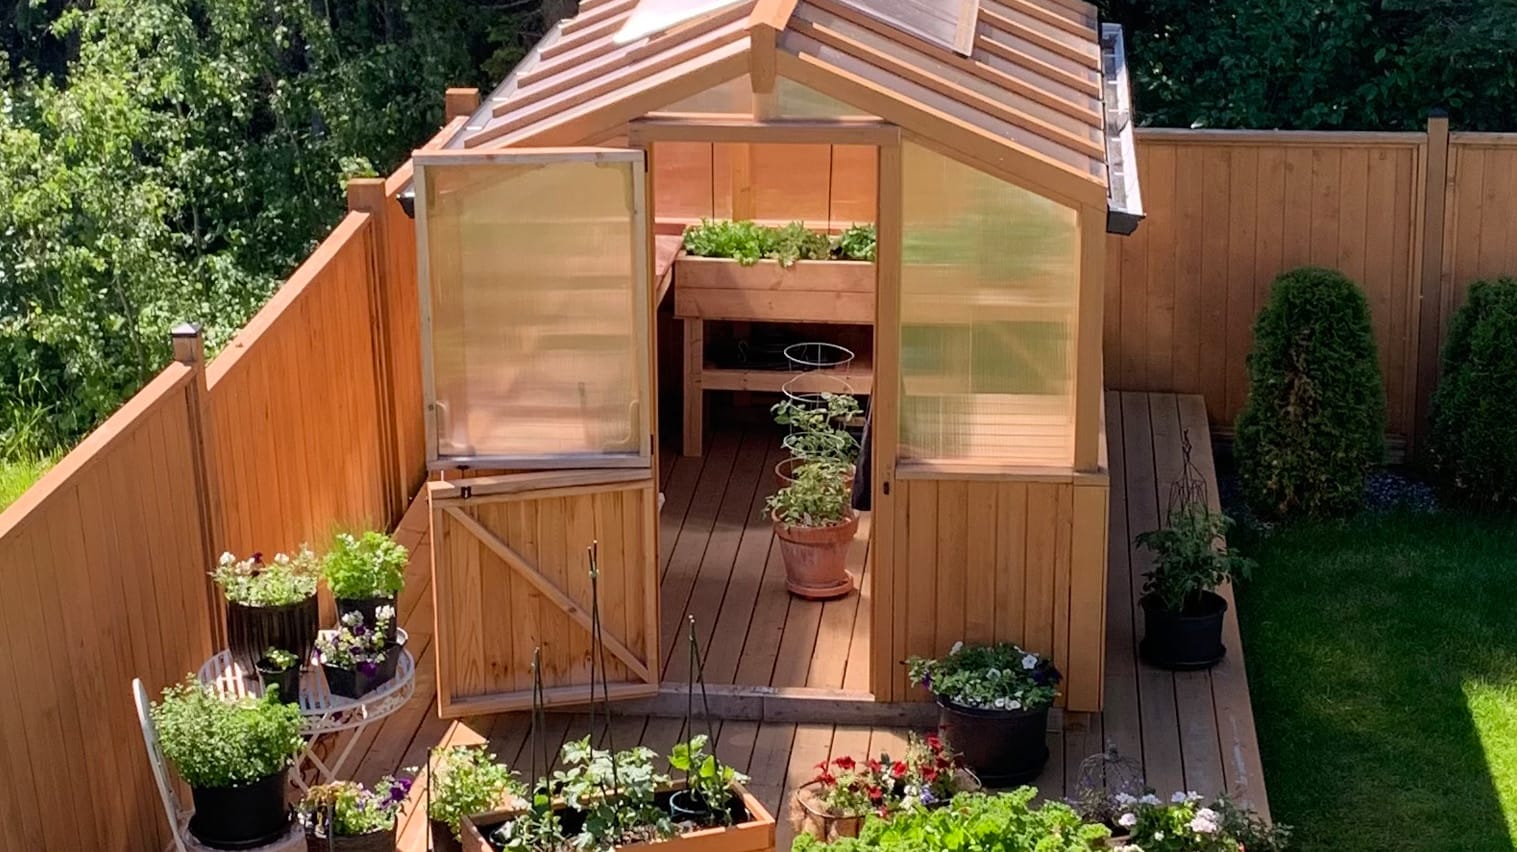
SetWidth530 1 bay12 racicot

Create a mini greenhouse in your gazebo for winter gardening. Add PVC or polycarbonate wall panels, a small space heater, and grow lights to cultivate cold-hardy vegetables like kale, lettuce, or herbs year-round.

Bonus: Check out our Raised Garden Beds for compact, soil-ready growing spaces.


🛍 4. Pop-Up Shop for Small Businesses

Have a handmade or local business? Use your gazebo as a temporary pop-up store at markets, community fairs, or parking lots. Just add signage, display racks, and don’t forget to check local permitting requirements.


💞 5. Host a Charity Drive

Set up your gazebo near a school, hospital, or community center to collect food, clothing, or donations for local charities. With the right decor and visibility, your gazebo becomes an inviting drop-off point that encourages participation.


📦 6. Temporary Storage Space


Renovating or fumigating your home? Use your gazebo as a makeshift storage area for boxes, furniture, or personal items. Add weatherproof covers or solid side panels to keep belongings protected from rain or snow.


🤝 7. Team Building Exercise at Work

Hosting a company event or retreat? A gazebo setup challenge is a fun team-building activity that fosters collaboration. Split teams into groups, give them a time limit, and award prizes for creativity or speed.

Bonus use: Set up the gazebo as a shaded snack station or breakout space during business events.


🎉 8. Birthday Party Centerpiece

Planning a backyard birthday for your kids? Use your gazebo as the main stage for puppet shows, magic acts, or crafts stations. Decorate with streamers and balloons, and let it double as a shaded snack or seating area.


🎁 9. Business Giveaways or Branded Gifts

If you run a local business, a branded gazebo makes an excellent promotional gift or vendor incentive. Print your logo on the canopy and offer it to loyal customers or use it as a prize in contests to increase visibility.


🏖 10. Shelter for Beach or Outdoor Events

Planning a beach day or outdoor picnic? A gazebo offers a wind-blocking, shaded retreat where guests can relax with blankets, drinks, and games. Perfect for chilly coastal evenings or mid-day sun protection.


Make the Most of Your Gazebo — Every Season

A gazebo isn’t just a summertime luxury — it’s a year-round investment that enhances your outdoor lifestyle, adds usable space, and opens the door to creative activities and business ideas.

Explore our full range of Western Red Cedar Gazebo Kits — all precision-cut, easy to assemble, and built to last in any season.

Read More