No products in the cart.
August 14, 2017
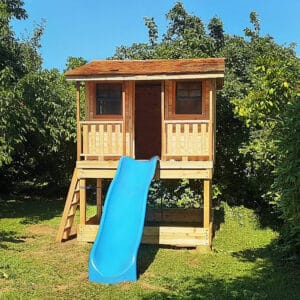
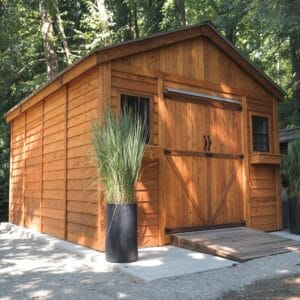
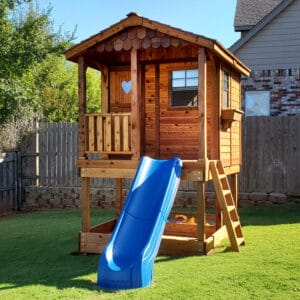
Would you like to know how to build a playhouse? Building a playhouse and building a house are the same – it is just that a playhouse is on a slightly smaller scale. To make things simple, you can make the little house’s dimensions match the pre-cut lumber that you will be picking up from the home improvement store.
A plywood sheet is 4×8 feet and 2x4s in 8-ft lengths is perfect for a playhouse. So your little house will have a length of 8 feet with 4 foot walls and a roof. This will be a lot less math and minimal work, and your kids will love you for it!
Items You will Need
Shovel
Drill driver
Circular saw
4×4 pressure treated lumber
4×8- foot plywood sheets
2×4 lumber
Joist hangars
Pick
Speed square/rafter square
Landscaping cloth
Sandpaper
Lay the foundation: You will be keeping things simple, but it is still important to start off right. First, find a place in the yard where there is enough room for the playhouse, making sure that the ground is mostly flat already. Take your shovel and pick, break up the earth and making it level and compact. Make a weed barrier by laying down a sheet of landscaping cloth.
You may not want to build a playhouse directly on the ground. The moisture and earth will rot away the foundation of the playhouse just like it would a normal house.
Frame the floor: The next step is to set two pressure treated 4x4s (the 8-foot ones) on the foundation. Then cut four 4x4s of 4 feet each to fit between the 8-foot 4x4s. Attach the pieces together with joist hangars. This job is best done with pressure treated lumber because it is going directly on the ground, and that will ensure that it is protected from the elements as already mentioned.
You may want to have a cement foundation. You can look online or hire someone who knows more about that.
Frame the side walls: Make the bottom and top of each wall with two 8-foot 2x4s. Make the walls 4-feet high by cutting ten 2×4 studs and keep in mind that the width of the 8-footers need to be accounted for. You will need to make the studs 4 feet, taking away 1½ inches, which is a 2×4’s actual width, so 3 feet 10½ inches. Now, you can lay the lumber on the ground and screw the studs to the plates both on the bottom and top. Keep them 24 inches apart on each center.
There will be 5 studs on each wall. Next, drill a hole of 5/8th inches in the bottom plate in the open bay that is between each stud and drill another hole corresponding to the previous, in the foundation’s 8-foot lengths. As you make the walls stand up on the foundation, drive in a 5/8-inch sized bolt through each of the pre-drilled holes. To prevent the walls from falling outward or inward, secure a 2×4 between them temporarily.
Install the floor: The space between the walls should be perfect for a sheet of plywood, meaning it should be 8 feet in length and 4 feet across. Lay a sheet in the space and every foot or so, screw it into the foundation. While the walls are still open, this is the right time to install an indoor or outdoor carpet if you wish to.
Frame the walls: It is now time to frame the front and back walls. Build the end walls the same way that you did the side walls, but with the top and bottom plates at 4 feet. Each wall requires four 3-foot 10 ½ -inch studs, set so that bay in the square’s center is 2 feet wide. Drill 5/8 holes in the outer bays only and then stand the walls up and bolt them down. Next, screw the studs together where they meet at the structure’s corners and you can remove the temporary support.
Frame the roof: For this, 10 rafters (5 on each side) are required, so they match up with the studs you screwed on the side walls. Cut ten 2x4s to 2-feet 15/16 inches with an angle of 45 degrees on each end. To get the angles, mark them with a speed square/rafter square or use a miter saw.
Now match two rafters up, making a V and screw them through the angle. There should be 5 Vs in the end. Set the Vs on the side walls’ top plate so that they match the studs and screw them down. Finally, make a ridge beam by setting an 8-foot 2×4 the length of the roof in the rafters’ angle abs screw it down to each rafter.
Now, you have a completed playhouse skeleton, so the next steps are to skin the side walls, front and back walls and the roof with the plywood sheets. Once you have done that, sand down the rough edges so that the little ones do not get splinter in their skin. That can be unpleasant and ruin the day!
After that, you can add the finishing touches and give it the look you want. You can give it a rustic or polished finish – that is all up to you! You can get the kids involved by letting them help you paint the wood to protect it. If you can make it match your actual home, that could look pretty sharp! You can have loads of fun with your new playhouse.
Build a Playhouse
August 14, 2017
-
 On SaleSale!%Off5Save $267267$5%267$On SaleSale!%Off5Save $267267$5%267$
 -
On SaleSale!%Off7Save $339339$7%339$On SaleSale!%Off6Save $260260$6%260$On SaleSale!%Off11Save $485485$11%485$On SaleSale!%Off11Save $485485$11%485$
-
-
On SaleSale!%Off6Save $339339$6%339$On SaleSale!%Off2Save $8080$2%80$On SaleSale!%Off6Save $251251$6%251$On SaleSale!%Off6Save $339339$6%339$
-
On SaleSale!%Off12Save $1,0741074$12%1074$On SaleSale!%Off10Save $825825$10%825$On SaleSale!%Off6Save $400400$6%400$On SaleSale!%Off12Save $1,0741074$12%1074$
-
On SaleSale!%Off15Save $709709$15%709$